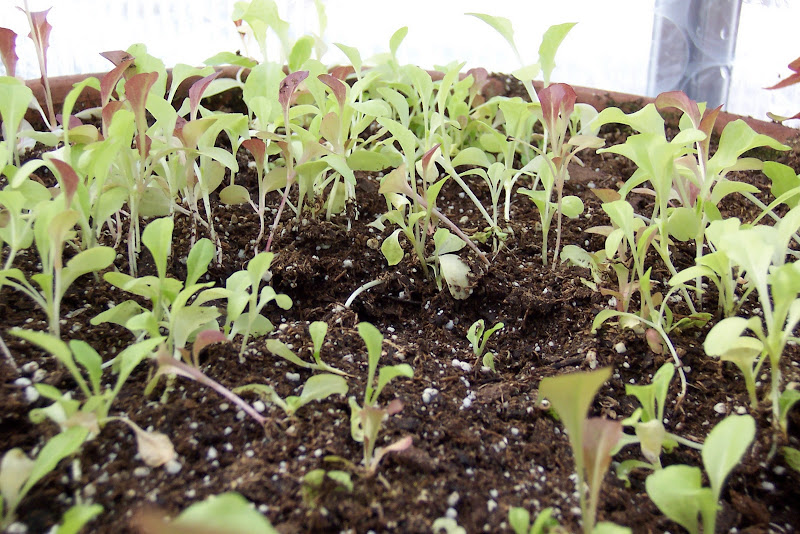
Wednesday, December 22, 2010

Christmas Memories and Best Wishes to You All

From In the Garden
Ever heard of the Velveteen Santa? No? Maybe the Velveteen Rabbit? A story by Margery Williams about a stuffed rabbit that through the love of its owner becomes real? Have you heard of that story? Well once I tell you of my Velveteen Santa I think you all will relate to him. There he is standing tall and proud in the picture above. He is discolored and missing the stand he once stood on that made music and made him spin, but oh how he is loved! 

As a child in the 60s, and the oldest of four girls I have some really great memories of Christmas. You see, my mother always went all out for Christmas and has continued to do so even to this day. She would put decorations on all the walls, in the bedrooms, on the kitchen counter, and even under the tree. My Velveteen Santa sat under our Christmas tree along with Mrs. Santa, and a most beautiful angel. I don't know where the plan started in my family but somehow the Santa became mine since I was the oldest and he of course had rank. Mrs. Santa belonged to my sister Dawn (the next oldest), and the angel belonged to the third girl in our family, Joanne. The youngest of us four girls did not get her own 'velveteen' Christmas character. Perhaps the stores stopped selling these characters in the late 1960s or perhaps my mother just couldn't find the perfect complement to the three characters we already had but my youngest sister was left out. I'm not really sure why we didn't have four but this I know, Santa, Mrs. Claus, and the Angel were the most loveliest things I ever saw on Christmas eve. They were a comforting presence and always happy and cheery. When I see my Santa I am taken back to the excitement of being a child and waking up to a bunch of presents and the love of my family.

A few years ago my mother went through her Christmas decorations and as a surprise she sent these characters to her three oldest girls (myself, Dawn, and Joanne). When I saw my Santa it was tears that came to me, along with happiness for the connection to my childhood and family. Today I share him with you and wonder if you all will recall your very own 'Velveteen Santa' for us during this Christmas week. 


From In the Garden
While I don't go all out for Christmas I do decorate. This has been a great year because while we had an excellent Christmas in the Smokies last year, we are excited to be home for Christmas this year. All of our decorations came out of storage. Whew! It is a big job. This year is the first year in over eight that all decorations have come out of storage for the big holiday. This particular decoration is a Christmas tree someone made (not me) from baby food jars and then filled with lights. It is such a retro thing and so colorful that it is right at home in my household. I just love it and wanted to share it. The lights really aren't pink. They just look that way through the magic of photography that sometimes doesn't get the color just right. The colors are actually jewel toned primary colored lights that really look neat when shining through glass. Do you remember all the things you could do with baby food jars when your kids were young? Those baby food jars sure take me back.  What is your favorite Christmas decoration in your home?


From In the Garden
I guess I am a bit sentimental this time of the year when I can reflect and remember my family, my childhood, and even my whole life as I look to a new and welcoming year that is peeking around the corner waiting to jump out with a splash. I'm not the only one though and I know many of you recall fond memories and special times of when you were young. Catherine posted a very similar post to this one yesterday so jump over to her blog and check out her sentimental memories. If you post on your memories let me know and I'll be happy to link to them in this post too. 

Additionally postings on Christmas decorations: 

Barbara from Gardening in Mannheim Germany 

I want to wish everyone a very happy holiday season spending time with family and enjoying those wonderful childhood traditions and memories that take you back....

in the garden....


I will see you all after the holidays sometime next year so in the meantime please do share your memories with us. 

Happy Holidays to all of you from all of us here at In the Garden. 


Words and Photos Property of In the Garden Blog Team,  

In the Garden

Monday, December 20, 2010

Birds Love Crabapples

From In the Garden
As I sit at my computer desk to work play on the computer I am easily distracted by what is going on outside my window. Even though the weather is frightful the birds delight me with their antics and resilience in the freezing cold weather. One tree in particular is a favorite tree amongst the birds and just happens to be close by. It is the crabapple tree I planted in 2003. This crabapple is not the greatest for looks but the crabapple fruit must taste mighty fine to all the birds in my neighborhood because they flock to the tree regularly to sample the fine fruits. On this day a pair of male cardinals were busy eating, though I was only able to capture one in this photo. The red cardinal sure looks at home and stands out against the snow. Such a lovely sight to see the birds enjoying the crabapples....


in the garden....


Words and Photos Property of In the Garden Blog Team,
 
In the Garden

Friday, December 17, 2010

The Wildflower Garden Planting List

From In the Garden

Today I would like to talk about the plant list from the wildflower garden design I did for my client Barbara. Barbara requested native wildflowers and had a pretty good idea of exactly what she wanted in her garden (she sure made my job easy). All I had to do was to fit the plants into the design in a pleasing manner and use my experience to make sure the plants chosen would do well in the new garden. I posted the design here so if you need to refresh your memory go back and check the design because today's post is only about the planting list.


Planting lists can be arranged any number of ways the designer would like to arrange it, but there are some elements that are helpful and even necessary to have on the lists. They are: the code identifying the plant on the design, botanical name, common name, quantity, size required for planting, and height and width of the plant. Some designers put the spacing on their plant lists. For instance, if foamflower (Tiarella cordifolia) should be planted 8" apart on center (O.C.) then you could annotate that information on the planting list. On all of my designs I usually include an approximate cost of the plant based on my experience-remember it is approximate only. An additional required piece of information would be to annotate whether or not a plant is existing. I usually note this in the last column on my planting lists. The planting list above though is from the planting diagram I posted about this past Monday; therefore it only includes plants that the landscaper will need to plant-no existing plants are annotated on this list but the design itself included existing plants.


Some designers arrange their plant lists into categories such as groundcovers, perennials, shrubs, trees, vines, etc. I have found I do not like this method because when a client; who is not always plant savvy; looks for a two letter code on the plant list he or she may not realize that HH; which stands for Hedera helix, aka ivy, is a groundcover or vine. This results in confusion looking for the code in the subcategories until it is found under 'groundcovers'. I find it so much simpler to just arrange all plant material alphabetically on the plant list. Therefore HH will be easy to find on the list for anyone.This is a personal preference only.


Codes on the planting list and design or diagram will be the same. In other words, whatever you see listed on the design or diagram should have a corresponding line on the plant list. Like everything else with designing, designers have several options when choosing codes. I will discuss only two types of codes I have personally used.  The two types I have used in my designs are two letter codes and four letter codes. You could also use the alphabet to label your plants (I.E. A=Callicarpa americana) and you could also direct label the plants (spell out each plant on the design and list).

When I first began doing landscape designs I really liked to use the four letter codes. I used four letter codes on my very first professional design found here. The four letter codes can be chosen a few different ways in order to keep them standardized. I chose the method of using the first three letters of the genus name, and the first letter of the species name. For instance; a tulip poplar is known botanically as Liriodendron tulipifera. I would choose LIRT for my four letter identifier. This helped to give more information about the plant and I could easily look at the code and tell you what it was without looking at the plant list. The problem with this was if you had several types of hollies that have different species or cultivars then you have to get really creative in order to vary all the codes. It wore me out and I soon realized it was not a sign of weakness that I would refer to the plant list if I could not remember the exact plant on the design based on the code-so why not switch to the two letter codes if I had to refer to the plant list anyhow? My logic let me get past that because even with the four letter codes some designs are quite in depth and many codes can be confusing and even I forget things at times. I'm only human right? Also, due to the fact the four letter codes are more writing on the design the additional clutter can make the design harder to read. Needless to say I now use the two letter codes.

I found most designers like use the two letter codes and I switched to it myself. The two letter codes I use are pretty simple. I just take the first letter of the genus and the first letter of the species and use that. For instance, if I used the plant Amsonia hubrectii, I would choose the code AH for the code. If I also had a plant called Agastache hyssop which theoretically would also be coded as an AH, then I might have a problem because I certainly could not use the AH again. In this case I might choose to use the A for agastache then maybe the first letter of the cultivar name (if applicable). Let's take a look at coding Agastache hyssop 'Blue Fortune'. I might choose to use either AB for agastache and blue as in 'Blue Fortune', or AF for agastache and F as in 'Blue Fortune' in order to differentiate the agastache  from the Amsonia hubrectii. Have I confused you all enough? I hope not because coding plants is really not difficult. The key is to stick to a method and use logic when choosing the codes.


As far as botanical and common names I use good plant references for ensuring I have the right names. Common names of plants may vary so it is vitally important to always use the botanical name. I usually use the common name most used in my region to identify the plants but refer to good garden books to ensure I have the right botanical name. Some great plant references are: Dirr's Manual of Woody Landscape Plant for shrubs and trees, The Native Plant Primer by Carole Ottesen for all native plants, The Prentice Hall Encyclopedia of Garden Flowers by Anita Pereire for garden flowers, and one last quick reference that is useful for general information about a plant is The Southern Living Garden Book. I use other books as well but generally these ones will provide most of the information you might need for your plant list.  


Quantity is based on the amount of plants needed based on the design. The height and width of the plant is the mature size and you can get this information from the above listed books. The size on my plant lists refer to the planting size. This is the size I recommend the landscaper or client purchase for planting. Perennials will normally be in 4" pots or gallon pots. I prefer shrubs in 3 gallon pots or larger but will occasionally specify smaller pots for shrubs depending on the shrub, cost or availability. Larger pots and sizes for planting aren't necessarily the best way and I've found the smaller sized plants will adjust better and fill in pretty quickly. They'll also be better established and more able to withstand stressors in the garden. 

I use Microsoft Excel to print my lists. Computers are wonderful! Not only can I prepare a professional looking list I can keep track of all the plants easily while working on the design. Once all is said and done, been quality checked over and and over again, I print the list. Avery has a full sheet label I use to print my plant lists. It is Avery 18665 Clear Full Sheet Label. This label is a lifesaver!  The paper is transparent and when you place it on vellum you can't tell there is a label there. This method of printing and attaching the label to the design was quite popular in college amongst my classmates so I thought I'd pass the tip along.


One last thing I try to do with my plant lists is to specify an alternative plant. Sometimes the first choice simply is not available or the client finds something else that appeals to them so an alternative gives them options. Ultimately, while I design and specify gardens and the garden plants the garden belongs to the client and they have to have the final say....


in the garden....

Any plant list tips or experiences? 


Note: I switched out my printer and do not have a scanner hooked up to my computer. I should've thought to scan this plant list on my husband's computer but did not. Consequently you have a screen shot of the actual plant list. Sorry for the extra stuff in the shot. 

References used: Plan Graphics for the Landscape Designer and Designing the Landscape, both by Tony Bertauski. 

Words and Photos Property of In the Garden Blog Team,  

In the Garden

Wednesday, December 15, 2010

Frozen Broccoli Anyone?

From In the Garden
From In the Garden

Frozen broccoli anyone? This is what I have growing in my vegetable garden at the moment that is edible (thaw first please)! Tennessee and much of the eastern half of the country has been in a deep freeze. For me the cold is one thing but the extremely brutal wind and wind chill factor has seriously chased me into my warm house. Baby it's cold out here! Nonetheless broccoli does okay in the cold and providing we get a few warm ups I fully expect these plants to bounce back like they did after the last big chill we had early last week. I may be a bit optimistic though and might just pick my heads of broccoli waiting for me in the garden. I love fresh picked broccoli! How about you?


The really good thing about planting broccoli in the fall is that you can be assured that when the heads begin to ripen there will not be any worms present to dine on your fresh broccoli-it's too cold for flying moths and their larva so dig in! I do think I'll plant my broccoli starts in mid to late August next year though so they have more time to fill out prior to the deep cold. In the years I've lived in my home it seems December always gets a few deep freezes so I should know to come to expect it. Note to self-plant earlier and don't put it off! Soon enough I'll be removing these plants but for now they aren't hurting anything and are producing. Once the plants come out I'm going to fill in this circular round bed with four blueberry plants. We'll talk about them in a later post.


The other vegetables growing in the garden right now are: onions, garlic, and some lettuce. I did sow seeds of peas, turnips, kale, and spinach. While the peas grew well they never produced and are now buried under the snow. I'll replant seeds in February. The turnips, kale, and spinach might still be growing but I won't know until things warm up here a bit. I probably should've taken more care to protect all crops with the coldframe but I just never got around to arranging things in the vegetable garden this winter. Sigh. There's always next winter.


 The greenhouse has some lettuce growing in a flat on a shelf but the lettuce might be called micro because it is SO small and hardly worth harvesting at this point. Hopefully it will grow a bit more and I can start picking some fresh lettuce. We so enjoyed our fresh lettuce from the garden this past spring that even if this lettuce does not grow more I'll plant it out in the garden in February where it will grow well. 

 That's it for the vegetable garden this month. December and January are normally when my vegetable garden takes a rest and there is not much going on in it. All beds have been prepared for the spring garden and I can relax for a while before things begin to wake up....


in the garden....


Words and Photos Property of In the Garden Blog Team, In the Garden

Monday, December 13, 2010

A Planting Diagram versus a Planting Design

It's wintertime and living is easy-and inside if you live in Tennessee. It has been cold! So this week I thought I'd talk about something inside-garden designs. Today I'll talk about the planting diagram specifically. 

When I was in advanced landscape design class the instructor gave us an assignment to do a 'planting diagram'.  To me all designs were planting diagrams so I drew up the design and added all the symbols just like normal. Imagine my surprise when a few (only the professionals knew the difference between a planting design and planting diagram) of the students in the class turned in designs that had no symbols but only circles for plants? The amount of time it took to draw circles versus symbols is considerably less. I learned from that point on to draw only circles when a planting diagram was requested. To illustrate the differences between a planting diagram look at the planting diagram below. It is simple and easy to read. Now look to the next picture; which is a big picture of the same garden in the context of its surroundings; and you can notice the total differences between the two.
From In the Garden
Generally, a planting diagram is used by the landscaper to install the plants. The landscaper doesn't usually need an artfully drawn design in order to plant the specified plants so it makes sense to draw the design for the client and a separate diagram for the client's landscaper. This is what I did in the case of this client (name and address blocked out for privacy reasons but she fully approves of my posting the designs-thanks Barbara!)


From In the Garden
Barbara wanted a native wildflower garden on the southern edge of her driveway where runoff from the driveway tends to take away some of the soil. The area is under a large maple and white pine though some sun does reach the garden from the southwestern side. Because the majority of the plants were wildflowers in mass, if you'll look at the design above you'll see the 'balloons' so many landscape designers recommend. I did not draw each plant but instead used dots to represent the plants when massed. The shrubs are drawn out though and are toward the back of the design (top as you are looking at the photo) Each group of massed perennials was colored a different color and a heavy line was drawn around the groupings. (Note: due to the larger sized drawings the copy machine I used to duplicate the design did not have color capability or I would post the color one). On the planting diagram (first picture) the individual plants in groupings can be identified by a line drawn from the center of each plant to the next. All plants are identified by a two letter code that can be deciphered when you look at the planting schedule (list). I will talk about this particular plant schedule in Friday's posting and will post a larger picture of it so you can actually read it. You may wish to refer back to this post when Friday's posting comes out, but for now I hope you can see the big differences between a planting diagram and a planting design....


in the garden....

Words and Photos Property of In the Garden Blog Team,  

In the Garden

Friday, December 10, 2010

Old Fences Have Character

From In the Garden
 From In the Garden

Old fences have the greatest character don't you think? All the moss, lichen, and graduations in the coloring of old fences make them ever so charming. But! The same moss, lichens, and wood variations make the fence a not so stable or functional fence because the moss, lichens, and wood variations are signs of decay and rot; which means the fence is in trouble. We all know wood fences don't last forever but with care they should last a fairly long time. That being said, if you acquire a wood fence that has damage how do you fix it? How can you make it functional and give it a few more years of good life? This was the very question Mr. Fix-it and I found ourselves asking when we recently acquired 24 panels of stockade privacy fence that had seen better days. The price was right ($100 for all) and even though we could see there was some dry rot on the panels, we felt like the fence was salvageable so we bought it. Now the real fun begins-refurbishing all 24 panels.


This fencing was taken down by the previous owners who got it from another Craig's Lister. When they took the fence down they simply ripped the panels off from the poles and did not bother removing nails or anything. The first order of business was to do something with the awful long and jagged nails. I could have pulled them all out but that would have meant some boards would be broken and days upon days of work. I decided to simply cut the ends off containing the nails. In doing so I sacrificed about 8-10" of length per panel. I would have preferred keeping that length since the area I'm putting this fence is about 200 feet long but the ends of the 2x4s were rotten anyhow so it was simpler just to remove them, nails and all.

Once the nails were removed I stood up the panels (as best I could) and then pondered on how to get the lichen and moss and discoloration off from the wood. At first I thought a good scrubbing and some wood or deck cleaner would work, but no it did not. The next thing I tried was our nearly fifteen year old never been used by me pressure washer. Wow! Pressure washers work pretty well when they are not leaking and shorting out circuits! The pressure washer was really the only way to restore the wood panels and get rid of all the character of the wood. Do you see the difference between the two panels above? It is quite a difference and while I won't go so far as to say the panels now look new, they do look pretty good. I used a wood cleaner that is biodegradable prior to pressure washing but honestly, I saw no difference when I used the cleaner versus when I didn't. The pressure washer did the trick. It has taken me about 30-40 minutes per panel to pressure wash these panels. As of this date not all are done but I am slowly working on it.


After pressure washing a few panels I would stand the panels up so they could dry a good three or four days. The dried wood really soaked up the water from the pressure washing. I knew at this point that if I did not seal the wood I'd soon have the same situation; lots of 'character' on my hands when the fence panels began deteriorating again. Therefore, I decided to use a solid color wood fence stain to seal the wood. I choose the solid color stain made by Behr because I've used it before and just love it! The solid color stain goes on just like paint but soaks into the wood and has a 15 year warranty on vertical surfaces such as a fence. The stain really lasts and is most easy to apply. The solid color hides any remaining blemishes on these fence panels so it is best for my use, but Home Depot also sells a semi-transparent stain for wood fences. The color I chose; which if you are a soldier who has been to Iraq it is a funny color and one you would not think I'd choose; is "Desert Sands". The joke is on me. For those who do not know it I went to Iraq a few years ago and I loathe the color of the desert when it is all you see. It is dirty and dusty and I did not enjoy that part of Iraq. The color name reminds me of my experience but I'm not holding it against it because the color is perfect here in my garden. You can see the desert sand in the last photo above. This is what color the whole fence will be when complete. I have finished pressure washing about two thirds of the panels, painted about one third and still have a lot to go before I can even begin installing the fence but I'm well on my way to creating some new character on this old fence by reusing it....


in the garden....

Have you ever reused privacy fence panels, and if so, what tricks do you have for making them work for you? 


Words and Pictures Property of In the Garden Blog Team, 
 
In the Garden

Wednesday, December 8, 2010

The Greenhouse: Lessons Learned on How to Heat and Insulate It

From In the Garden

Normally I'd post some blooms on this frigid second Wednesday of December, but my son and husband had to borrow my camera and I just was not able to get some photos prior to today's posting so I thought I'd talk about my greenhouse. I'd been wanting to share some more of what I've learned about the greenhouse anyhow so my excuse is no pictures of blooms:) Honestly, the only color in the garden is frozen pink camellias that are turning to mush, and some ragged at the edges yellow button mums. You all have seen those two flowers in my garden plenty of times so let's talk about the greenhouse and how it has fared with recent temperatures in the teens!


In last month's Bloom Day post I spoke about my apprehension and worry about heating the greenhouse this winter. A greenhouse is a dream I've always had but not one I thought would realistically come true. When it did, I was a bit taken aback in that I never really expected to have to figure out the workings of a dream I did not think would materialize. Does that make sense? I hope so. Nonetheless, the greenhouse is here and it is my responsibility so today I'll share some lessons learned so far this year. 

Like I normally do I researched various methods on heating and insulating greenhouses. I found bubble wrap is an excellent insulator and does not block the sun's warming rays from entering the greenhouse during the day. I only wish I had added the bubble wrap insulation prior to the weather turning cold. The problem with adding the bubble wrap once the weather turns cold is that condensation tends to form on the metal parts of the greenhouse. The tape I used to attach the bubble wrap to the greenhouse walls does not adhere to moist walls. Lesson learned: add bubble wrap while the temperatures are still warm next year.


While the bubble wrap is not the most attractive thing about the greenhouse it has been a lifesaver as far as retaining heat. It is no surprise I'm okay with the bubble wrap because you all remember I am a functional gardener versus an aesthetic gardener. Functionality will win here at Tiger Gardens before good looks any day and in this case insulation must be my uppermost concern when the temperatures hit a low of 18 degrees! Lesson learned: While the bubble wrap is not the most attractive thing in the greenhouse it is an excellent insulator.


As far as heating the greenhouse I had originally intended to use a ceramic heater because all I read on the Internet talked of ceramic heaters as being safe and efficient heaters in a greenhouse. I tried a small ceramic heater I had purchased specifically for the greenhouse but it did not work. The heater has a switch that will turn off the heater if it overheats. Apparently it overheated a lot because the heater never ran. It is a good thing the extra insulation added to the greenhouse kept the greenhouse about 10-15 degrees warmer than outside temperatures or my plants might have frozen. The heater I purchased should have worked for my 48 square foot greenhouse because I used a special formula to figure out the size of the heater required based on surface area of the greenhouse and other information. You can find that formula here and the math is automatically done for you-a good thing after my leaf posting. Once I realized the ceramic heater would not work (it didn't take long) I dug around my garage and found a small electric radiant heater that has worked like a charm. Yesterday morning when I checked the greenhouse (outside temperature was 18 degrees) the inside temperature was a toasty 45 degrees. Forty five degrees is pretty good for my purpose of keeping my tender perennials and houseplants from freezing. Lesson learned: Try what you have on hand first before buying something new to serve a purpose.


Below is the greenhouse from the northern side of the structure. I took this picture so you all could see the two inch coated rigid foam insulation I used to insulate the northern side of the greenhouse. It is kind of weird having this side closed off but sun would never enter the greenhouse from the north side and I wanted to block the chilling northern winds from ripping through the greenhouse. Insulating the northern end of the greenhouse was a tip I received online and a super good tip. This rigid foam insulation with the reflective material on the heated side (inside the greenhouse) has been a much better insulator than the bubble wrap because it is one solid piece and is in place permanently. The plants are nestled right up against the foil lined foam and get reflected sun from the insulation while staying warm because the foam prevents cold wind or air from penetrating the greenhouse. Lesson learned: Insulate the northern end of your greenhouse with a fairly permanent insulator. If you use the reflective insulation be sure to put the reflective material on the inside of the greenhouse.


From In the Garden
I will talk more of solar and passive heating at a later date. But a question for you now: knowing I have a ton of deciduous trees on the southern side of my garden, and knowing that even with all these trees the greenhouse receives some winter sun, just how warm do you think it gets in the greenhouse during the day? Hint: It is a very comfortable warm! Take a guess and I'll reveal the answer in a later post....


in the garden....


Words and Photos Property of In the Garden Blog Team, In the Garden

Monday, December 6, 2010

How Many Leaves Have Fallen?

From In the Garden


Quite a while back another blogger and I were talking of all the falling leaves in our gardens and we were wondering just how many leaves were falling. I also know many of us are still raking leaves and composting them, or shredding them or whatever we do with them. Have you ever wondered just how many leaves have fallen in your yard? Just look at part of my backyard-there are tons of leaves laying all about here at Tiger Gardens. What a mess! I will eventually get around to raking them all and piling them in gardens or in the compost bin but for now they are just here in the garden.

Well, I can't tell you how many leaves have fallen for sure in my garden or yours but I found an interesting article that provides a mathematical method of figuring out just how many leaves have fallen. I subscribe to Dave's Garden's Weekly newsletter and found a very
worthy article by Bev Walker   in which she discusses how to mathematically figure out some statistics about leaves. Have you ever wondered how much leaves weigh? How much nitrogen and carbon leaves provide for the garden? Well then check out the article by Bev Walker


You all have a super day and don't fry the brains working on math problems....


in the garden....

Friday, December 3, 2010

The Plant Cam

Like I always have on this blog and will continue to do so, I will share experiences with you all. Today's experience deals with a freebie I received from a company late last year. I have been pleased with the product and it is rather inexpensive so I thought I'd share it with you today now that it has been more than one year. I was not asked to publicize this product or to do anything else. The product came to me free of strings so I post of my own freewill-as always:)

I guess it was waaaay back in 2009 sometime I was asked if I'd be interested in a plant cam. Actually, the email asked where she should send it to. I replied, "Free? Send it on then." No strings were attached to this plant cam. As promised the UPS man brought my plant cam. I could not wait to set it up and put it into action. It was so exciting for me!

The plant cam is weatherproof and pretty much fool proof. It came with a great mounting bracket so I could mount it in the garden if I wished-and of course I wished. You can see how it was mounted in the garden in the first photo. I was anxious to catch pictures of birds up close at my bird feeding station so I mounted it facing a bird feeder instead of a plant. The company (Wingscapes) actually has a bird cam which is motion activated to take pictures of the birds, but this one worked well even though I had to edit out a lot of pictures. The plant cam is not motion activated but you can set it to take pictures at specified intervals: which enabled me to capture a ton of birds in time lapse mode at my feeder. One other setting that I used extensively was to take a series of three pictures at each interval (in my case I set the interval at five minutes during daylight hours). You can take a series of photos or just one each time the camera snaps a shot if you wish.

The software that comes with the plant cam is very easy to use and user friendly. Hey-even I was able to make a slideshow out of the pictures my plant cam took last November. I wanted to share them with you today. It was such a nice experience to be able to see the birds up close and personal-albeit through pictures and not in real time.


The picture quality was acceptable for the price the cam, but it does take some adjusting to get really good pictures. One thing I found that was not good for the plant cam (any camera actually) was the sun. As the day progressed on the video you will see where the sun was low enough in the sky to shine right into the camera. This was an issue I was able to correct by changing the orientation of the camera. Overall I love my plant cam and am seriously thinking of getting the motion activated camera so I can really capture some critters around here....

in the garden...

Wednesday, December 1, 2010

Plant of the Month-November 2010

From In the Garde
Despite snow and ice, drenching rains, and freezing temperatures the camellias have come through the month of November so admirably they are my only choice for the Plant of the Month for November 2010. I took this shot to show you all the ice and snow we woke up to the day after Thanksgiving on 26 November 2010. It was a very early snow for us here and not all too welcomed. It is all gone now though and the camellias have bounced back as big as ever. If you'd like to see a better picture of them please look at my 'Snow Rose' post found here. The fall blooming camellias here at Tiger Gardens have been blooming since the 24th of October and show no signs of letting up. Now that is what I call a true Plant of the Month!


What is your best and longest bloomer for the month of November...


in the garden....

Words and Photos Property of In the Garden Blog Team, 
 
In the Garden

Monday, November 29, 2010

Bloggers' Kindness Unifies and Leaves a Lasting Impression

From In the Garden

After more than three years of blogging I've been most blessed to 'virtually' meet many other bloggers and to look into their gardens and to share a bit of their lives. I've also met a few other bloggers in person and have enjoyed swapping plants and talking of gardening. Gardening is a hobby most people are most passionate about.

Gardening is not only a very popular hobby but it is a hobby that unites people all across the world. A lobelia is a lobelia in Washington State just like it is in Tennessee. A banana tree is a banana tree here in the United States just like it is in the Caribbean. An oak tree is an oak tree in Europe just like it is here in my home state of Tennessee. I find plants a most comforting unifier for this world because when all diplomacy and communications fail; we will still have plants all throughout the world no matter what language we speak, what religion we practice or what our temperature and growing conditions bring us we will still have plants that can unify us. But not only do plants unify us they connect us in personal ways. Who among you have your grandmother's peony growing in your garden? Or perhaps you grow peonies because your grandmother grew them even if you don't have hers. Plants provide a comforting normalcy to our lives and plants and I think that is one reason gardening is such a popular hobby.

If you are a blogger and choose to share some special plant or seeds with a fellow blogger you too are unifying people-bloggers from all across the world and the country. This is a very special way of connecting with others and a method of connecting I never would've anticipated when I began blogging. Then, someone would occasionally email me and offer me a plant or a seed. Huh? I never even knew you could send plants through the mail (only from commercial sources) so I was stunned! Seeds yes, but plants? Wow! 


Some plants are most special and hard to find so when a fellow blogger offers up a coveted plant it is with a great deal of gratitude that I accept the offer. It is a kindness I remember for a very long time and growing that plant that another blogger sent me helps me to think of that person each time I see the plant-it is a unifier since I live so far from most bloggers. I am not going to name all of the gifts I've received through blogging because that is just not something I generally do on this blog, but I wanted to share a few with you today.

Earlier this year Catherine of A Gardener's Progress shared some seeds with me. She sent me several but the ones that come to mind are: great blue lobelia, 'Lilac Fantasy' veronica, and red valerian. I diligently planted and babied those seeds and the resulting seedlings and I have finally found success! The plants I thought were red valerian actually turned out to be great blue lobelia and what an awesome and wonderful surprise the lobelia turned out to be. It is actually still blooming in my frozen garden here in Tennessee! Thanks Catherine!

Marnie from Lilacs and Roses and I did a daylily swap-through the mail. She has the most gorgeous daylilies and sent me not only a lovely daylily but some irises and a book too! How very sweet and I will so enjoy the daylilies and irises in my 'Friendship' area of my gardens. That is an area that is growing as I collect more and more plants.

Lastly, Kathleen of Kasey's Korner offered me some
Veronicastrum virginicum or Culver's Root. It arrived perfectly and is happy in my garden. I've seen the Culver's root on so many garden blogs I really liked it. I'm pretty sure it will do well in my garden conditions too and am ever so excited to see it grow and bloom here-and to think it came all the way from Colorado!

So when you blog and you talk with your fellow bloggers and maybe offer to share a plant or some seeds with your colleagues think about how you unify us all and how those plants will leave a lasting impression....

in the garden....

I've received several plant exchanges and gifts in the mail from bloggers near and far. I've also traded with other gardeners and bloggers in person. I tell you all of these plants and gifts make me think of the giver-not for the gift but for the gesture. Plus I so love plants. I think pass a long plants are sometimes the best.

Do you think of special folks who have given you plants?


Words and Photos Property of In the Garden Blog Team,

In the Garden

Friday, November 26, 2010

A Japanese Maple Seedling with Yellow Fall Coloring


From In the Garden

I was sadly mistaken on some of my seedling Japanese maples turning a plain old green. Not so! This particular one is out front along with the orange one and a few red ones. It has turned an eye grabbing yellow and looks great in the Front Center Garden. This particular seedling J. maple took a lot longer to change colors than I would've expected-but the show was worth the wait.  It has taken several years to get to this point and I tell you I'm ever so glad it's finally presenting a show in the garden.
 
This particular garden is the center of my front yard and is a high visibility garden for me. I look at it from inside the house, while on my porch, when walking to the house and really all the time. It needs to have color and interest all year long. In order for this to happen I planted a lot evergreen shrubs, hydrangeas, and some perennials in this garden as well as the two J. maples. A mature oak tree and a huge short needled pine tree round out the plants growing in this bed. Looking just past the Japanese maple's trunk you can just make out the green split rail fence. On the other side of this fence is the busy state highway I live near.


Of course, I can't see the highway anymore because I have this lovely garden and J. maple to draw my eye....


in the garden....

Words and Photos Property of In the Garden Blog Team, 
 
In the Garden

Tuesday, November 23, 2010

Snow Roses, aka Camellias, and Happy Thanksgiviing

From In the Garden
"A rose is a rose is a rose is a rose..." (Gertrude Stein)

From In the Garden

But this is no rose....

From In the Garden
Still, I can't help but think of roses when these bright and cheery camellia blooms lighten the garden....so very much during these drab, cold and dreary days of late fall.

From In the Garden

Everyone have a fabulous Thanksgiving and take time to really appreciate the little things in life....in the garden.

Words and Photos Property of In the Garden Blog Team,

In the Garden

Sunday, November 21, 2010

St. Black Makes an Appearance

From In the Garden

Twas a Saturday morning before first light

When all through the gym the chairs were a sight

From In the Garden
In hopes that St. Black would soon be there

The drums and guitars were stacked with flair

From In the Garden
The amps were prepared to make a patter

When St. Black began to chatter....


My youngest son and his band recently performed at the Austin Peay State University's First Annual Teen Summit. Kudos go out to the organizers of this very wonderful event for teenagers and their parents here in Montgomery County Tennessee. The teens got a great deal out of this event involving local community members and leaders talking about issues that affect teens. Anyone who has a teen or who is themselves a teen now or even who remembers their teenaged years will attest the teen years are not easy years. Today, being a teen is much harder than I could ever have imagined. Any tools that can help my teen deal with issues in today's society are most welcomed and the Teen Summit sure provided some helpful tools to my son. To say I am a very proud parent would be an understatement, but all the performers at the event were wonderful and every single parent who had a teen at the summit should be proud....

in the garden....

Words and Photos Property of In the Garden Blog Team,

In the Garden

Friday, November 19, 2010

Some Fall Pictures from Tiger Gardens

From In the Garden
I thought I'd share a few fall pictures from Tiger Gardens with you today. I have cut back on posting a bit but that so doesn't mean I'm not still getting out and enjoying (and working) in my garden. Today we'll look at a few random scenes that caught my eye this very week. First but not least is an unknown Japanese maple seedling-just splendid! I have five unknown type Japanese maples out front and this one is the only one that is orange. Seedlings are quite variable I tell you. Three of the others are red, and one is a plain old green for fall. I think I'm liking the orange best.

From In the Garden
Here is a long shot of it. This J. maple seedling grows in my Walled Garden. The last time I posted on my Walled Garden was when I first planted it back in 2007! This vantage point shows both the Crabapple Garden (in the foreground with the Crabapple Tree) and the Roadside Shrub Border (in the background just in front of the green split rail fence-the other side of the split rail is a state highway). The orange just glows!

From In the Garden
Here is another vantage point looking north toward the Northside Shrub Border. You can also see a 'Nova Zembla' rhododendron in the foreground. This rhododendron is part of the walled garden as well as several PG hydrangeas, azaleas, mums, Solomon's seal and other plants including a 'Forest Pansy' redbud. This garden gets pretty much full shade. The seedling was planted in 20o7 when I planted the entire garden. The seedling is finally getting a bit of height on it-if I can just watch out for those voles I'll be golden with this small tree.

From In the Garden
Here is Christine's Japanese maple (really 'Sango Kaku' but I call it her tree). It colors up completely different from the red leaved Japanese maple. This tree turns a pure golden yellow in my garden. It is magnificent backlit! See the red veining? A nice feature. You can just make out one of the fall blooming camellias in the background.

From In the Garden
And here it is! It is an unknown camellia along the northern side of the deck. It is slowly gaining more girth than height-kind of like me I guess; which is not good for me but great for the plant. Eventually it will grow to above the deck rail so that we can enjoy the blooms at eye level when we are on the deck.

From In the Garden
'Jean May' has no problem gaining height as this shrub is more of a tree than shrub. It has one main trunk and has grown phenomenally in the 8 or 9 years it has been growing in Tiger Gardens. I have posted on how I grow camellias here if you are interested in learning how I do it (besides good luck:). Be sure to click on 'camellias' on my sidebar label section for more informative posts on growing camellias from all of here at In the Garden. I'll tell you regular readers and bloggers, if you do not have a label link on your sidebar you are missing a ton of traffic. The labels are used quite often on this blog and I'm glad I have kept them up-many that there are though. I know when I visit blogs it is one feature I sure appreciate-more than any other feature on a blog.

From In the Garden
Here we are looking west along the Northside Shrub Border. The blueberries in the foreground have colored up beautifully and my yellow button mums are blooming in mass quantities. The color combo is nice and I sure appreciate these late blooming mums.

From In the Garden
More of the yellow button mums in the corner of the Northside Shrub Garden. I mainly show you this picture of the Amsonia hubrectii a favorite perennial for my garden. It is very drought and shade tolerant. The blooms come in the spring and are not so much to look at but the foliage is great! It has taken several years for it to reach this size but I think that is good since the root system has plenty of time to develop nicely. This plant is extremely drought tolerant. I have several smaller seedlings scattered around and I am so enamoured of this plant that I've begun spreading it around the rest of Tiger Gardens.

From In the Garden
Another shot of my 'Jean May' camellia. As I was peeking around the shrub looking for a good vantage point a few song sparrows were most worried about my presence so I decided to investigate further. I'm sure this nest is not used for eggs but more for roosting. The evergreen leaves of the camellias and other multiple shrubs in my garden provide a fantastic hiding and warming place for birds to roost during the long winter nights-and even during the day. I can usually find the birds in this tree since it is so close to my house and I can tell you all types of songbirds including cardinals have nested and lived in this tree. It is a wonderful habitat tree for a wildlife garden. If you do not have a lot of evergreens like camellias, arborvitae, viburnums, eleangnus, hollies, boxwoods, yews, and multiple other types-plant some now to provide shelter for birds....

From In the Garden

One last shot (fittingly it is an orange one like the opener) of one of the three crabapples in my garden. This tree was planted as a twig seven years ago and it has really taken off. The 'apples' are a light orange and provide some great color in the garden-not to mention the birds love these little apples. Crabapples-any kind of fruit tree actually-are also excellent habitat trees for wildlife....

in the garden....

Words and Photos Property of In the Garden Blog Team,

In the Garden

Thursday, November 18, 2010

Happy Fall Colors in Georgia

By Skeeter;
I am popping in here today to say hello and take a moment to partake in Dave's Fall Color Project 2010. I will pop back in here when time allows :-)

I wish everyone a wonderful Thanksgiving... Hello everyone! I have spent most of my Fall days in Tennessee helping my parents get moved back into their newly renovated house after the May Floods. I spent most of my time inside therefore, not enjoying as many Fall colors as I would have liked to but work came first. I have been one busy gal this Fall but everything is falling (yes, Pun here) into place for me and my family. I am ever so happy these days. I have not been into my Georgia Garden in some time but knew I was not missing much with flowers playing out and plants getting ready for their long Winter nap. This past Sunday, I found a moment to sit in my swing. Look at the beautiful view I was given in my front yard! Fall happens late in the year for us Deep South dweller's. Even though, not much color adorns my gardens, I am ever so grateful to see such beautiful colors in our trees. In this picture you can see the big Green-leafed Willow Oak tree in the middle. It is the last to show color as well as loose its leaves. The last of the oak leaves will drop to the ground in late December and some times, may last until January. What about those wonderful Crepe Myrtle Trees? They give us beautiful flowers in the summer months then again in the fall with vibrant colors on their leaves.
One flower that continues to bloom for me is the Trumpet Angel that Tina gave me from her Tiger Gardens. I just love this plant Tina and cannot thank you enough for passing this beauty along to me!
The Saint's Bald Cypress is turning a bronze glow with a bright red Dogwood in the background.
The Saint's Crab-apple is yellow... and produced some fruit this year. Hopefully, the fruit will become a meal for the deer. That was the Saints plan when planting this tree in the route of the deer.

I am glad to finally be able to slow down a bit and enjoy HAPPY FALL COLORS, In the Garden...