Good morning and hello new and regular readers of this blog. It has been quite a while since either Skeeter or I have posted but I can assure you, we have not forgotten about you all! I still love this blog and all of its memories and readers and the Internet, I just am not on the computer as much as I used to be. Smartphones and Facebook seem to be about the only blogging I do lately. So, if you like this blog and would like to hear more from your Coach in the Garden be sure to like my Facebook Page found here.
I have been traveling in Europe, puttering in the garden, and generally keeping myself busy. Sometimes I am so busy I forget where all the time has gone. I know that can happen to a lot of us often. The project I am sharing today is such a fun and easy project that I wonder why I had not yet completed it-like last year when I had the vision to dress up my big 250 gallon propane tank. I guess, aside from being busy, I was a bit afraid to tackle this watermelon. I really had no idea where to begin to paint this monster and make it look great for me. Well, once I got started it was really SO easy I should've finished this long ago.
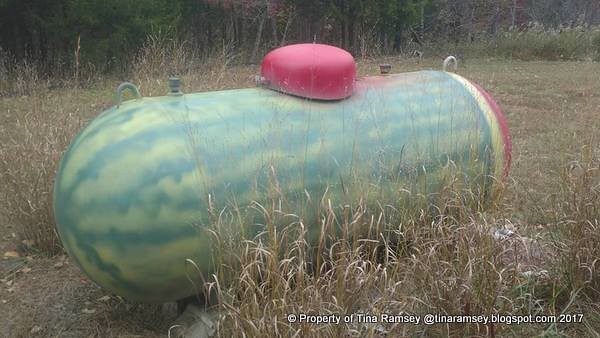
I think it turned out exactly the way I wanted it to and it fits into my garden and home setting so perfectly it could've been custom made-and it was!

This whole project took perhaps an hour or two. Mainly, the time spent was letting the paint dry. The active part of the design came from squeezing the trigger on the paint cans. And that's it! I did not draw anything nor did I worry about preciseness on my watermelon. I added the seeds to the watermelon by hand using a black patio paint and paint brush.
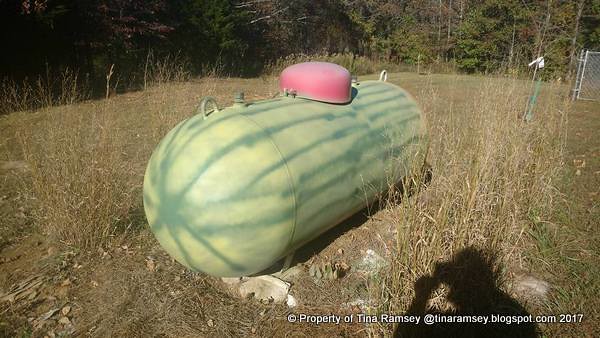
The tank has been in place for three years (that's how old my house is and how long I've lived here). The tank is actually in an out of the way area but still within thirty feet of my house and I wanted it to blend in. In the above state, it did not much fit into the garden even though I tried to disguise it with planting 'Shenandoah' grass clumps around the tank.
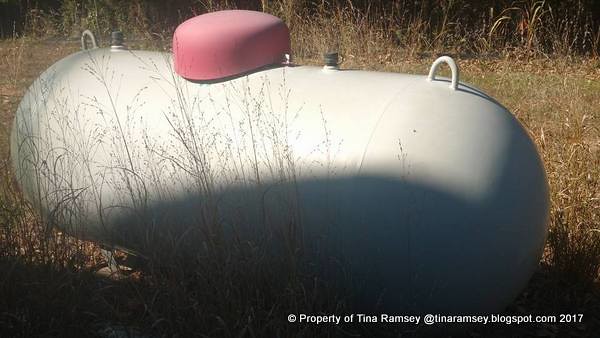
I first cleaned the tank really well and sanded it a bit with steel wool and a fine sandpaper. I then began spraying an Self Etching OD Green Primer all over the tank. It took two cans of the primer to cover the tank. You can just make out the OD Green primer on the far left end of the tank in the above picture.
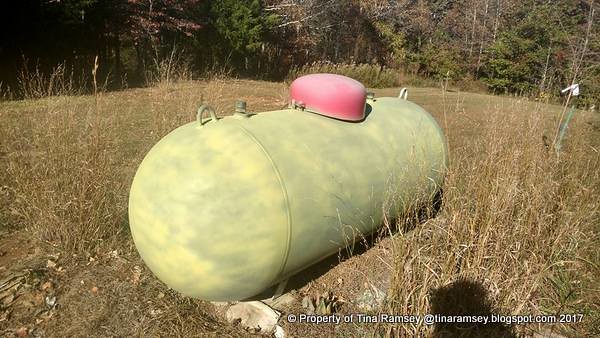
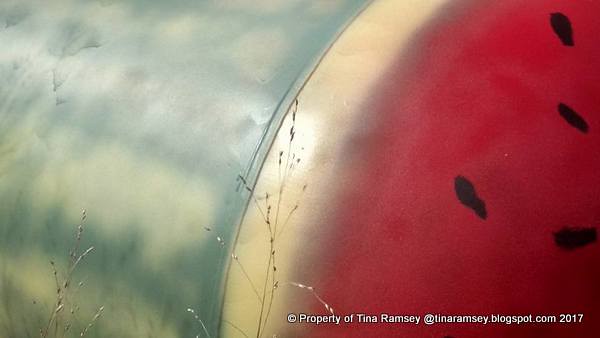
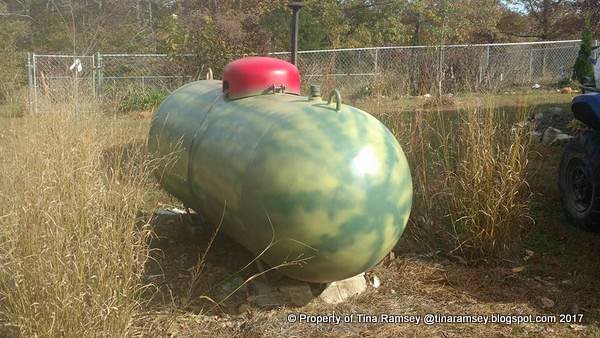
I then covered most of the tank with a lime green Anti Rust Paint. I left the far end OD Green because it would be the cut part of the watermelon and would be painted red.
I next took a can of OD Green and spray painted lines similar to what you might have on a real watermelon rind. At this point it was beginning to look like a watermelon and I was encouraged. The colors I picked were perfect (they are pictured below). The lines needed to be blurred a bit so I scribbled around them to fatten them up and make them appear to be more natural.
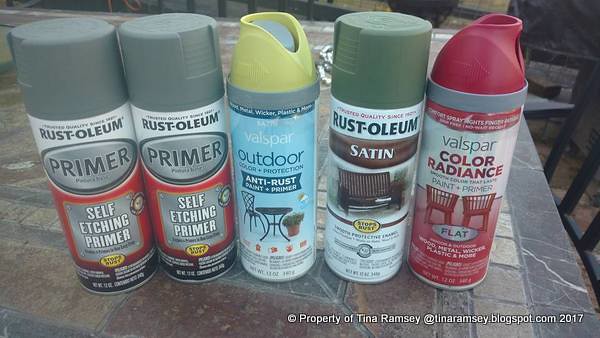
The above colors and paints are what I used for my watermelon. All are easily found in any big box store. I also applied a coat of polyurethane over the top of the completed tank.
One more look at my "Watermelon" propane tank!
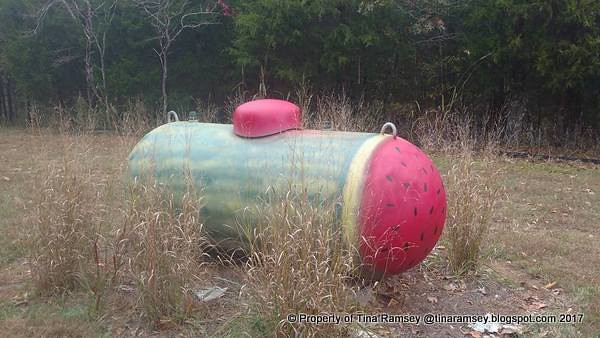
Loving it in the garden.....