 It did not take me long to decided what to do with the empty uneven stump in the middle of my planter. After reading the suggestions from you wonderful commenter's, I rushed out the same day to the garden center! I put two pots of pretties together taking Darla to heart with her suggestion. Spike and ivy now adorn the stump with some Viola's for color. Your voice is heard in my Georgia Gardens!
 I also dug up some of the Vinca from the ground and added it to the round pot. The long pot has the ivy. Hopefully they will grow soon and hide the green tie downs to the pots.
 I sure hope the pots are accepted in this spot. The squirrels love to chase each other around the stump as if a merry-go-round.
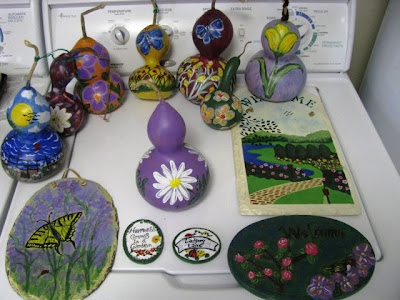 I was stuck inside the house with being too sick to go into the gardens for 2 weeks. I longed to be outside but knew it would not be best. I was not sick enough to sit still though. I took up painting. Ha, a painter I am not but I had fun creating and playing with the paints anyway. These are gourds I grew two seasons ago and am just now getting around to playing with them. They are painted, now what to do with them???
  I also painted small birdhouses. I finished the last of them last night while talking on the phone with my mom. She wanted to know what I was going to do with them but I told her she had to wait until today's Blog to find out. Can you spot the one I called Halloweeny mom?
  So here is my grand idea for a project we took on this past weekend. (like the planter was not enough) The Saint replaced our front entry hand railings to the house last summer. I would not let him trash the old ones as I knew in time I would come up with some idea to recycle them. He cut the spindles square for me.
 He drilled a hole into the bottom of each one and installed a piece of Rebar.
  We put them into the ground and I topped each one with a birdhouse.
 I put them along side the Entry to the Semi-Formal Garden. A sort of faux fence. I have always thought the Entry was a bit lonely and needed something. I neglected this garden last year and have decided it is time to give it some attention. I think this is a good start.
 I am in the process of taking out the planter where I once put herbs. I plan to divide lilies and extend them on down to the last post. I have ideas running in my head as to what I would like to do here.

While in Tennessee last May, as the rains were coming down, I stopped by the Humane Society's big Yard Sale. I found such bargains as these saw blades. I believe I paid a mere dollar each for them! The cats you see on some of the post were picked up at this Yard Sale also. Can we say bargain...

Look where I put the saw blades! I am dealing with a dry cough now, which is driving me nuts. But that is not keeping me down. I am enjoying creating such things as this FAUX FENCE, In the Garden...
HAPPY ST PATRICK'S DAY!
Note, I will be off the blog for a bit. Everyone enjoy this awesome spring we are having....
Words and Photos Property of In the Garden Blog Team, In the Garden


