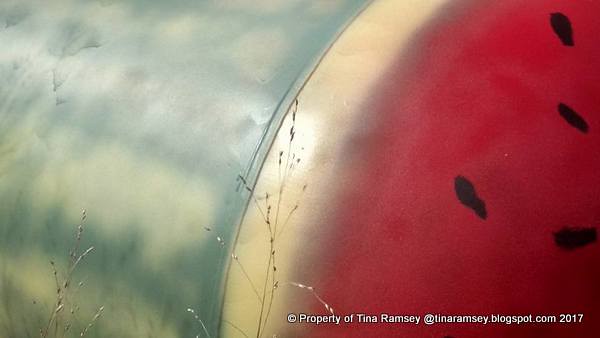
 Good morning and hello new and regular readers of this blog. It has been quite a while since either Skeeter or I have posted but I can assure you, we have not forgotten about you all! I still love this blog and all of its memories and readers and the Internet, I just am not on the computer as much as I used to be. Smartphones and Facebook seem to be about the only blogging I do lately. So, if you like this blog and would like to hear more from your Coach in the Garden be sure to like my Facebook Page found here.
I have been traveling in Europe, puttering in the garden, and generally keeping myself busy. Sometimes I am so busy I forget where all the time has gone. I know that can happen to a lot of us often. The project I am sharing today is such a fun and easy project that I wonder why I had not yet completed it-like last year when I had the vision to dress up my big 250 gallon propane tank. I guess, aside from being busy, I was a bit afraid to tackle this watermelon. I really had no idea where to begin to paint this monster and make it look great for me. Well, once I got started it was really SO easy I should've finished this long ago.
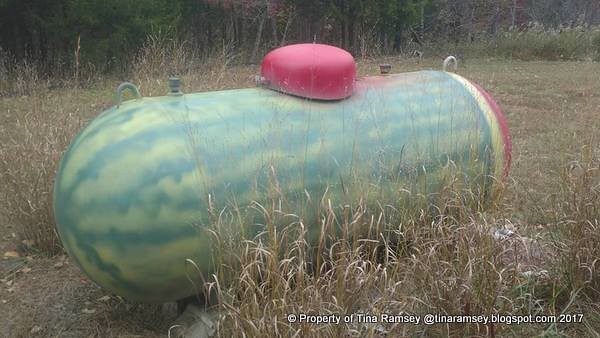 I think it turned out exactly the way I wanted it to and it fits into my garden and home setting so perfectly it could've been custom made-and it was!
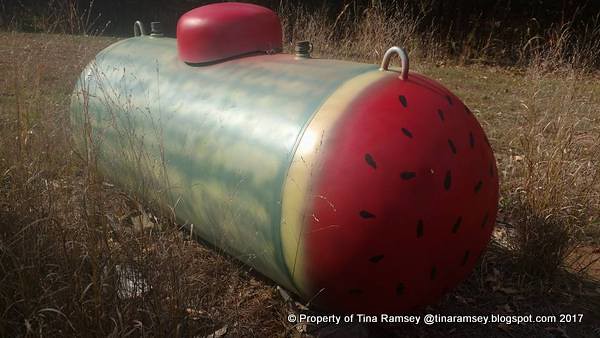 This whole project took perhaps an hour or two. Mainly, the time spent was letting the paint dry. The active part of the design came from squeezing the trigger on the paint cans. And that's it! I did not draw anything nor did I worry about preciseness on my watermelon. I added the seeds to the watermelon by hand using a black patio paint and paint brush.
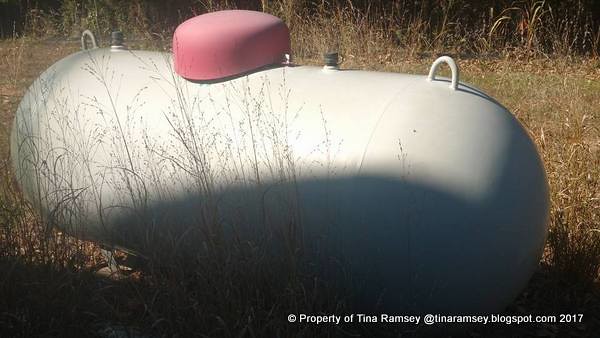 The tank has been in place for three years (that's how old my house is and how long I've lived here). The tank is actually in an out of the way area but still within thirty feet of my house and I wanted it to blend in. In the above state, it did not much fit into the garden even though I tried to disguise it with planting 'Shenandoah' grass clumps around the tank.
I first cleaned the tank really well and sanded it a bit with steel wool and a fine sandpaper. I then began spraying an Self Etching OD Green Primer all over the tank. It took two cans of the primer to cover the tank. You can just make out the OD Green primer on the far left end of the tank in the above picture.
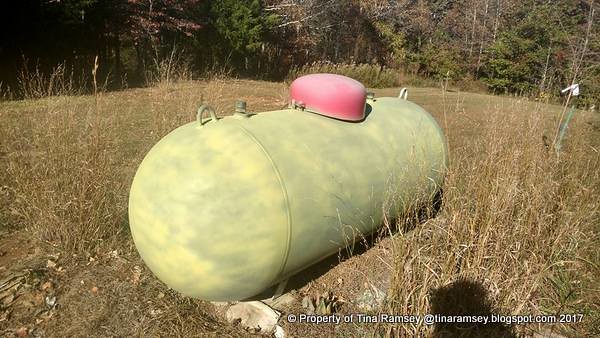 I then covered most of the tank with a lime green Anti Rust Paint. I left the far end OD Green because it would be the cut part of the watermelon and would be painted red.
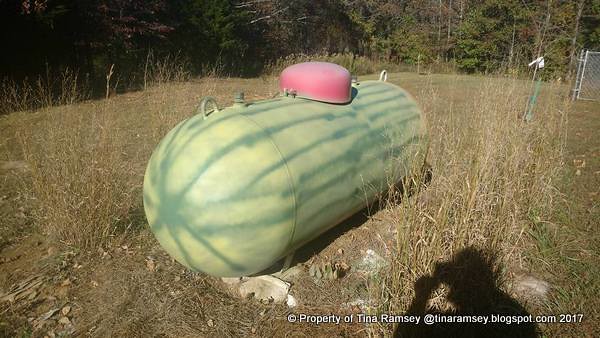 I next took a can of OD Green and spray painted lines similar to what you might have on a real watermelon rind. At this point it was beginning to look like a watermelon and I was encouraged. The colors I picked were perfect (they are pictured below). The lines needed to be blurred a bit so I scribbled around them to fatten them up and make them appear to be more natural.
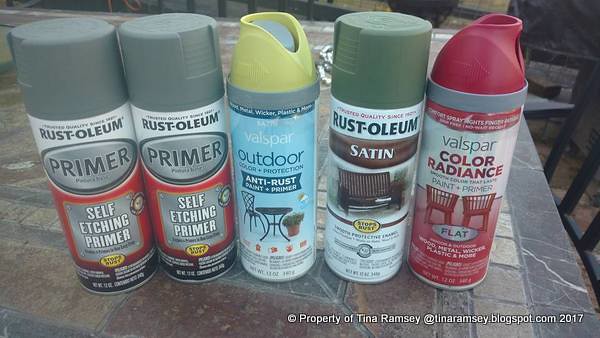 The above colors and paints are what I used for my watermelon. All are easily found in any big box store. I also applied a coat of polyurethane over the top of the completed tank.
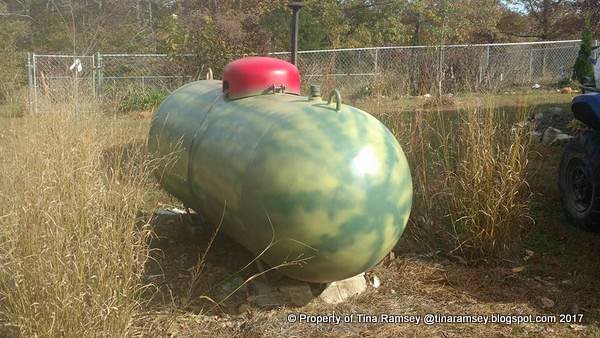 One more look at my "Watermelon" propane tank!
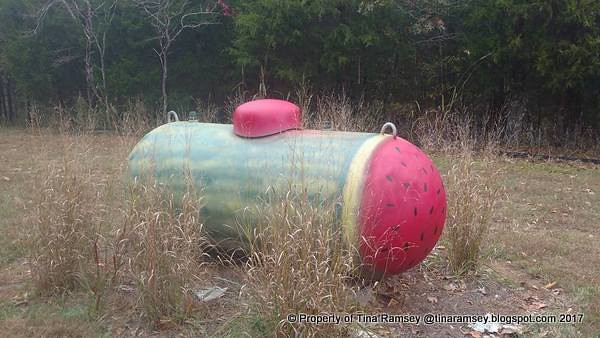
Loving it in the garden.....
Words and Photos Property of In the Garden Blog Team, In the Garden
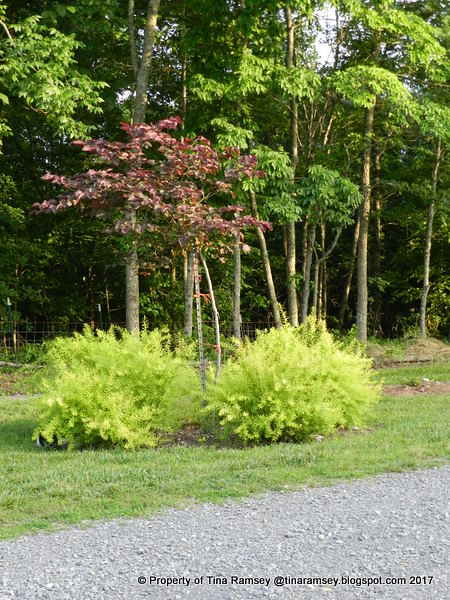 I confess, the above picture is not from the Red Garden (the subject of this post), but I liked it anyhow and I wanted to share it. I'll be posting more random pictures of the garden very soon and that may be where the above picture belongs, but the 'Forest Pansy' is red and that counts in my opinion. The shrubs at the feet of the 'Forest Pansy' are Spiraea 'Ogon'. I love the color combination and I especially love Ogon! It blooms very early and simply glows in the garden. As far as the Forest Pansy, this small tree was a replacement to these new gardens since my Forest Pansy at my old gardens was way too big to move. This tree has been here three years and still has not made much progress with its growth. I am holding out hope it will finally begin to grow in this perfect spot for it.
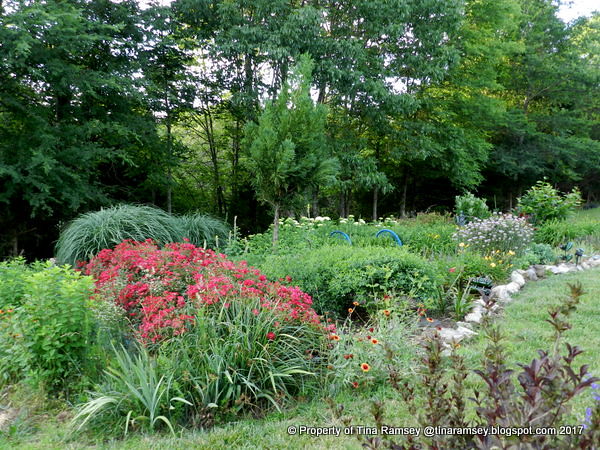 Here is the Red Garden, so named because of the Red Drift roses in the foreground. Also, I have tried to pick a theme and/or color for several of my gardens and this one is the Red Garden since not only does it contain red roses; which bloom all season; but since this garden is located in full sun in the front of my home I have tried to keep reds and yellows and bright dark colors in this area since I think they show up better in the harsh light of full sun. This garden is also a butterfly garden and is quite visible from my kitchen window where I can enjoy the many butterfly visitors while inside the house.
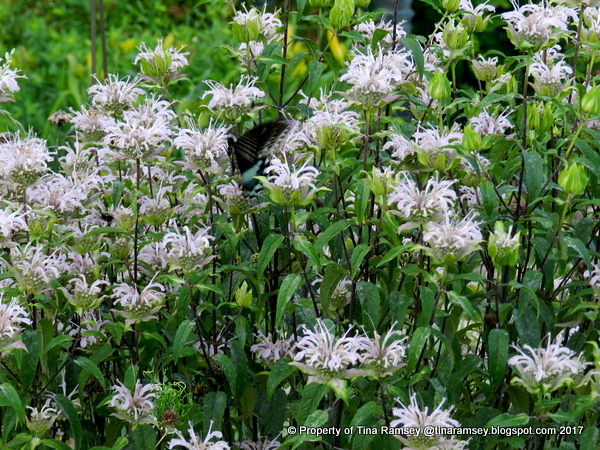 Here is one of those visitors, an Eastern Tiger Swallowtail. I can never find this particular plant without several visitors. It is rare there is only one butterfly visiting it for nectar. This plant self seeded itself in the Red Garden and since it is such a wonderful butterfly plant and does not clash with the reds, I have let this native bee balm (Monarda fistulosa) grow and prosper in this garden. This particular bee balm grows wild all over our property and is always covered with butterflies. It is a great blender of colors for all sorts of garden flowers because the soft lavender does not seem to clash with other colors. It can easily take on reds and yellows and looks equally at home with blues and pinks. I highly recommend this bee balm.
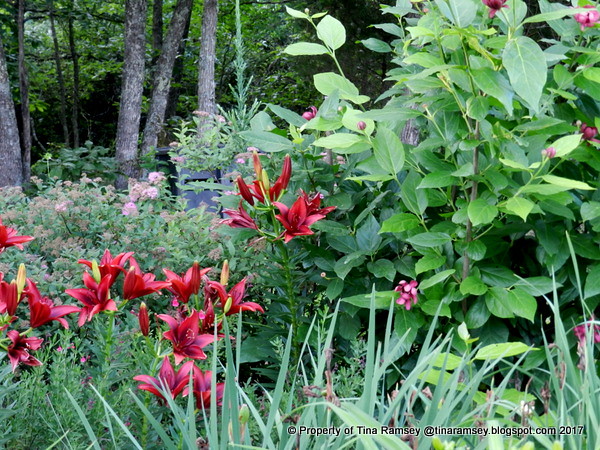 The far end of the Red Garden contains some spireas along a slight hill on the back side of this garden. You will soon see why this post includes 'bumped up' in its title. The pink spireas are a great erosion controller and work well in the somewhat shady conditions of the back side of this garden. On the level part of the Red Garden we see dark red lilies (cultivar unknown) and 'Aphrodite' sweetshrub. In the foreground is the foliage of Siberian irises-already gone by.
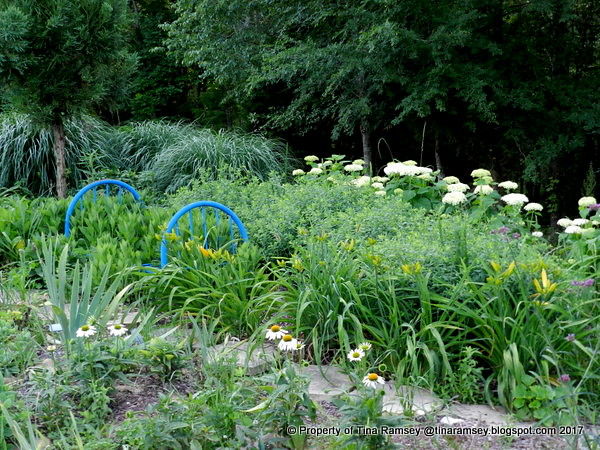 In the middle of the garden we have daylilies, 'White Swan' coneflowers, blue asters, 'Annabelle' hydrangeas (along the edge of this bumped up garden), a Japanese cedar tree, and miscanthus grass in the far corner.
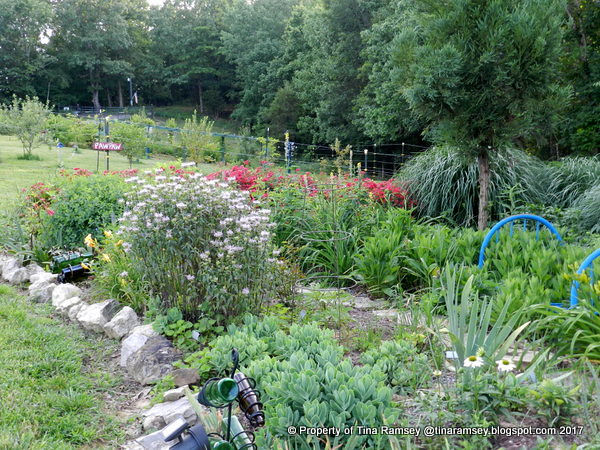 Here you can see some sedum, more daylilies, tatarian asters, and cut leaved coneflowers along with the Red Drift roses and miscanthus. From this shot it looks like all is level with the surrounding orchard-but it can be deceiving.
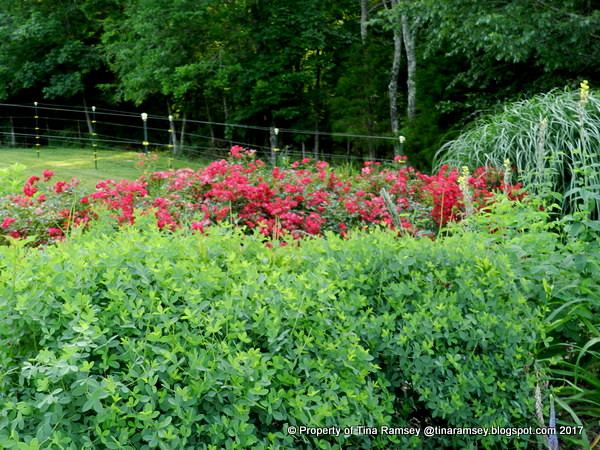 Getting closer to the edge we see the Red Drift roses which are bordered by baptisia that has gone by. Baptisias are a must have plant in any perennial garden because they provide year round interest are easy to grow if given the right conditions. After the bloom is gone the foliage looks outstanding and helps to keep down weeds by shading the ground. Brown pea pod like seedpods remain on the plant most of the year and in the fall the leaves will fade away and you'll be left with a bunch of branches you can leave in place for the winter for winter interest if you like.
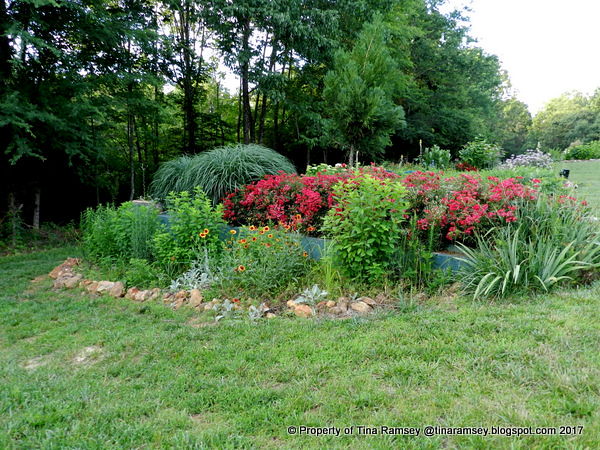 Flipping around to the other side of the Red Garden and the Red Drift Roses we find five 'Limelight' hydrangeas, blanket flowers, and lambs ear growing on a lower level with concrete pilings behind the front part of the Red Garden. Now we can see that the entire Red Garden is actually not level with the terrain on the lower end but it is leveled with the lawn closest to the house due to the concrete barriers.
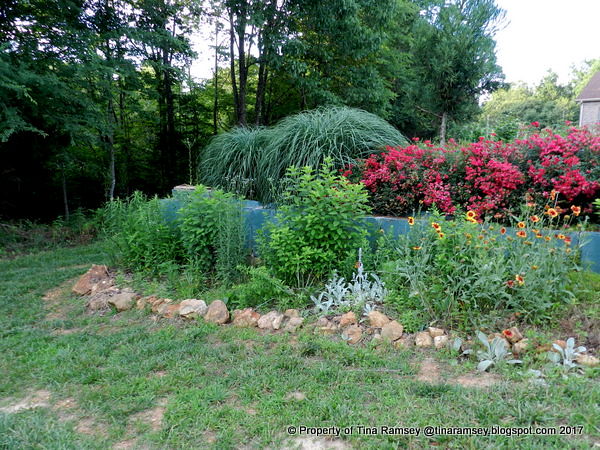 A closer look really shows the barriers from a better perspective. I had purchased fourteen of these very heavy concrete barriers in order to barricade a road on our property. We then opened the road and the county moved the barriers to a location near this garden. When Mr. Fix-it and I built the house I had a good idea to use these barriers to level up the lawn and to reduce runoff and to reuse these no longer needed barriers. I had a great backhoe team that kindly put these fourteen big blocks of concrete into an L shape in this location creating me a new garden area during the house build three years ago.
We then filled the space in with backfill and I began landscaping. Prior to landscaping tho I did paint the front of the concrete barriers with a green concrete stain in order to help the barriers blend into the garden a bit better. It has taken a few years to really get this garden going and to pack down all of the infill. Once a piece of dirt has been dug up then refilled it seems like nothing ever goes back together properly and so it was with the entire front lawn since it too was dug up, and not just the Red Garden. I had to continually refill the location and work the rainwater run off from the higher ground by directing it to where I wanted it to go. All in all, bumping up the front yard to create this garden was a great idea and has worked well for us....
in the garden....
Barriers like these are available from any concrete supplier for a nominal cost. In my area they were $50 per barrier. The real cost comes in with getting someone to not only pick them up and deliver them, but to put them in place in your landscape. If you have the means to do this then all the better but you do need a good sized tractor or machine to maneuver them around the landscape so be prepared. These barriers worked better than any retaining wall and were a lot cheaper to use as well.
Happy Early Birthday to my twin daughters who turn 36 wonderful years young this week!!
Words and Photos Property of In the Garden Blog Team, In the Garden
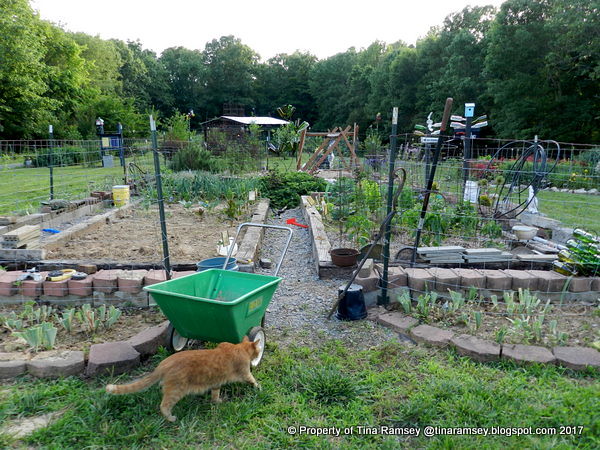 I find it difficult to spend much time in the house so I have not really had the time to blog. I feel most sad about that because I really like to post and I like keeping the historical record of my vegetable garden above most all other posts. These posts really help to refresh my memory.
Above is a long shot of the vegetable garden. It's looking great this year!
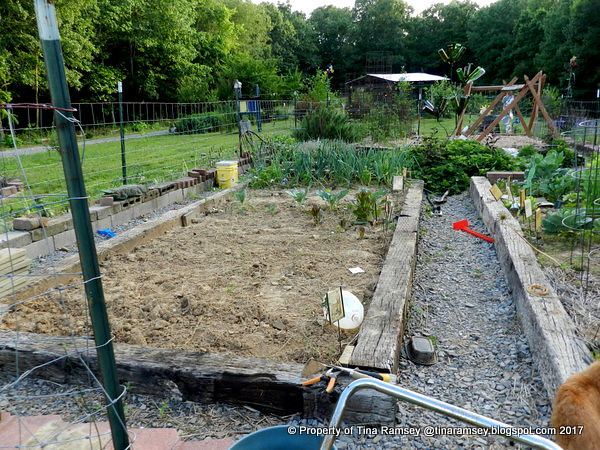 This first bed has been planted with corn, carrots, and squash by my three year old grandson. He simply could not get enough of planting seeds! Prior to planting the corn on Sunday, May 28th, the bed had been planted with potatoes and other cool season crops in and amongst a cover crop of rye and crimson clover. That cover crop was a mistake; or rather the mistake was mine. I made the mistake of planting the cool season crops in the bed while the cover crop was still growing and I underestimated just how tall and thick the cover crop would get. The cover crop totally smothered out the cool season vegetables and as a final insult, never died! I had to physically pull all of the rye and crimson clover. Next year I will use only one kind of seed for a cover crop and I will be sure to till it under prior to planting in the spring. Lesson learned. My corn is a bit late going in but I think it will still be fine.
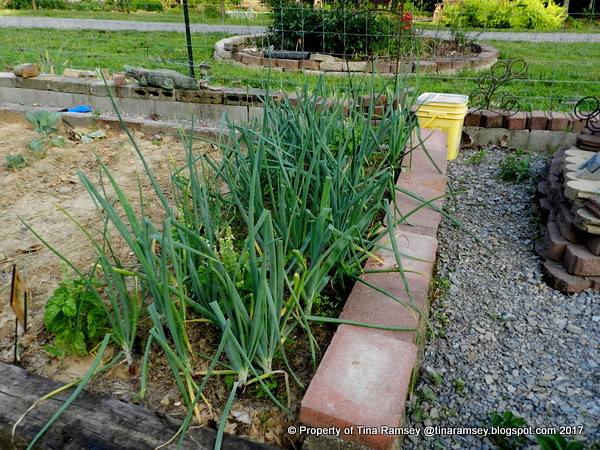 This end of the bed was planted in onion sets in February and I did pull the cover crop prior to planting the onion sets. As a result, these onions are doing fantastically and will be ready for harvest in a few weeks. I also have interplanted basil among the onion bulbs so once the onions are pulled the basil will be in a good spot to grow.
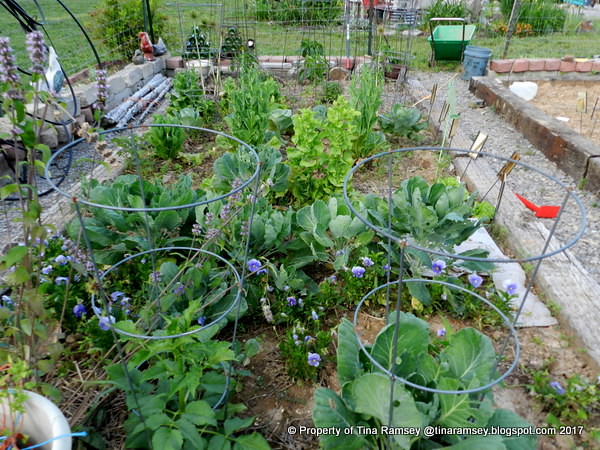 Bed number two is doing just fine. I have some mums, dahlias, and alliums growing among the crops here. This bed is mainly still full of cool season crops with squash planted in and among the cool season crops. At one end of the bed where I have harvested the cool season crops the peppers are growing well.
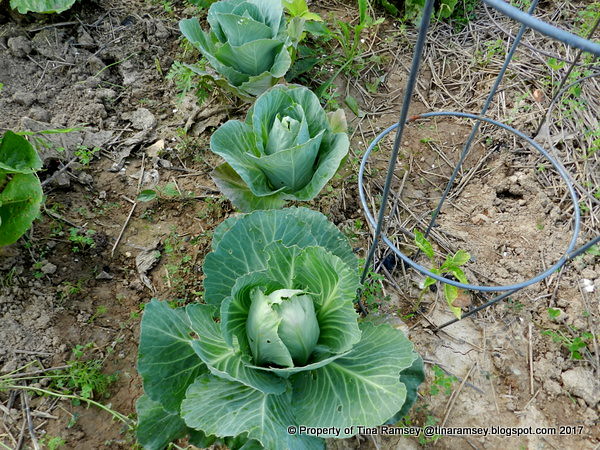 The cabbage is looking good. Due to the cabbage worm I will most likely be harvesting these very soon since I saw some of the cabbage moths flying around looking to lay their eggs.
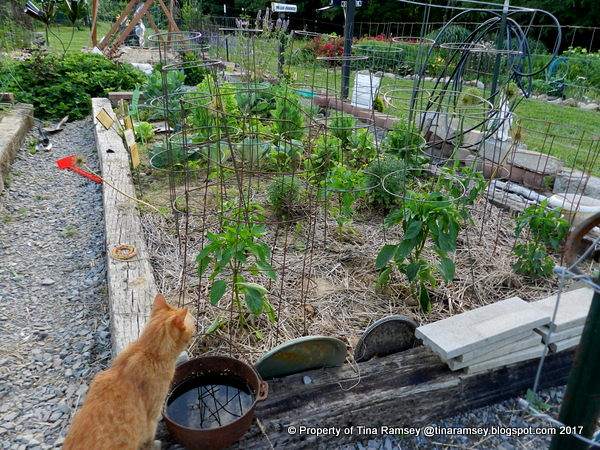 Here we see the peppers growing in their cages in the foreground of this bed. My cats like taking walks with me in the garden. Here Tiger is getting a good look.
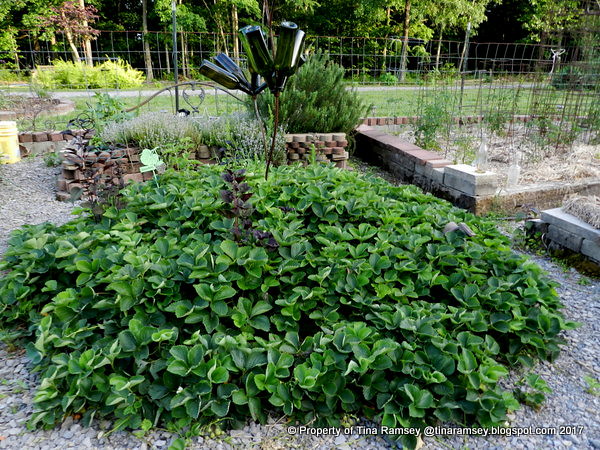 We had fun picking a lot of strawberries from the strawberry bed. This year the strawberries were all very good. Last year I had a short harvest due to mold getting on the berries because there was apparently not enough air circulation.
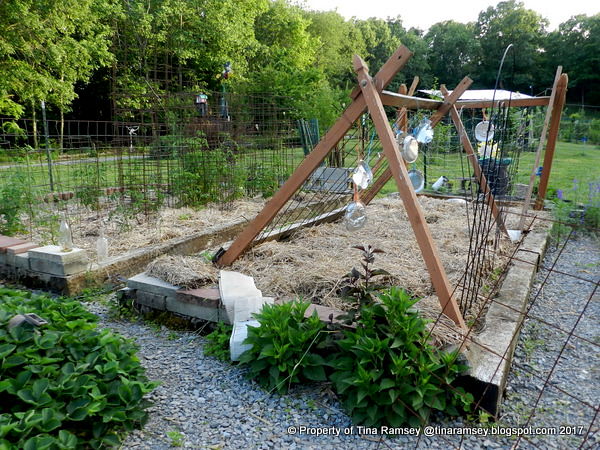 The last two beds are kind of boring. The furthest away is packed with tomatoes. I am growing some that I started from seed in the greenhouse in January. Those cultivars are: San Marzano (paste tomato and I have already picked four of these), 'Cherokee', and 'Pineapple'. I also purchased some cherry tomato plants and a 'Beefmaster' tomato plant. All are doing well and are mulched with cardboard and seasoned straw to keep the weeds down.
The bed to the right is my cucumber/vining bed. I planted about 25 plants of cucumbers and my grandson planted watermelon and squash. Soon this bed will be a jungle.
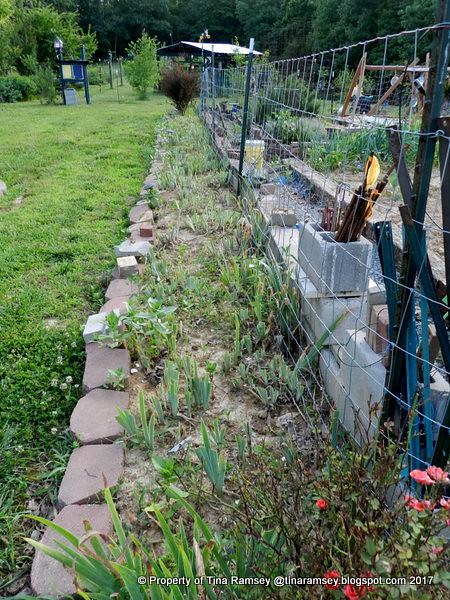 When we walk around the vegetable garden we now can see a fence. I found a couple of deer browsing in this garden on the cover crop so I thought it wise to fence it off. The irises in this bed have gone by and all been trimmed down. They will now be replaced with self seeding zinnias.
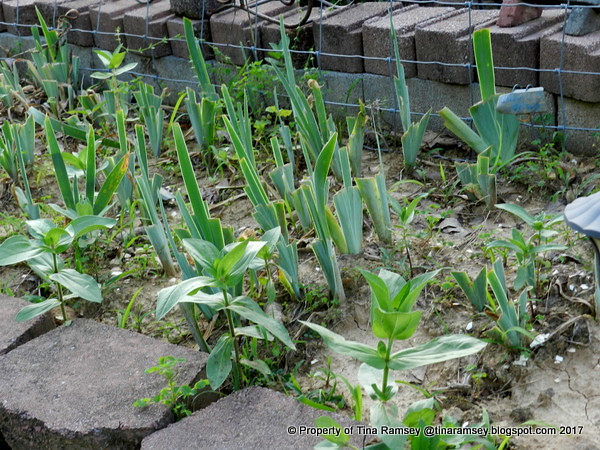 I am always so happy for self seeding zinnias because they save me so much time. Whenever the ground is very wet I gently pull these seedlings and plant them all around the garden. Most of them are on the edge of the iris bed because the iris leaves were so thick they prevented the sun from reaching the interior of the bed. Butterflies love zinnias and come summer this will be a great way to attract pollinators to the vegetable garden area.
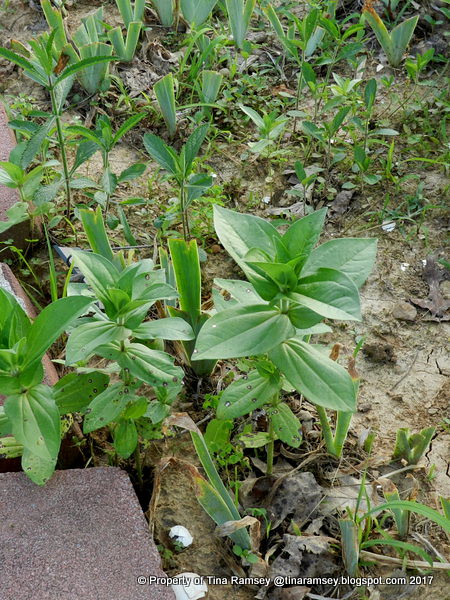 A close up of the self seeding zinnias....
in the garden....
Words and Photos Property of In the Garden Blog Team, In the Garden
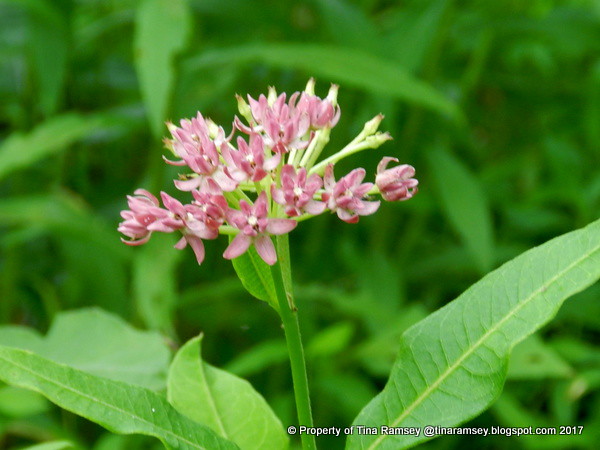 Good morning all! Things are really popping in Tiger Way Gardens and since I've been so busy taking pictures of butterflies with my cellphone I thought it was high time I posted some on here. If you'd like to see videos of the 'sea of butterflies' here in Tiger Way Gardens please do visit my professional page called Coach in the Garden!
Above is an unidentified milkweed. I am leaning towards Swamp Milkweed (Asclepias incarnata). If anyone knows for sure please tell me. It is growing wild at the bottom of Wildflower Hill.
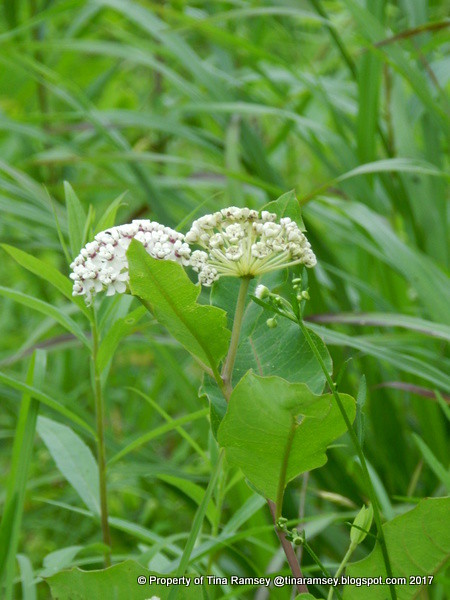 This milkweed is also growing wild on Wildflower Hill but I know for sure it is Redring milkweed, aka Asclepias variegata.
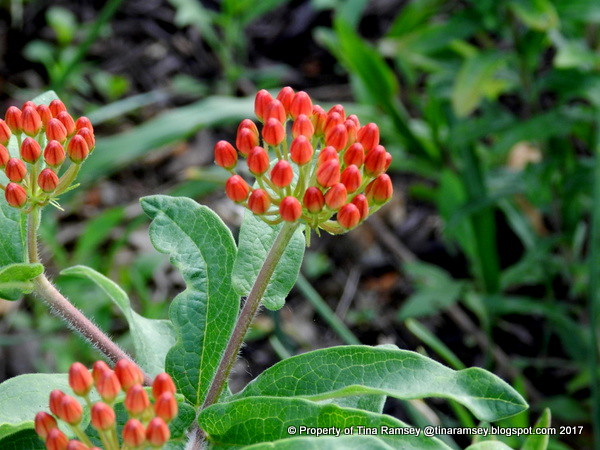 The above picture is wildgrown native Butterflyweed, aka Asclepias tuberosa. It was growing in this spot along with three other large butterflyweed plants. I have worked this particular garden around these milkweed plants even tho a couple of them were damaged due to the electrical ditch being dug in this location. For more information on this butterflyweed here check out this post.
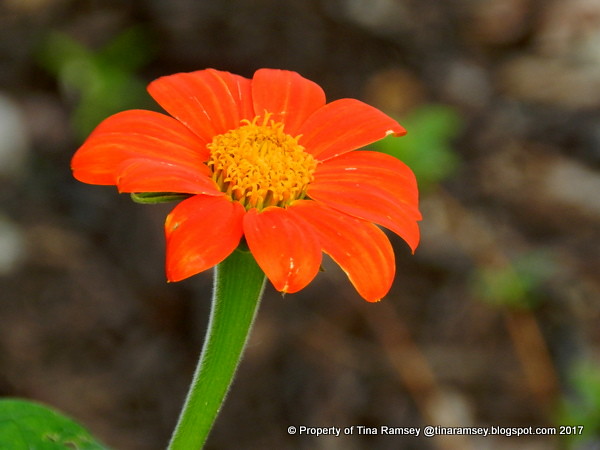 Mexican sunflowers, aka Tithonia rotundifolia are butterfly magnets. I started seeds for this flower and many of its siblings in the greenhouse in March. They are already blooming and it is exciting to see the colors.
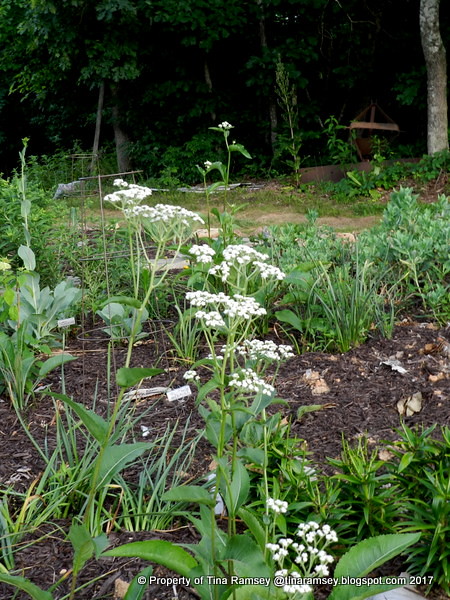 I believe this beautiful plant to be Euphorbia corollata. I purchased a start from a Tennessee native plant nursery several years ago. I then moved that plant out here to the farm and it put it in my Prairie Garden. It has really taken off and is quite hardy. I have no problems dividing it and moving it around in the garden. I absolutely love it as it seems to bloom all season long and the foliage always looks good. I am surprised it is not grown more in perennial gardens.
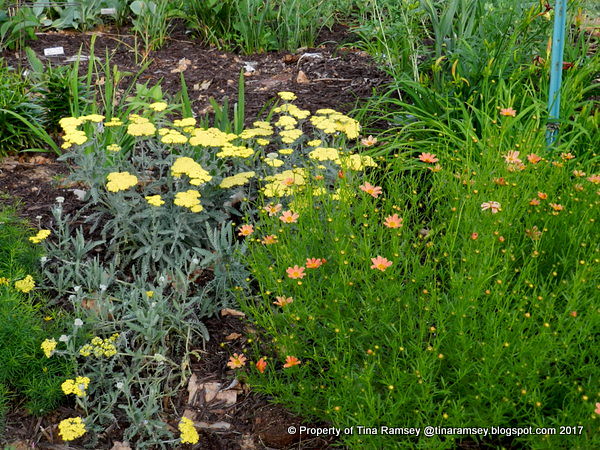
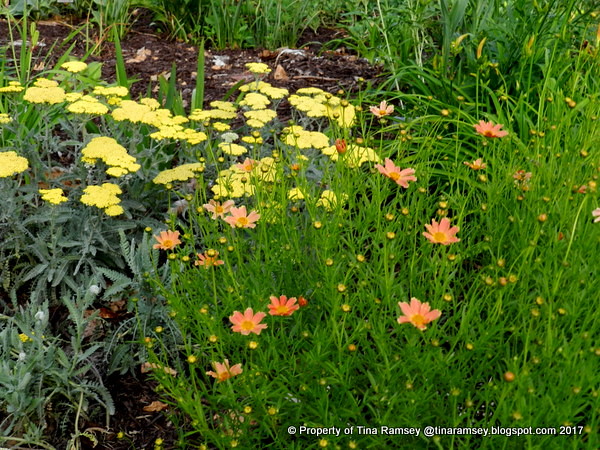 Coreopsis 'Sienna Sunset' and 'Moonbeam' yarrow make a perfect match not far from the Euphorbia corollata.
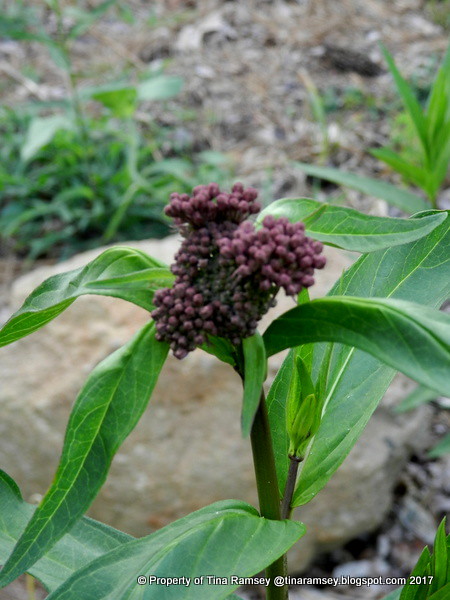 This is for sure Swamp Milkweed (Asclepias incarnata). I purchased a couple of flats of both swamp milkweed and whorled milkweed last summer from Monarch Watch. It took a really long time to plant all of the plants (I think it was 100 of each) but plant them I did! All of the swamp milkweed went into cultivated gardens because I read where it does not compete well with weeds. The whorled milkweed was spread about the property in both cultivated gardens and Wildflower Hill.
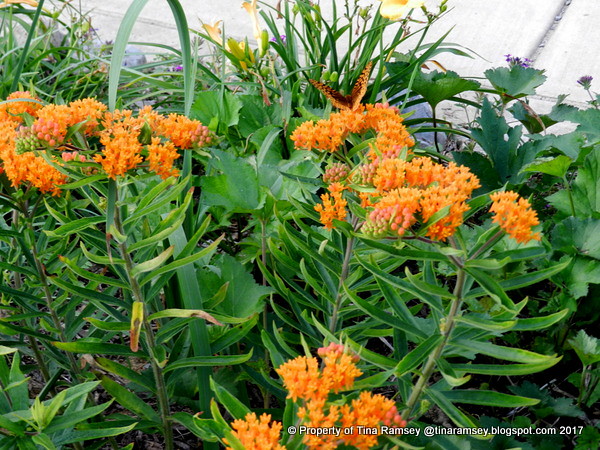 Above is butterflyweed but it was planted by me. I purchased a few pots at a nursery two years ago and stuck the plants in a butterfly garden right next to my front sidewalk. My goodness these few plants see SO much activity that I have to stop and watch the action daily. Eastern Tiger swallowtails, Gray hairstreaks, Zebra swallowtails, Great Spangled Frittilaries, Monarchs, bees, and many other pollinators love this grouping of butterflyweed. A tip for you if you garden for pollinators. Make 'islands' in your gardens for the pollinators. Don't just scatter one plant here and one plant there but group a couple of plants in a fairly close grouping then put another group of the same plant in another location. These islands ensure the most amount of pollinators can be accommodated at any given time in the garden.
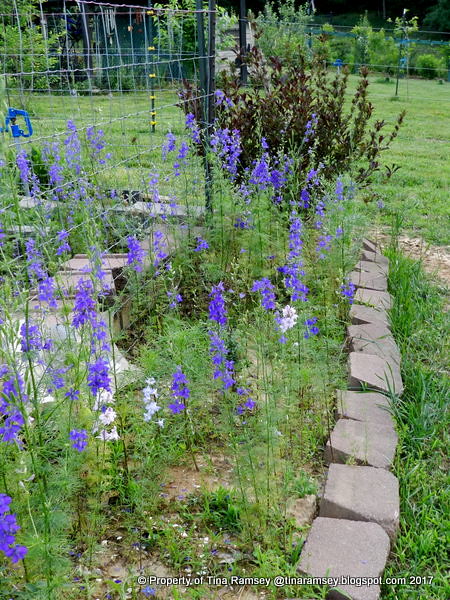 Larkspur self seeds itself yearly in this outer edge of the vegetable garden. Eastern Tiger swallowtails love these flowers. Once they fade away they will be replaced by self seeding zinnias for late summer butterflies.
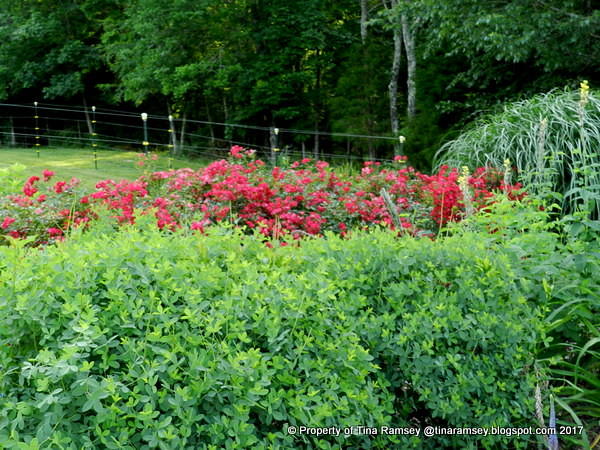 The red garden is looking decidedly red with Red Drift roses taking center stage. Baptisia is in the foreground and it has already gone by but still looks good.
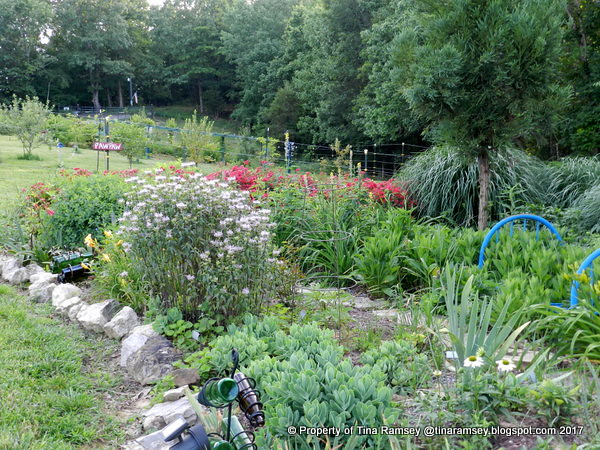 A longer shot with native bee balm (Monarda fistula) blooming. It planted itself in this location and since SO many butterflies and bees and even moths partake of its goodness I let it stay in this garden. Wildflower Hill is full of the native bee balm but this cultivated one blooms earlier than the wild grown ones.
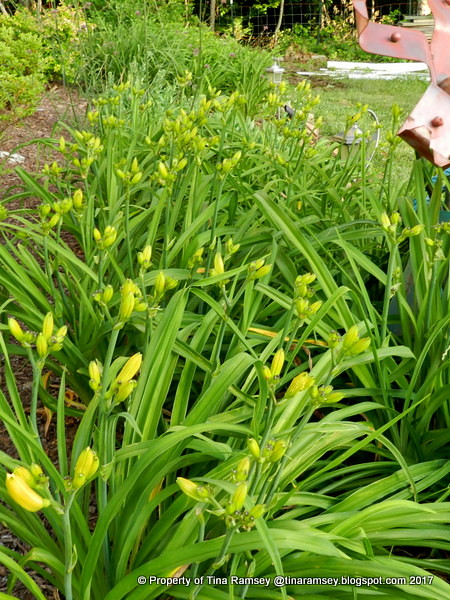
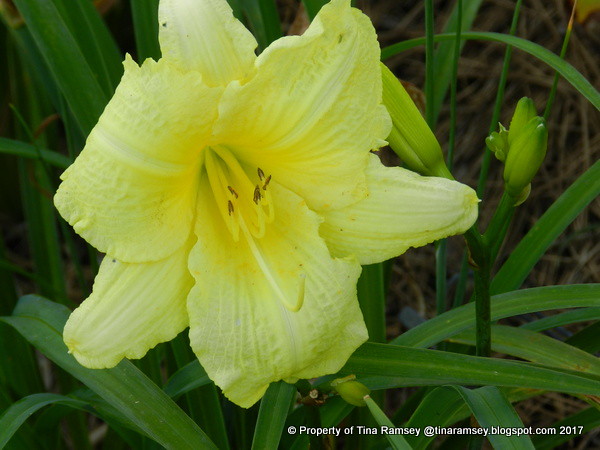
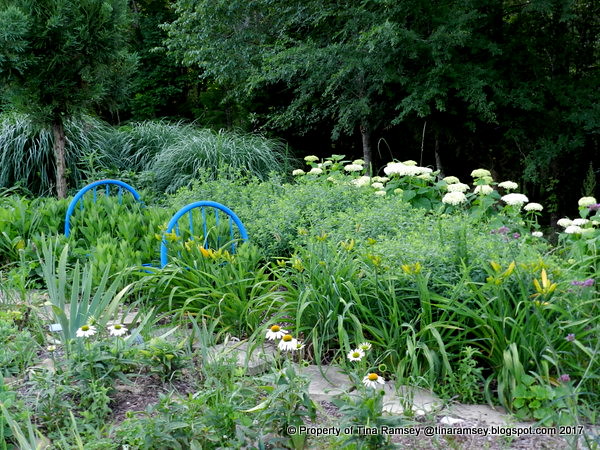 The daylilies can hardly contain their excitement. They are all LOADED with buds. Have you ever eaten a daylily bud? Yum! The fat ones are great fresh from the garden. Rudbeckia, Annabelle hydrangeas, miscanthus, and 'White Swan' coneflowers are also all visible here in the Red Garden.
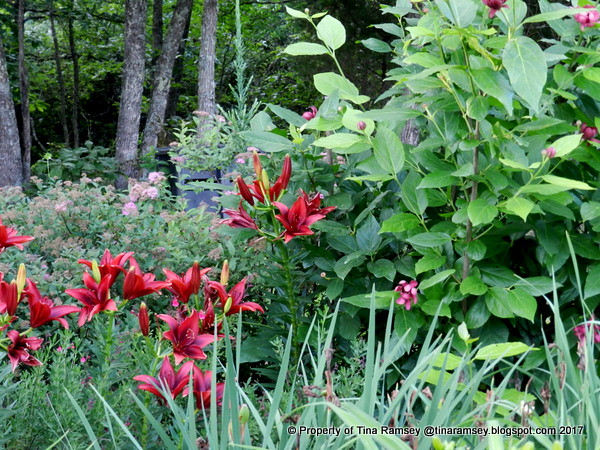 Lilies, spiraea and 'Aphrodite' sweetshrub in the Red Garden. Butterflies are all over this garden!
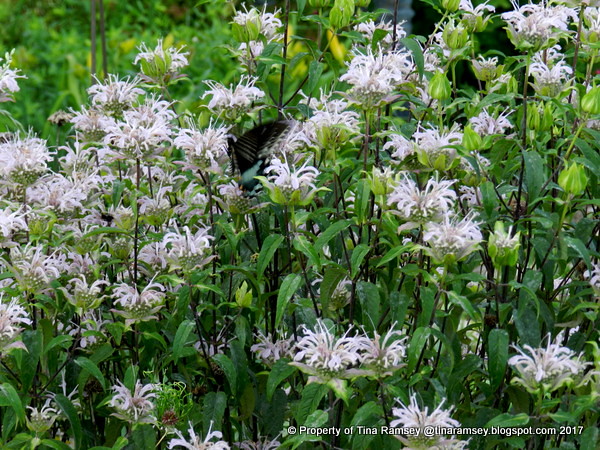 A close up of the native bee balm with a nectaring butterfly.
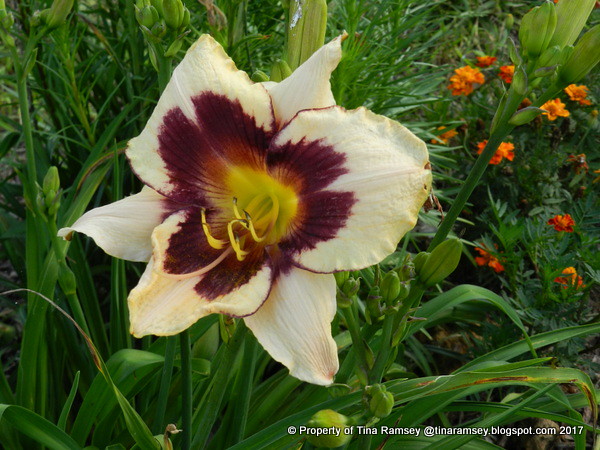 A few daylilies with marigolds. Butterflies do like both of these plants.
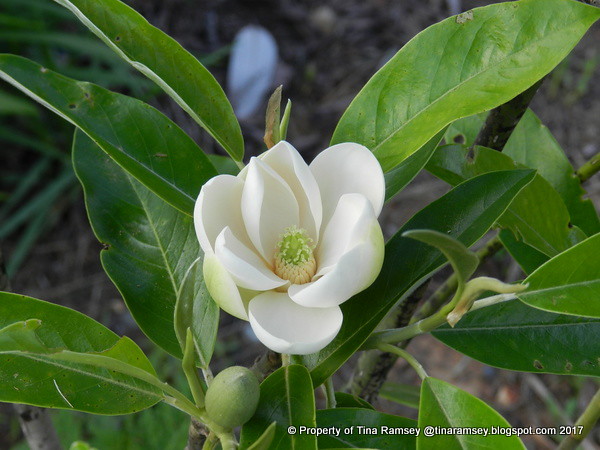 Sweetbay magnolia is located in the Butterfly Garden and while it is not visited as much for its nectar as it is for being a host plant, it is amazing in the garden and the blooms smell great!
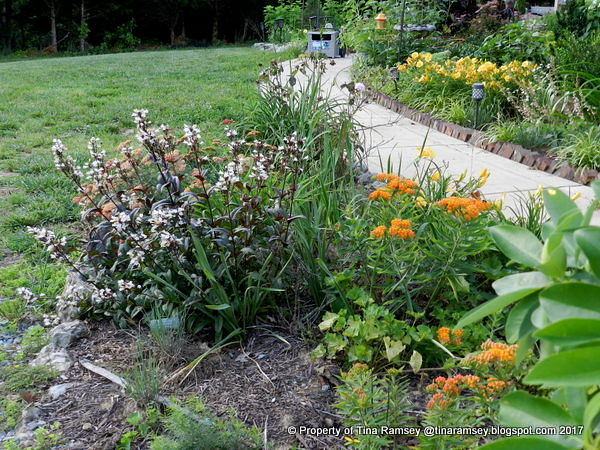 One last look at the Butterfly Garden. I've heard many say butteflies are not in abundance but I find that is not true here in northern Middle Tennessee. I do live in a rural area and have planted lots of plants specifically for the butterflies so that surely brings them in. It's funny, not all plants are attractive to butterflies and other pollinators like honeybees. I now have six honeybee hives and have harvested nearly 60 pounds of honey from my bees. I note what plants they visit and adore. My philosophy for gardening for the pollinators is to provide a smorgasbord of yummy plants they may like. Diversity is the key and also creating those pollinator islands for all of the good insects and birds you may find....
in the garden....
Ticks and chiggers need not apply!
Words and Photos Property of In the Garden Blog Team, In the Garden


