Showing posts with label Orchard. Show all posts

Friday, June 24, 2016

A Walk Around Tiger Way Gardens Part II


DSCN5396
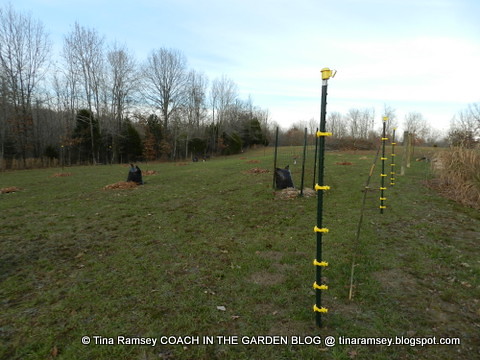
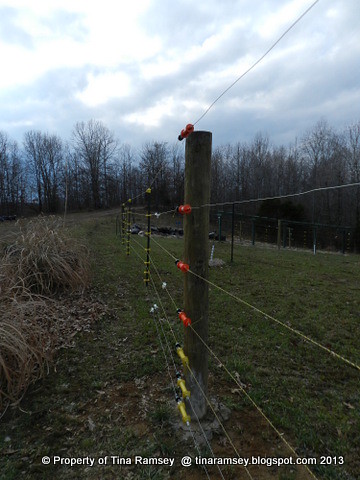
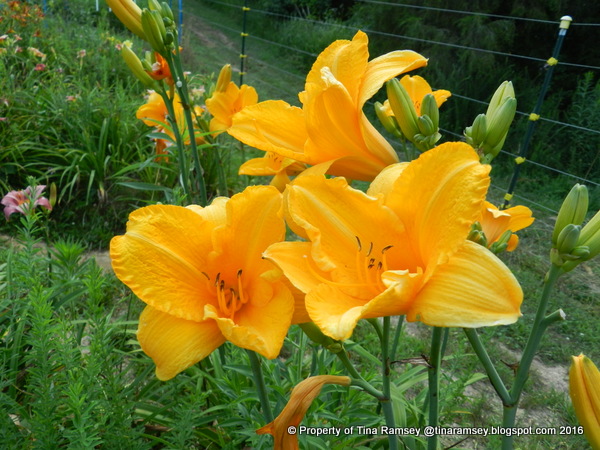
Continuing on with our walk around part of Tiger Way Gardens we find ourselves in the orchard. Here is where most of the daylilies, the fruit trees, hydrangeas, small fruit, and the chickens are in relative safety from marauding wildlife because they are behind a seven strand electrical fence (noted in the background behind these daylilies). I don't always need to turn on the electric fence for it to be a good deterrent but Mr. Fix-it and I recently found some peaches that had been devoured. That caused me to turn on the electric fence and guess what? It worked!
DSCN5387
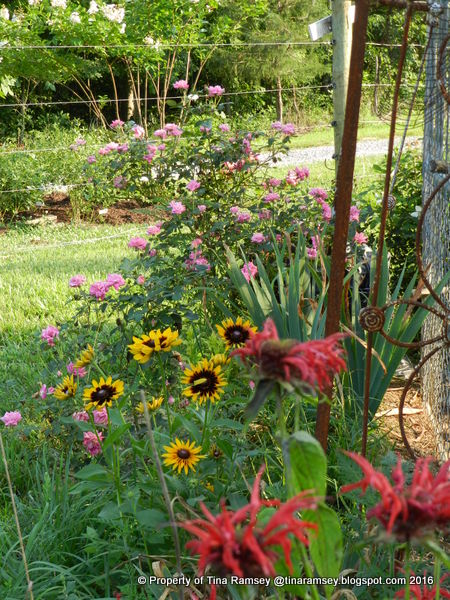
Outside of the chicken coop we find some bee balm, Gloriosa daisies and pink knockout roses. There are also a bunch of lilies and other plantings here. I am trying very hard to at least mask the smell from the girls (and the Boss) and if I can't do that then making the area pretty is a consoling fact.
DSCN5389
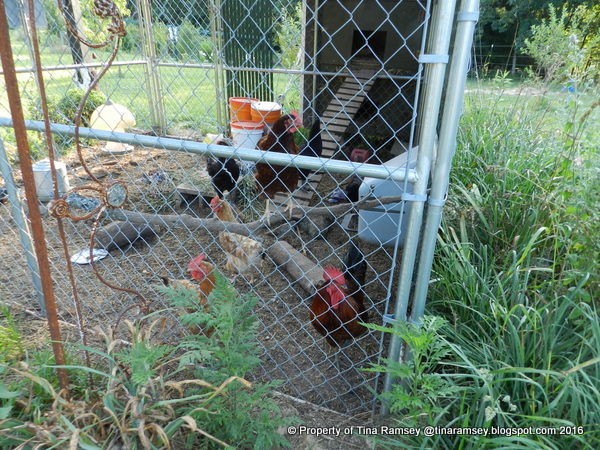
The chickens! We now have six hens and one rooster. Two of hens are golden comets, one is the original Rhode Island Red, the rooster (named The Boss) is a Rhode Island Red, and just this February I purchased three baby Australorpe chicks. The new chicks are now full grown and are the black ones. I did a lot of research on chickens and think the Australorpes will be a good fit for us. I do really enjoy chickens but some days I don't get any eggs between the hens eating their own eggs and them just not laying regularly as they age. It is frustrating. Now that I have been successful with chicks I may add one or two yearly just to keep up the flock. We really love fresh eggs in the Ramsey household!
DSCN5391
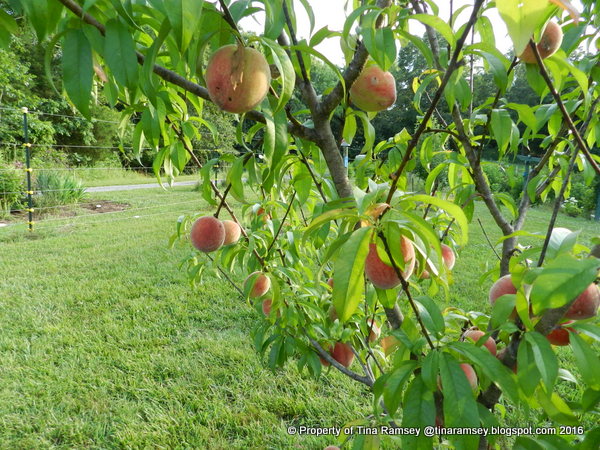
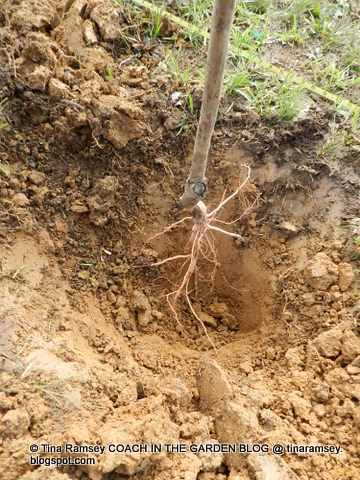
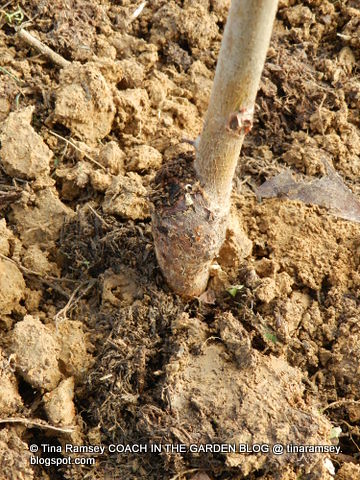
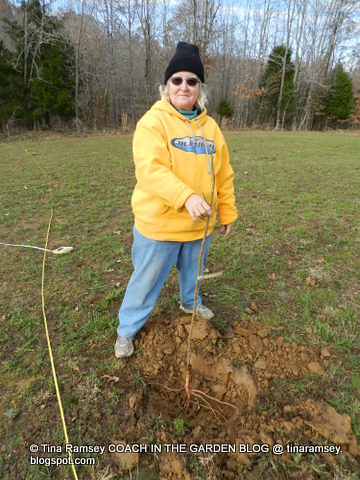
The orchard was planted three years ago come November. I remember it well because it was very cold. I believe this peach tree to be the Early White variety. I can't believe it produced so many peaches after less than three years. We have one other peach tree with peaches too. It's cultivar is Intrepid. We have also harvested some tart cherries and plums from the fruit tree part of the orchard. Right now we are currently picking blueberries and raspberries. The blackberries will be coming on soon.
DSCN5394
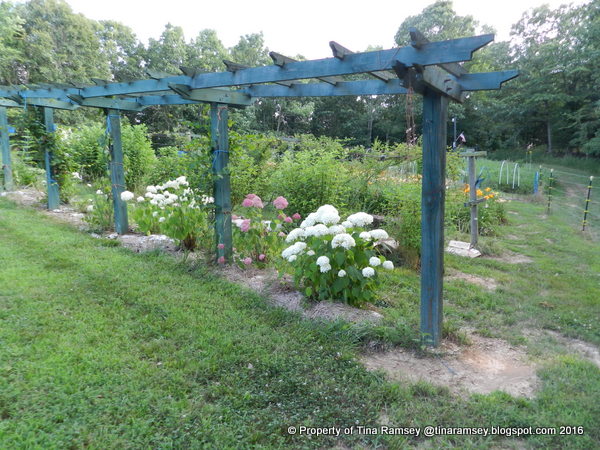
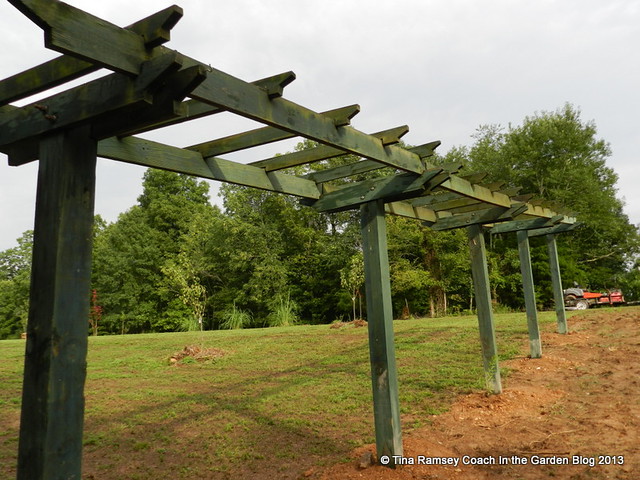
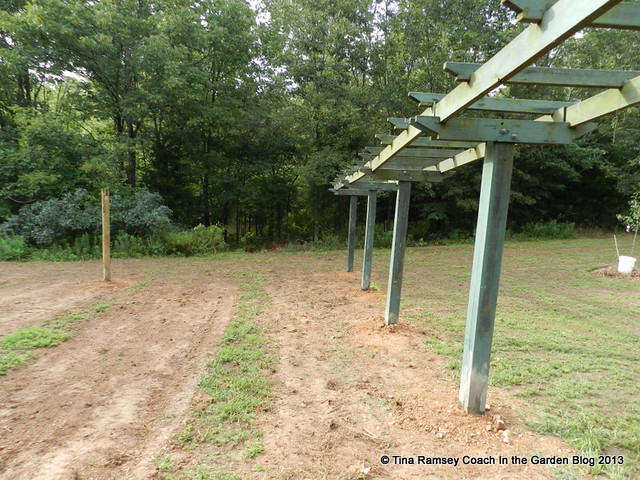
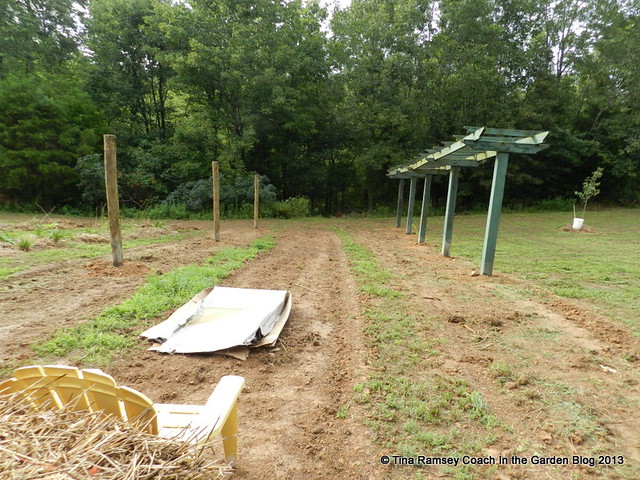
The grape arbor with its hedge of 'Annabelle' hydrangeas and one lone surviving 'Bella Anna' is looking good. Growing up the arbor we have a 'Concord' grapevine, two muscadine grapevines, and one hardy kiwi vine. All of the grapevines are loaded with grapes. We are pretty excited about them. The hardy kiwi is not yet bearing.
DSCN5395
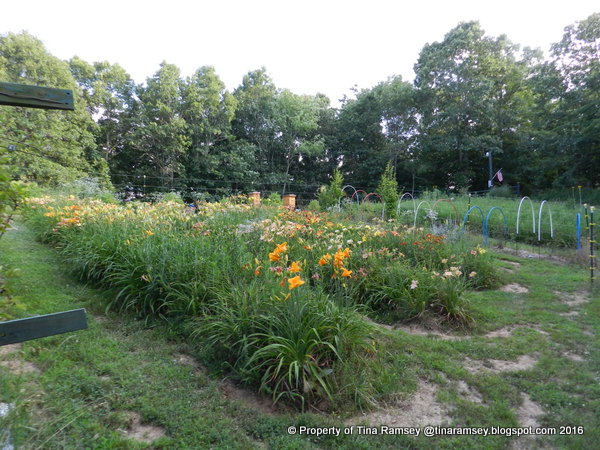
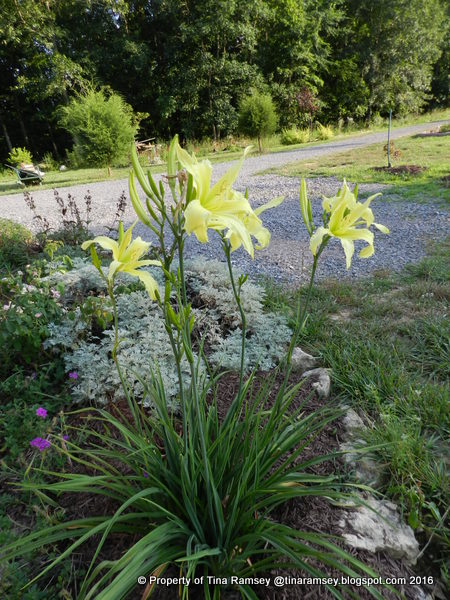
The three daylily beds are in full bloom. This picture really does not do them justice as the flowers and total effect is stunning. I have not weeded these beds at all this year and they really need some attention although the weeds are not too awfully visible in this picture. Thank goodness!
DSCN5416
This butterfly garden started life as an 'Orange Garden'. I am transitioning it a bit still focusing it on butterflies. The straight leafed plant on the left is Chinese blackberry and it is about to bloom. The frilly flowered shrub is Abelia 'Raspberry Profusion'. The swallowtails love abelias! This is a popular area this time of the year. Behind the abelias are two 'White Diamond' hydrangeas with a new addition from Proven Winners of 'Blue Diddley' Chaste tree. I am very excited to see how this shrub does because chaste trees have a beautiful blue flower that blooms in the summer and the blooms are beloved by butterflies. This particular cultivar is supposed to stay relatively small so that it can fit into garden easily. This fall I will probably add some sedum and coneflowers or rudebeckia to the front of the garden for some perennial interest.
DSCN5418
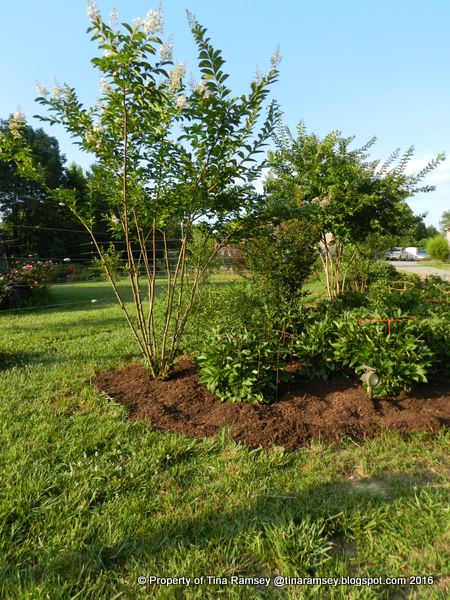
Right next to the Orange Garden is the Peony Garden. The peonies were spectacular in May but they have all gone by now. The five crepe myrtles I dug up from my old garden are now beginning their bloom period and look great. I find that bees really like crepe myrtle blooms and for me that is an added benefit to the crepes since I try to garden for pollinators.
DSCN5430
These lime green daylilies were a gift from my friend Angie of Angie's Gardens.  They look lovely in an island garden right next to our driveway near the house.
DSCN5441
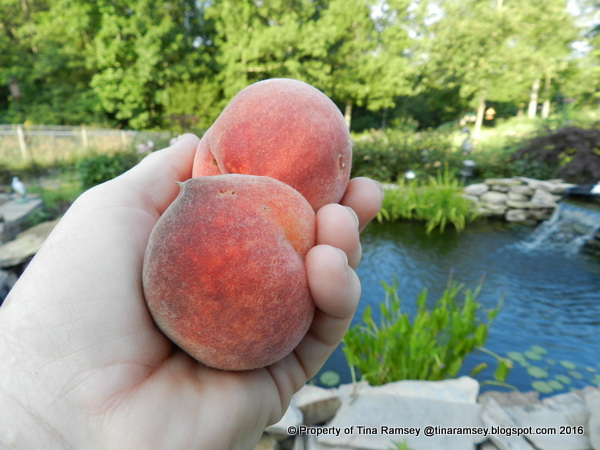
Here are a few of the peaches we have been picking. For Mr. Fix-it and I we find the ability to walk outside our door and pick our food to eat right then and there a most amazing thing. I will try to get a vegetable garden post up this month. We've harvested a bunch of potatoes and onions and even one tomato so far and some heads of cabbage. Yum!
DSCN5442
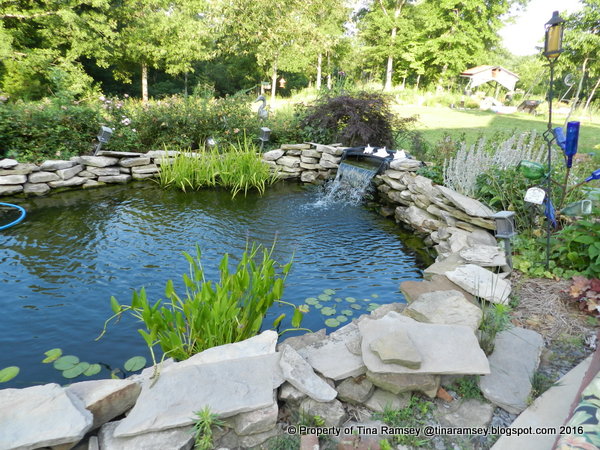
One last picture of my koi pond. I simply love this spot on a hot day. The sound of running water helps to cool things down here in Tennessee. Speaking of which, I will be giving a presentation to the Perennial Plant Society of Middle Tennessee at Cheekwood Botanical Gardens on July 19th at 7:00 PM. Be sure to come on out and show me some support! I'll be talking about how to keep cool....
in the summer garden.....
Words and Photos Property of In the Garden Blog Team, In the Garden

Friday, January 3, 2014

Planting and Protecting the Orchard in Tiger Way Gardens


DSCN9692
My posts are a little out of order as to how they have come about with my hands on gardening, but that is fine. It all works out in the end. I thought I'd share a new arena in my gardening with you all today. I have never seriously considered growing fruit for eating except for small fruits like blueberries, blackberries, raspberries, and strawberries. Well, with the addition of our land, now our little farm, Mr. Fix-it and I are very serious about growing our own food. And, by judging by the number of trees we planted we may be growing enough food for all of our families and then some. That is a great thing because orchards are not an easy thing to manage and be successful at. If I can successfully grow enough food for all of my family then that is all the better because I am in a good position to provide both labor and knowledge about growing fruit that the rest of my family might not have the time to work on. Mr. Fix-it and I are really good partners in our life. But when it comes to plants I supply the know how (after reading multiple books and learning hands on) and I also supply the labor in our team of two! Occasionally he helps out but with growing things that is pretty much my purview.

The picture above shows our newly planted orchard. I used the modified diamond planting method. Which is basically my trees planted in rows with adjacent rows offset half the distance. Even with 60 acres we don't have a lot of room to plant so I had to be frugal with my space. Our fenced orchard area is about 200'x80'. That is the entire fenced area which includes three beds of daylillies, one bed of blueberries, one bed of quince, a bed of raspberries and blackberries, and the grape arbor. When I take out all of that the orchard area we have allotted for the fruit trees actually is about 120'x80'. This is nearly all of the area pictured in the above photograph. Before we got to the point of planting the orchard we had already had a soil test, seeded 100 pounds of fescue, and limed the entire area with about 400 pounds of  pelletized lime. This was vital to us because most fruit trees need a pH of about 6-7 and our pH was rather low. Additionally, I plan to mow the orchard floor and fescue works best for me. The area is now nice and green and all is doing well.
DSCN9594
Our trees arrived about the third week of November. They were scheduled to arrive earlier but because I was out of town I asked Stark Bros. to please delay the shipment by one week. It wound up they were also delayed another week by other factors. That actually really worked out quite well for us-other than planting in the cold and the snow.

I ordered almost all of the trees, which are actually grafted whips (basically a twig that has been grafted on rootstock and pruned to a single leader about 5/8" of an inch diameter and about three feet tall) from Stark Bros. I really liked Stark Bros because the trees were all healthy, well marked and packaged, and arrived in good condition. Although I have not ordered a lot of fruit trees from other companies I can say I had a great experience with Stark Bros and have already ordered from them again.

I spent countless hours researching varieties that would work well for my growing conditions and area. Countless hours totaling over 40 but probably more like 100 hours. These hours involved some practical experience I had with a client who has an established orchard, as well as researching disease resistance of the various cultivars. Disease and pest resistance are top priorities for me in my garden. Common diseases of fruit trees we see in Tennessee include: fire blight, apple scab, cedar apple rust, powdery mildew, all sorts of rots, rusts, and various other diseases. My goal was to select trees that are noted to show the most resistance to the most amount of these diseases and fungi. Other people might reasonably choose fruit trees based on taste alone. While taste is always important my reasoning is that you can't have great taste if you can't reasonably grow the fruit, hence my focus on good disease and other problem resistance. I have found that the trees offered in nurseries locally are not always the most resistant trees to these problems. Once I found the correct trees I had to also choose their pollinators. Geez, the job was never ending. Despite all of this research I have since learned even more things about fruit trees via a few books specifically on growing fruit trees that I did not know. For instance, did you know sweet cherry trees grow twice as big as tart cherries? I just recently found that out. I am lucky that my spacing for the cherry trees should accommodate the two types easily no matter what. I hope!! Are you dying to hear the cultivars? Okay, here they are:

Pears
Bartlett (Traditional pear)
Kieffer (Oriental pear)
Moonglow (Traditional pear and pollinator)

Note: All pears were purchased locally and planted from plant pots. These pear trees were well rooted and established in the orchard back in August. I have spent time pruning them only.

Plums
Earliblue-Prune
Gold  (Impulse purchase locally purchased and planted from a pot-not bareroot)
Methley
Starking Delicious Plum

Apples
Crimson Crisp
Enterprise
Golden Delicious (Good pollinator)
Gold Rush

Peaches
Early White
Intrepid
Redhaven

Cherries
Balaton (Tart)
Emperor (Sweet)
Montmorency (Tart)
Starkrimson (Sweet)

Pawpaws
KSU
Overleese
Sunflower

Note: All pawpaw varieties were purchased from Hidden Springs Nursery located in Tennessee. I had seen a segment on Volunteer Gardener about this nursery and thought I'd give it a try since it was local. Another plug for Hidden Springs Nursery is the fact that Kentucky State University (the authority on pawpaws) recommends sources for purchasing pawpaws and Hidden Springs was one of many nurseries. I was quite happy with my pawpaw whips. The graft points were all good and the whips were and still are, green!! The directions that came with the pawpaws were clear and simple to understand too. They included information you had to protect these whips from sun for the first few years or so. I'll show you my answer to this problem since the pawpaws are planted in full sun in the orchard.

DSCN9593
Planting the whips was more entailed than I had expected. I knew that the spacing of the trees had to be about 20-25' because all of my trees are semi-dwarf and are expected to remain about 10-20' tall and wide. Setting up the rows keeping everything straight meant getting out the compass to make sure the trees were on the same heading (240 degrees for the rows and 330 degrees for the columns) and that the spacing was all adequate. You would think bare root whips would be easy to plant but I think they took more time than planting potted trees! I had to dig BIG holes. The holes all wound up being about two feet deep and two feet wide. I amended the soil with a bit of lime, rabbit droppings, greensand, and compost. I set the whips in there, spread out the roots and backfilled taking care to make sure there were no air pockets. I then watered the whips. A lot of this work was mostly done in a sleet and snow storm. I'll never forget it. Fortunately, on this day during the snow and sleet it was not as cold as it could be because there was no wind blowing. Additionally, hubby and I were dressed quite warmly in layers. He was busy working on part II of this post-protecting the orchard while I planted the whips.
DSCN9694
I have never been a fan of painting tree trunks but when I read that rabbits like to gnaw on fruit tree bark I thought these flexible white PVC wraps would be a good idea. I really like them too. They will not protect the whips from voles but so far we are doing good in the pest area-rabbits, voles, and deer have not been a major problem. Thank goodness because there are tons of deer on our land and they love the newly planted plants-including fruit trees in the summer (they ate all of the leaves from the 'Gold' plum but not from the pears), and they also ate the daylilies. Once I noticed the daylilies were being nibbled I though we might as well fence off that part of the field as well as the fruit trees because it is all in one area in the field. The only area we did not fence off was the wildflower field. A post on that will be coming soon. I do not think gardening should be stressful if we can help it. Dealing with deer can be stressful so I prefer to take passive measures to deal with the stress and problem of deer. To protect the orchard area we knew we would have to go with an electric fence and we are quite happy with the results.

DSCN9600
This is one of the three pawpaw shelters to shade the whips from the sun for the next few years. I had originally planted these whips 11' on center but found another source that said they needed to be planted 15' on center. I dug up the whips and replanted them. I hate admitting that because I said I would move or plant things only once but I have already had to dig up quite a few things and plant elsewhere. Sigh. I do also have two pawpaw trees that are pot grown. They are the species type and not grafted. They are about seven feet tall and will make beautiful shade trees at some point. I wish I had a picture of a mature pawpaw grown in sun but you can Google it if you'd like to see what they look like. The leaves of pawpaws are rather large and shaped like hickory leaves. The shape of the tree is pyramidial and the trees are quite dense. I am very excited about my two new pawpaws I purchased from a local nursery (Bates) at their 50% off end of season sale! I plan on placing my additional two pawpaws in front of the house once the house is done. Right next to the pawpaws (in the orchard) we will be planting fig trees. Right now we have five fig trees of different cultivars. They are all either in the garage, the greenhouse, or under the house for the winter. Fig trees are not reliably cold hardy in my area. I decided to wait until the spring to plant them in the orchard. This way the figs will have all summer to develop and establish good roots to hopefully be prepared for the winter next year.
DSCN9591
Okay, so here I am with one of the whips. Can you see the roots? They spread pretty far and I had to be careful of them. The grafted point was very visible and instructions that came with the whips said to be sure to not cover the graft union. I tried to face all graft unions to the north for uniformity and made sure they were not buried.
DSCN9592
While I was working on planting the whips Mr. Fix-it's job was to install the electric fencing. Right next to Mr. Fix-it you might note the wooden post. This is the end of the orchard proper but because we decided to extend the electric fence all the way down the field to protect the small fruits, he had to do a lot of extra work by adding more poles. The sweet little dog next to Mr. Fix-it is our little Buttercup. She belongs to a neighbor but just loves us and spends all of her time with us when we are on the farm. She does have a good home but just likes the attention she gets from us. We are good with that because she is a doll and very good with both people and other dogs. She does like to chase deer tho. We don't appreciate that. She does not chase them long--just long enough to let them know she is boss so they had better move. We worry she may get shot one day but our land is posted so perhaps that won't happen if people are respectful and smart. So far she is a savvy dog who survives lots of diverse conditions--including running through glass and trash in the woods and chasing cars. This is not what our dogs will be allowed to do when we move out there just for the record.
DSCN9595
Our electric fence is six feet tall. That meant the pickets (T-bars) had to be eight footers. Driving them into the ground took a lot of work on Mr. Fix-it's part. For some reason he was quite optimistic that he could install the fence in one day. Haha, it took several days to finally complete it. Once it was completed he tested it with the solar charger we purchased. The solar charger said it was good for several miles and since the total amount of electric fence (all seven rows from just above the ground to the top of the pole) all the way around orchard was just under one mile we figured the charger would work. Not! The charger was so weak we could stand there with our hand on the fence. Don't make the same mistake we did with electric fence chargers. Just because they say they will do several miles you also have to look at the type of varmints you wish to keep out. We want to deter: deer, raccoons, skunks, possums, foxes, dogs, and perhaps people. That meant we needed a strong charger. The solar one only put out 2000 volts. None of the available chargers they had at the local farm stores would work. We had to turn to the Internet for a stronger charger. We mostly used Zareba fence products and turned to their website for a great deal of good information and Zareba is also who we purchased our more powerful charger from-at a lower price than the less powerful one. They actually spell it out on how to install a fence that will do the job no matter what you wish to keep in or out.
DSCN9693

Zareba recommends seven lines of charged fencing up to six feet tall to keep out deer. There is actually specific spacing for each line as well. The website will help you to plan all the materials you need in a fairly easy manner if you happen to be a novice at electric fence installations. Fortunately for the most part we got it right other than the charger. We wound up buying a 25 mile battery operated charger for our fence. It puts out 7000 volts and no, you do not want to touch it! The above picture shows our drive through gate into the orchard. This side worked well with spacing but the other side was too close to the beds. I could not get a mower around the beds to mow the rows so Mr. Fix-it is in the process of moving the T-bars our about five feet so I can access the paths between the beds. Poor planning on my part as neither he nor I thought about mowing when he put in the fence. You live and learn I guess. We definitely learned. 

Right now there is no charger hooked up to the fence and it seems to be doing well keeping the deer out. I have not noted any damage to the trees or plants inside of the fence. We need to build a storage a cabinet for our charger and its accompanying battery. That is my next project. Once that cabinet is built and we are able to secure it with a padlock and are out at the land more often, we'll then put the charger in place. The area is not secure and although we don't anticipate problems one can never be too sure that things might not grow legs and walk away. Additionally, the trees are all dormant so I really don't think they are that attractive to deer right now. There is no fruit or greenery that may attract smaller varmints either so we feel good about not charging the fence as of yet. 

One good idea I had about the orchard is to put the chickens and bees in the orchard. I reason that the same electric fence that will protect the fruit will also protect the chickens, bees, and honey from all sorts of creatures who may wish to eat them. Solving two problems with one fence was a bonus! There is plenty of room in the orchard for the chicken coop and bee hives once I take the plunge. The chickens are a must once we get the chance to move the coop and kennel out there. I also think they'll do a good job keeping pests like ticks and chiggers in the orchard down--as long as I can keep them safe from hawks. I'll work on that later. 

Wow, this is a long post, as always. I'm not sure how they get this way but most of my posts are informational. It is where my passions lie--with learning. I learn from words so think that perhaps others might learn from words as well. A lot of the sites I research don't use a lot of words--unless they are pdf file sites from educational institutes--and I am left coming away with more questions then before I started the research. I like to put a lot of info into my posts because in a few months I promise you I will have probably forgotten what I did so the words are actually all for me....

in the garden....

Words and Photos Property of In the Garden Blog Team, In the Garden

Friday, August 9, 2013

Moving the Wisteria Arbor: Now Renamed the Grape Arbor and a New Grandbaby


DSCN8178
The farm is coming along mighty nicely! It helps me so much that Mr. Fix-it is on furlough and has been able to do some real work on the farm; specifically in the orchard area. Due to the shortfalls in the government budget Mr. Fix-it's job has not been funded so he has been home all the time and it is a joy! Our most recent project was taking down the wisteria arbor and moving it to the orchard area to now become a grape arbor. The results of several days work (in the rain I might add) are pictured above. I think it was worth it what do you think?
DSCN8176
This picture and the one above are looking south. Our huge field is oriented basically west to east with a slight slope to the north. In order to maximize sun and air flow I oriented the orchard on a north/south axis. The hill you see slopes slightly to the north which is toward me (the picture taker) and our pond. We are looking south in the picture. Orientation of fruit and vegetable producing gardens is a very important thing so that is why I am trying to explain my reasoning for how I oriented my area. I really did not want rows downhill toward the pond due to erosion but this orientation simply made the best sense to me. I have seeded the hillside and will establish the beds with mulch very soon so erosion is not really a big problem. I do have to be careful about any chemicals I put on this field though since all runoff does go directly into our pond. Rows on a east/west axis would have helped to slow down water run off a bit but then again the lower plants would be very sun challenged. I simply liked the orientation this way.

The disturbed soil is where Mr. Fix-it box bladed the turf so that I can easily turn over the beds with my shovel. Once all of the soil is turned over and amended (organic material such as cottonseed meal and greensand) I will then begin planting and mulching and establishing the beds. The plants and fruits are all waiting at Tiger Gardens 1 and are really looking forward to being able to stretch out-as is the gardener!

You can clearly see three beds in this picture. The first bed is under the grape arbor. I will plant two muscadine type grapes on the second and fourth poles with the plants planted on the south side of the 6"x 6"s. The cultivars are 'Cowart' and 'Dixie'. Both of these muscadine grapes are recommended for the south and I am hoping with my research that I will not have to spray these grapes in order for them to be productive. Both grape cultivars are self fertile but by planting two different varieties I increase the chances of good pollination of these grapes. Muscadine grapes need 20' of trellis per grape vine. The grape arbor is about 35'; which will mean each grape will have about 17.5' of trellis. It should be enough for them depending on my pruning techniques. Ideally each grape will cover the top of the trellis within a few years. I suspect that will happen quite rapidly and before I know it I will be posting a picture of the mature grapes! 

The next bed is a flex bed. I have not decided what I will plant in this bed. It will be flowers in the form of perennials or bulbs, or it will be a collection of hydrangeas. I just haven't decided yet but whatever I plant there will be fairly low growing (under 4-5') because I don't want the grape arbor or blackberry/raspberry trellis crowded. 

The third newly dug bed has four fence poles placed in it spaced 16' on center. This area will be the blackberry and raspberry patch. I have a ton of 'Canby' raspberries in my current garden as well as thornless blackberries that are dying to get out of their crowded accommodations into the new 48' long bed. I have not installed the trellis system yet but it will be made of cabling that will be threaded through the fence poles. The trellis will be permanent as are the fence poles since they are all concreted into place.

DSCN8180
Here is the view looking north. If you peer closely you will see the pond way down in the woods. It is the background between the cleared tree trunks. Mr. Fix-it and I are working so hard on doing so much that we find we only get a little bit done at a time. The pond has not been a big priority but we are slowly cutting a path down to it and clearing the undergrowth away from the water so we can see the pond and have some room to enjoy it. The grape arbor points to the path entryway down to the pond. This is where Mr. Fix-it likes to spend his time when he cannot help me. On this day Mr. Fix-it caught seven little fish (bluegill--thanks Skeeter!). Our pond has been fished out it seems, but we hope to restock it this fall and next spring.
DSCN8181
A longer shot looking down the rows. The raspberry/blackberry patch is not done yet. I still need to turn the soil then install the trellis wire. More on it later. The grape arbor is complete but we have not planted the grapes yet. We do have both plants and will soon plant them out. The little tree to the right of the grape arbor is one of our three pears. We planted a 'Moonglow', 'Bartlett', and 'Kieffer' pear tree about a month ago. We purchased them at Rural King when they had their big sale and got a pretty good deal on them ($10 per tree). These cultivars will work with pollinating each other and in a few years we hope to get some pears from the trees. More on the fruit trees later. So far since the house is not built we really can only play on the land where construction is not anticipated to be. The orchard is a big part of it so we are really focusing on it.
DSCN8051
To get to this point we had to spend a few days pulling down the wisteria arbor from Tiger Gardens I. The original arbor was designed primarily as a privacy screen from the adjacent property owners. As a bonus it supported two wisteria vines and a 'Dropmore' honeysuckle vine. The whole thing worked very well for many years. Once that neighbor moved I really did not need the privacy as much and I had already cut down the wisteria (two years ago but it is STILL coming back to this day) so it was time for the wisteria arbor to turn into a grape arbor. A ready made one for the new land! We used the tractor to pull the large 6" x 6"s (a tough job since they were concreted in) and took the rest of the arbor down using primarily a drill since it was mostly all screwed together. Big kudos go to Mr. Fix-it since he did most of the work because I was out of town this past weekend visiting my daughter and granddaughter in Louisville. 

This past Tuesday Mr. Fix-it and I were able to dig nine holes and install the five 6"x6"s as well as the four fence poles--all in one day! This was a big day as digging deep holes is hard work but we cheated. We purchased a power auger for our tractor and I can't tell you what a lifesaver this auger was for us. Here is Mr. Fix-it (official tractor man) getting ready to drill his first hole. The first hole went quite easily but on the second one we hit some rocks and had a tougher time. The rocks have the capability of causing a shearing of the shear pin on the auger. This happened two times and Mr. Fix-it actually had to leave the site for a few hours to go buy some more shear pins. Once he got the hang of it all though it was smoother sailing.
DSCN8057
After the holes are dug you must of course insert the poles, level, then pour in the concrete and water and tamp it all down. We always use fast setting concrete that we pour into our holes dry, then add the water and mix it all real well with a very heavy tamper. That is what Mr. Fix-it is doing on the raspberry/blackberry pole.
DSCN8048
Prior to beginning the job we laid everything out near its final location. The arbor was a very well built trellis and held up well on the move. Not only that but when we put it all together again it fit perfectly!
DSCN8054
Each of these crossbars and support poles are eight feet on center. There are two crossbars per support pole and each of them is notched to accept the overhead trellis. Once everything is in place it is all screwed together tightly.
DSCN8146
I did not take a picture of the wisteria arbor before we took it down but here is the after photograph. We had to level the ground below the arbor because there was a raised bed there. The dwarf nandinas were all dug up and are awaiting transfer to the new garden. The raised planters in the foreground contain about 40 cultivars of bearded irises. Those are slated to make the trip to the land soon too. 

It has been raining a lot here in my area of Tennessee. Not really a lot of rain but a lot of annoyance. Once the ground gets good and saturated on the land (it is not as of right now) we next plan to aerate our back 40 and seed with Kentucky 31 grass seed. There is an erosion problem on the big hill that needs to be fixed before winter and I think the grass seed will help. I may also plant some ditch lilies and Joe Pye weed back there too. We also need to finish clearing by the pond, dig and mulch the beds, move the plants, and establish the wildflower garden. All of this will need to be done by fall. Once the first freeze comes we will move to our driveway area. It is a mess and full of glass and rocks and all kinds of trash. It will take some time to clean it all up but we can't do it now since the poison ivy is so lush and happy and mixed with the trash. In other words it is always something.
DSCN8084

On the day we spent digging those nine holes and installing the poles we were gifted with a fourth grandchild. This one is Riley. The other three are: Joshua (6 years), Adella (20 months), Everleigh (4 months), and now Riley. Riley came into the world big and healthy and we are all excited and happy for good things in life like new grandbabies.....

in the garden....

Words and Photos Property of In the Garden Blog Team, In the Garden