Showing posts with label Driveway Garden. Show all posts

Monday, April 25, 2016

The Driveway Made In the Shade Gardens


DSCN5054
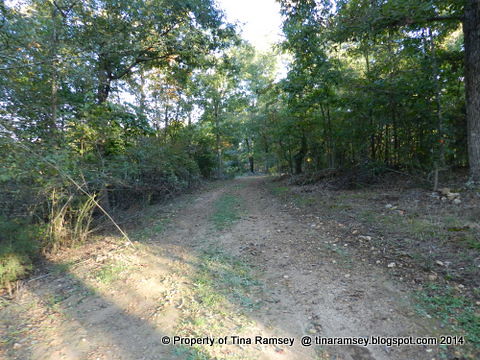
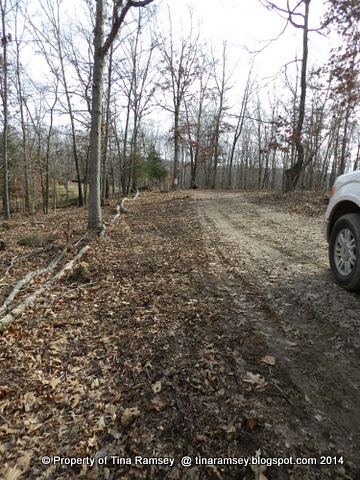
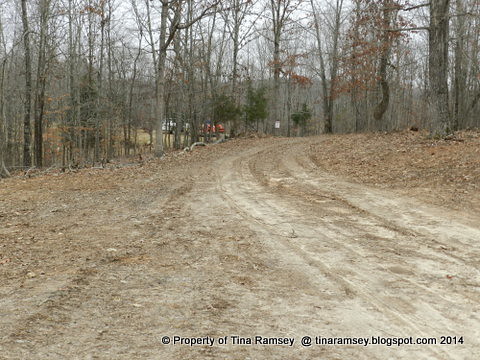
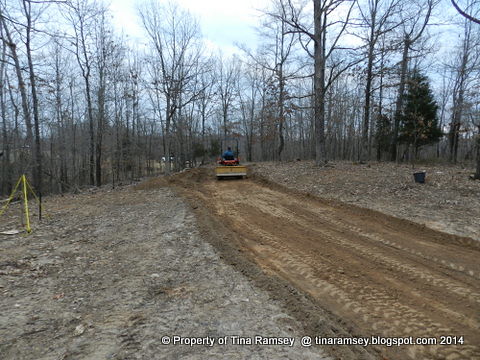
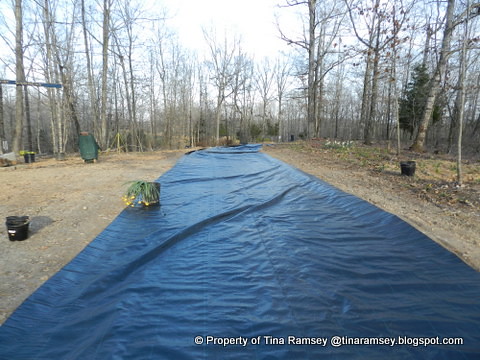
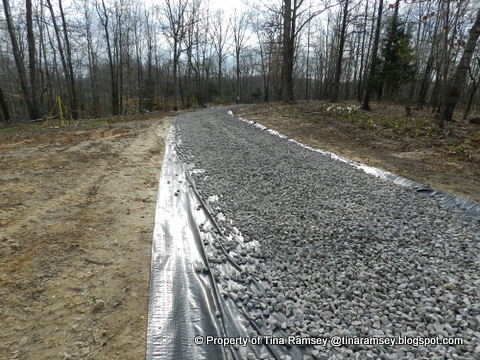
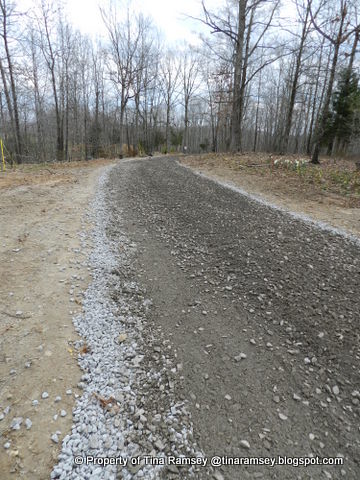
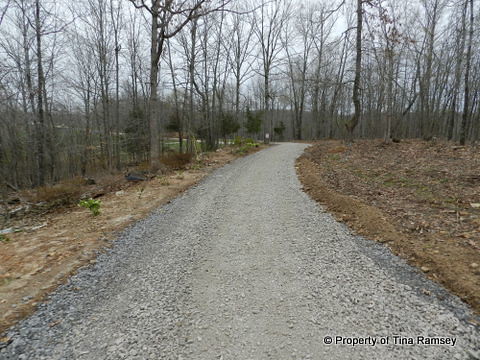
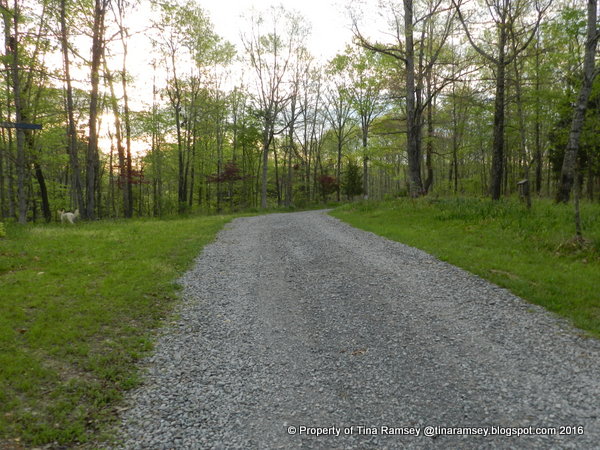
It's really hard to believe it has been a full two years since we made our driveway. Look back at this post to see the changes in just two years. Things are beginning to fill in and settle down after our messy house build in 2014. This is the driveway as you enter the gate. We put about 10 full trucks of gravel of varying sizes on the driveway. That was after we put down a geotextile fabric. I can say that fabric and the careful planning we did for the driveway has really paid off. There are maybe two tiny pot holes we have to work on and the rest is compact and flat and solid. I always get happy when driving on the driveway because I remember a mud road a few short years ago.

The red Japanese maples I transplanted here from Tiger Gardens are doing well. There are six and they are spaced 30 feet apart. They have finally settled in. This year we have noticed damage to the trees from the transplant shock from two years ago. Some of the branches and in one case part of the upper trunk have died. It's rather frustrating for me but to be expected when you dig up huge trees and move them to a new home.
DSCN5052
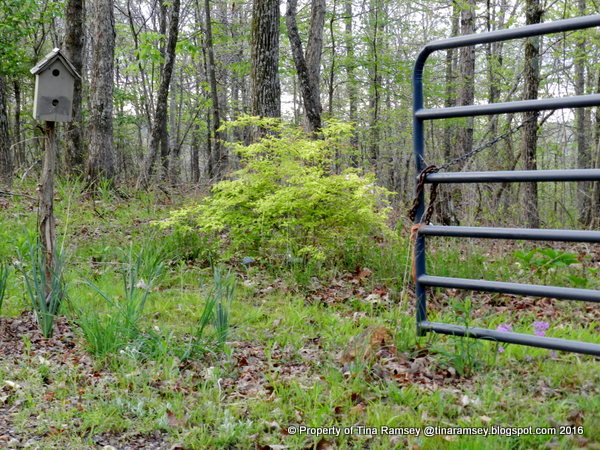
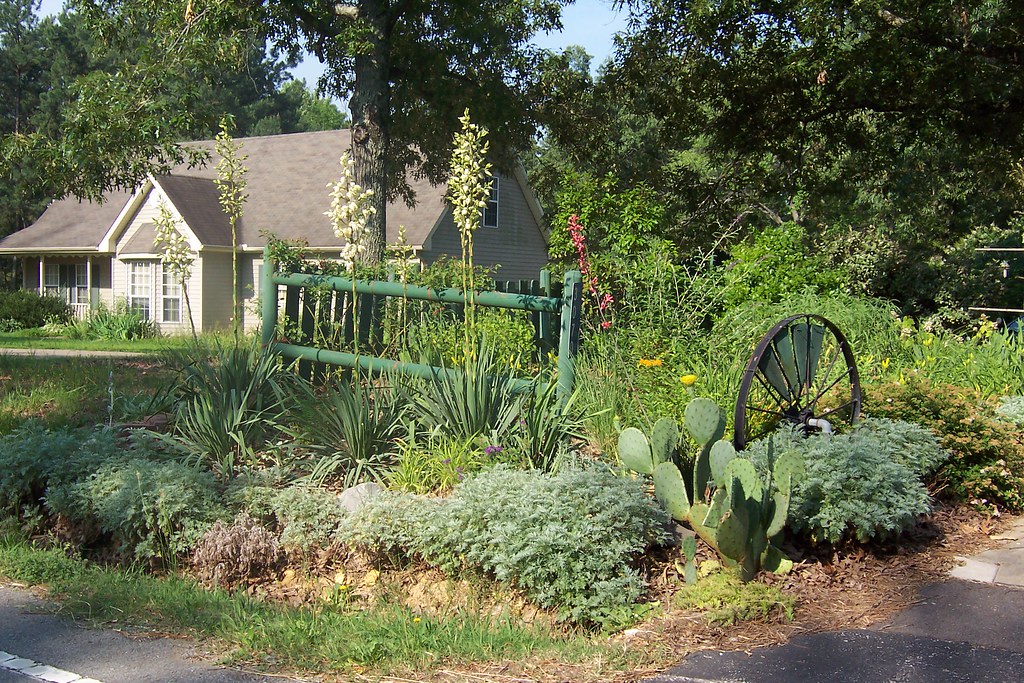
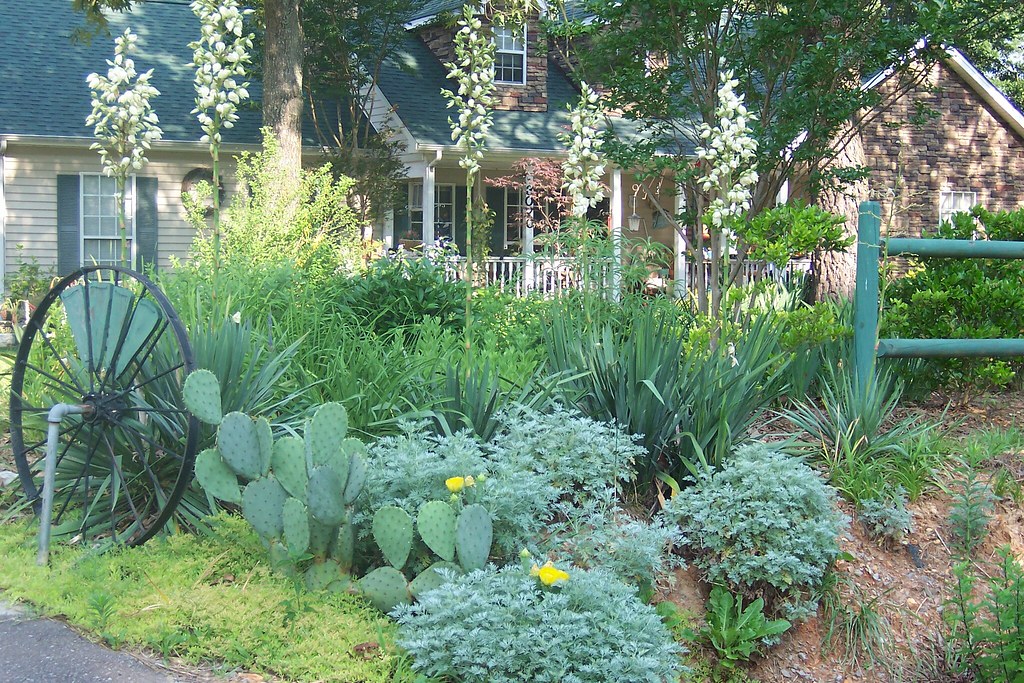
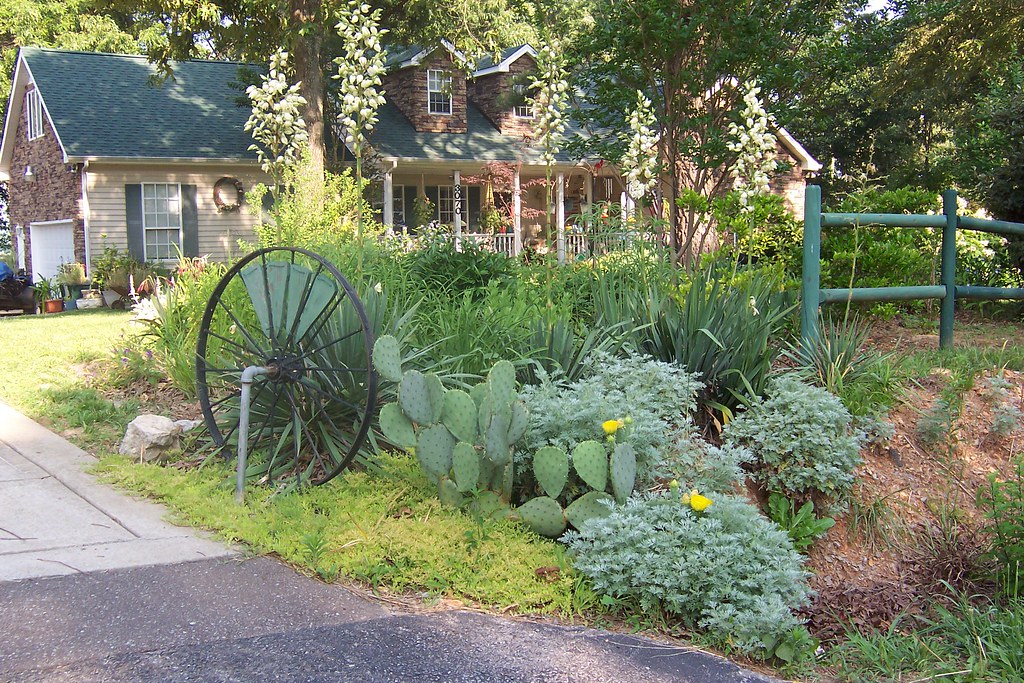
Coming into the gate this beautiful 'Dreamcatcher' Kolkwitzia amabilis by Proven Winners. It is a winner! It is beginning is lovely bloom and I think I may just have to showcase this shrub a bit more in depth because it is indeed a winner. 
DSCN5051
Fire pinks (Silene virginica) self seed themselves all over the place out here in the woods. I love the red. They also have a long bloom period.
DSCN5049
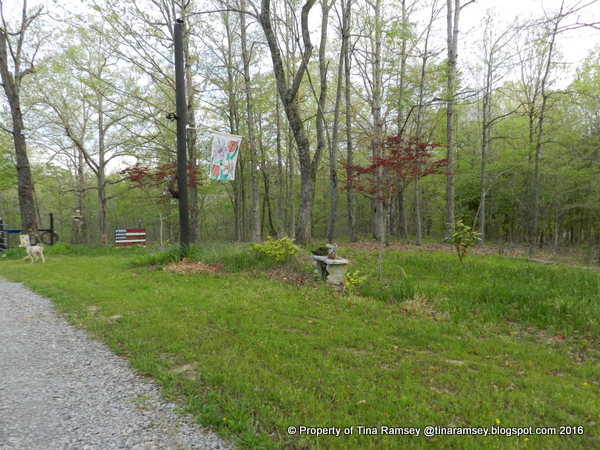
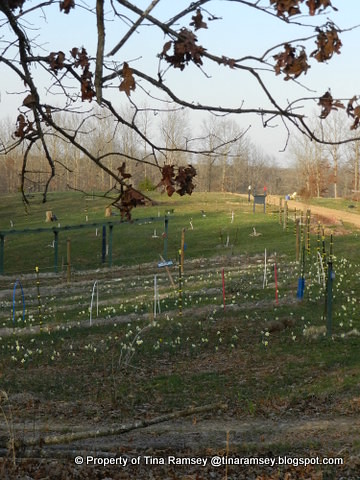
Looking out toward the little road I have a bench for seating and tons of daffodils and hellebores. It is mighty tricky gardening out here because the deer love all the 'food' I have planted for them. Hellebore leaves get eaten but not the flowers, daffodils are never eaten and so far the gold spirea and red Japanese maples have not been eaten. A buck did decide to rub one of the Japanese maples but I think it will survive.
DSCN5048
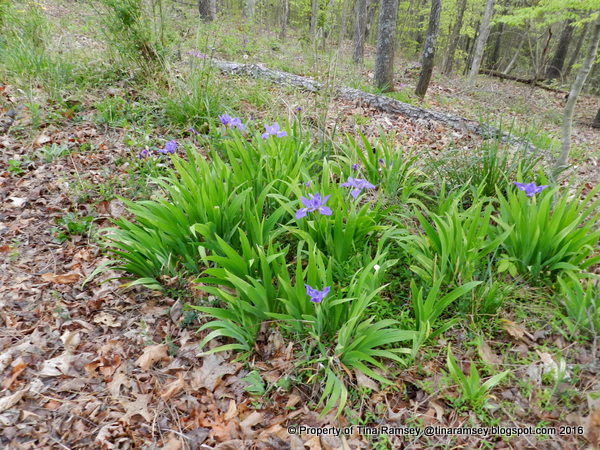
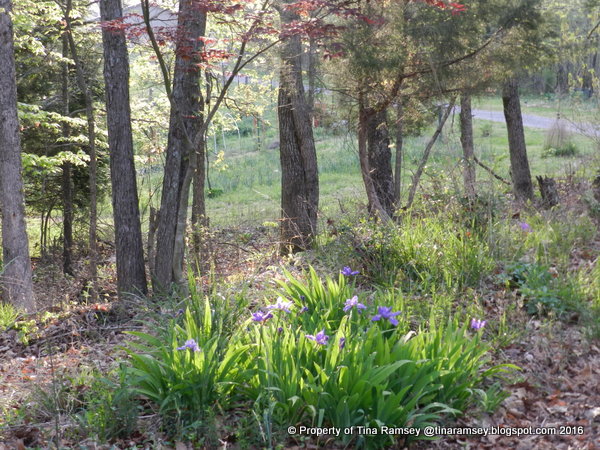
Japanese roof irises (Iris tectorum) are a great groundcover iris for part shade to shade. They are just beginning their lovely bloom.
DSCN5047
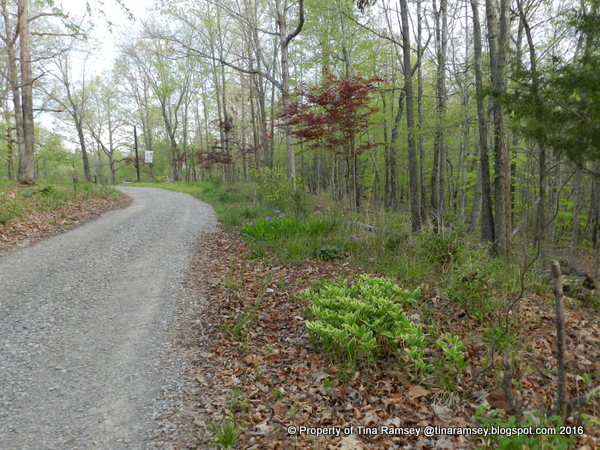
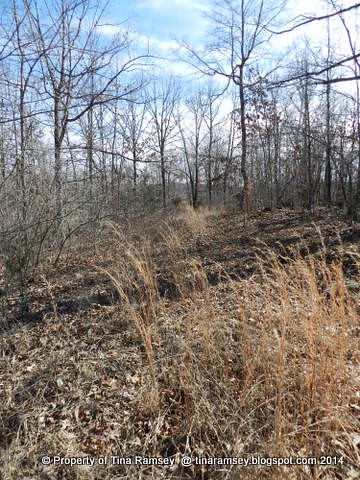
Looking toward the road again we see a few textures. The left and right sides of the drive are completely different owing to the different growing conditions and elevations.

DSCN5046
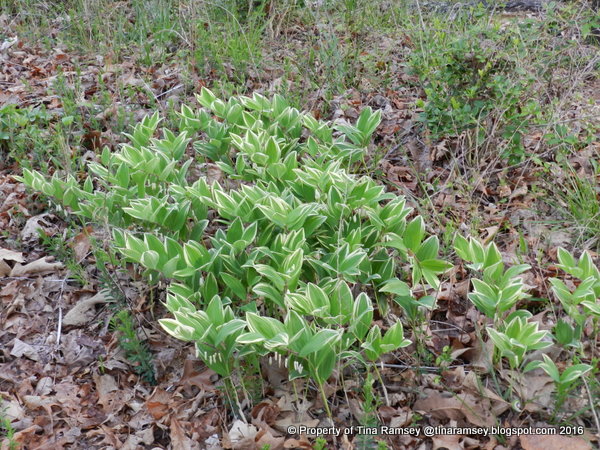
Solomon's seal is a keeper. Deer don't bother it and it looks good all season. The variegated kind really adds texture to the driveway.
DSCN5059
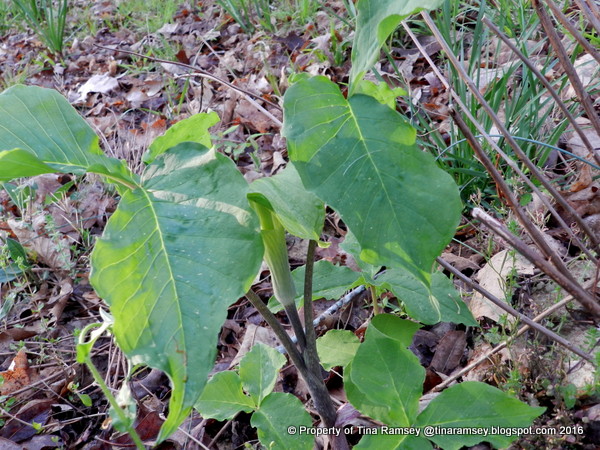
I have a lot of wildflowers planted on one side of the driveway. Some I transplanted here like the above Green Dragon (Arisaema dracontium). I will have to move this one soon to a better garden closer to the house to join a friend I just purchased. These are lovely shade plants and quite unique. The bloom is just beginning and is covered by a hood. Can you see it tucked in there?

DSCN5060
I transplanted a bunch of white trilliums to the driveway area. They are doing wonderfully. Of course the deer love these so I get to enjoy them for about a day. The stem to the left of this flower is evidence of deer nibbling.

DSCN5062
One last picture looking toward the field. I never get tired of the play of sunshine on the forest and am fascinated by it each day. We are looking east and the sun is promising us a beautiful day....

in the driveway garden....
Words and Photos Property of In the Garden Blog Team, In the Garden

Wednesday, April 9, 2014

Clearing, Grading, and Graveling the Driveway Area


DSCN5619
February 7, 2013
I've been waiting quite a while to post this post about our new land. I am finding that with the garden move and the impending house build taking the different moving parts and focusing on them one at a time is a good thing. Well today we are looking at one section of the driveway area of our new gardens. I love before and after pictures so have saved up several to post here. If you look in the distance on the right you will see an elm tree that has a crooked trunk. This crook is so pronounced that you could sit on this crook. It is about five feet off from the ground. I tell you this so you can get a good perspective of all of the pictures. These pictures are all taken looking east but some are closer or further to the tree.

We had to excavate the driveway down to a solid base in order to bring in our 6" of gravel and the geotextile fabric. The driveway is 700' long and we excavated it to be about 10-12' wide. The depth of the excavation varies from 4" to about 14" due to the varied terrain. Parts of the driveway that were in the field and were of a lower elevation needed more excavating than the area of the driveway in the woods where there was already a great base of gravel and tree roots. Just kidding on the tree roots, though there are a lot of tree roots in the parts of our driveway.

We bought our land on February 22nd of 2013, but if you look at the date on the above photograph you can see we were at the land a lot last year even before we closed. We even went so far as to plant daffodils in the field prior to closing--shhhhhhh! When we first visited the property (early February) the above picture is what the driveway area looked liked. It was drivable; which was great; but there was little else it offered. The area was strewn with tons of trash including a sofa, mattresses, play sets, and berms of household trash that our neighbors and the like had dumped on the property for years. Broomsedge grass and blackberries were growing in and along the driveway.
DSCN9073
October 8, 2013

  While the driveway is 700 feet long in its entirety, I am only focusing my attention on planting gardens in the wooded section of our driveway' which is approximately 250' and which is the feature of today's post. Past the end of the wooded part of the driveway is where we open to a large field and that is where a lot of other gardening takes place, but that area will have to be a subject of another post, though I will show you some of the 8000+ daffodils I have planted on the land so far. They can be seen in the last picture. At any rate, due to all of the clearing of the interior portion of the land we had to do behind this part of the driveway we did not actually get to this area until last fall. The first thing we did was rent three 20 yard dumpsters in order to dispose of all of the trash along this section of the driveway. It took us three weeks of scooping with the tractor to get the majority of the trash off from this driveway area.  I will not bore you with the details but let's just say anyone who dumps trash on land in other than approved dump sites is shameful! Those people deserve to get their trash back and more dumped right into their living rooms. If I could legally do this and find out who the dumpers were I'd gladly do the job myself. I don't care if everyone dumps in a local place, just because one person dumps there does not make the area a dump! There are approved locations for disposing of trash and we in this area pay for these dumps each and every month, so people use them! Not your neighbor's property! 

The long term consequence of all of the trash is the fact that we will always have broken glass in the soil and perhaps even chemicals from oil, and other household wastes. While the land recovers itself with time, certain things never decompose and that includes glass. There is so much glass that we have had to cover it up with fresh dirt from the driveway excavation. This glass cuts up wildlife and could pose a danger to a gardener or other humans that may like to walk in this area. Glass is not a good thing for land. There is a great variety of antique bottles and if junkers like this kind of thing and are local, just email me and I'll let you know when you can come and get some. There is still a large area across the street that needs to be cleaned and has junk but that will come later. We found countless moonshine and liquor bottles, even completely sealed bottles of beer on the ground. What, do folks offer bottles of beer to the land or what? So, long story short, the above picture shows what this particular area looked like prior to us beginning the clean up. Clean up was a major part of this garden area. Again, if you look down the driveway on the right there is a pronounced crooked trunk. This is the elm you can use as a reference point.
DSCN9686
December 22, 2013

By Christmas the trash clean up was completed. We paid nearly $700 to rent the dumpsters and spent a good amount of hours working on the clean up all to take care of others trash. It was not a fun time but cleaning the land was necessary and now finally done. We also cleared some trees and the blackberries growing alongside the driveway. I stacked the tree trunks along a soon to be garden area. My wish for this area is to make the area user friendly and low maintenance where the trees and native flora will not encroach on the driveway space. I also do not wish to do heavy gardening in this area due to all the glass remaining in the soil. Therefore I have selected mainly bulbs, shrubs, and hearty perennials for this area of the driveway. There will be some grass in this area but mostly there will be bulbs, wildflowers, perennials including mainly hellebores (deer resistant), Japanese maples, hollies, kerrias, St. John's wort, and a few other deer resistant shrubs.  The color theme is predominantly yellow, red, blue, and white. I'll show the gardens later once the azaleas bloom and things are leafed out a bit.
DSCN0066
February 27, 2014

This picture shows the same area after the winter just prior to excavation for the gravel to come in. We must have a driveway in order to access the area of the house. As you can imagine, a dirt driveway in the winter is not a fun thing to traverse and is at times impossible to drive upon. There were many times I had to park the truck out in this area and walk back to the field but that will not be the case anymore now that the gravel is in. 


DSCN0075
February 27, 2014

Mr. Fix-it excavated the entire driveway with his small tractor (27 HP Kubota). I helped a little by mainly moving soil and fine tuning the lines. It was quite a job and we were stymied by rain several weekends during the process; which set us back considerably. The rain was a good thing to make the clay and rocky soil soft, but then we had to deal with the muck. It was a tradeoff for sure but the job was finally completed last weekend. 

DSCN0388
April 1, 2014
After the excavation and prior to the gravel being delivered Mr. Fix-it and I went out to the land and laid out the geotextile fabric. This was an extra step we took to help ensure the longevity of our driveway. Geotextile fabric is used to help stabilize roads and stop erosion. I had done a lot of research on building a gravel driveway and found this is an essential component in the driveway if you wish to do it right. We want to do everything right or at least as best as we can. I researched online and found this fabric available at a very reasonable price when you compare it to the cost of gravel. I ordered the adequate amount we needed. In our case our geotextile fabric is 12' wide and each roll was 300' long. We needed three rolls to cover the 700'. It kind of looks like blacktop doesn't it? Not too many people around here use it, at least not in my area. One of the drivers of the dump trucks told me Fort Campbell applies geotextile fabric under their roads. That was a good thing for me to hear. 

The purpose of the geotextile is to separate the gravel from the mud and help to provide a barrier to the gravel sinking down in to the mud. It allows water to easily pass through and is woven and is fairly strong too. Mr. Fix-it and I weighed the fabric down with rocks and even pots of daffodils that need to be planted in order to hold the fabric in place. We were lucky in that the evening we laid out the fabric the wind was calm and remained so the next morning as well. You really need a calm wind when laying out this fabric.
DSCN0395
April 2, 2014
The builder and dump trucks arrived right on schedule the next morning. On our driveway we wanted the large rock (1"-1 1/2") as a base of about 3", then about 2" of 3/4"-1" medium rock, then finally about 1" of crush and run. Each dump truck held approximately 23 tons of gravel. We had three trucks of the large rock, three trucks of the medium rocks, and finally two trucks of the crush and run. Gravel is sold by tonnage. Each ton of rock will cover approximately 20 cubic feet but that amount varies by the size of the rock. We had approximately 3500 cubic feet to cover with gravel. Eight trucks brought approximately 184 tons of gravel, which easily covered our 3500 cubic feet. Everything worked out well. The above picture shows the large rock in place.


DSCN0397
April 2, 2014
This picture shows the driveway immediately after the gravel was delivered. Those dump truck drivers (there were two that made all of the trips) were awesome!! They poured the gravel in place and knew exactly how fast or how slow to travel to get the right depth. Everything worked out very well. It took a few hours to complete the job due to our distance from the quarry but overall the process was easy for me.

DSCN0466
 April 6, 2014
Finally we come to completion. Mr. Fix-it had to use a landscape rake to level out the gravel. The initial load of large rocks went in fairly level but as the gravel was built up we wound up with a crown in the middle. The landscape rake quickly took care of that. Now all we have to do is pack it down by driving on it and varying our tire tracks. Heavy rain came in right after the gravel was delivered and helped to wash the crush and run down to lock all gravel in place. We have one low place where the water sits despite all of this gravel. We plan to dig a trench and put in corrugated pipe along with some gravel in order drain off the water to another location at some point. But overall we are quite happy with the results. We can drive down the field with no fear of getting stuck and without mud everywhere! The total cost was less than .75 cents per square foot, mainly because we did all of the labor. We know that us doing the work took a bit longer than a bulldozer would have, but we like to put sweat equity into our home and this sure counted.  
DSCN0391
As promised, here is the last picture and this picture is actually taken from the wooded part of the driveway I just showcased. The white dots in the field are 'Ice Follies' daffodils planted last spring. I planted approximately 1850 'Ice Follies' in this location of the field. In one marathon planting day I managed to get 900 into the ground. That was tough! I hand plant all of my flowers the old fashioned way. Dig a hole, place the bulb, and cover it up. So far I have planted nearly 9000 bulbs on the land. All bulbs came from my current garden. Anyone can have thousands of bulbs in just a few years just like I do if they consistently divide their bulbs. I started my daffodils back in 2003 with a few hundred bulbs in my current garden. Over the years I have divided the original daffodils time and time again. The 'Ice Follies' and 'Tete-e-tetes' are some of the most stoutest bulbs I have and they barely wink before they get settled in. They are the ones that have bloomed prominently this year. That is why they are so dominant in this landscape. Daffodils are an awesome bulb that is easy to grow, multiplies itself readily, blooms a fairly long time, and is deer resistant. Their cheery colors brighten early spring so much that I just tend to go overboard with them, but hey, can you blame me....

in the garden....

Don't forget about the giveaway found here!

Words and Photos Property of In the Garden Blog Team, In the Garden

Wednesday, June 22, 2011

A Full Entry Along a Busy Highway-Landscaping a Driveway Area

100_3097
Here in upper Middle Tennessee, just like in many areas of the country, we experience droughts and harsh growing conditions for our plants. No area of the garden can be harsher than the area by the driveway entry point for your property (if you live-like me-on a state highway or any road but not in a subdivision). My driveway area is an area I do not like to spend time in gardening but I still want it to look nice for when I come home and for my neighbors to enjoy as they pass the house.
100_3096
Prickly pears are but one plant that can not only thrive in harsh growing conditions (think no water, red clay and rocks mixed with gravel, sloping areas, periods of heavy rain and even flooding due to the drainage ditch, heavy piles of snow pushed on it during the winter, and the smog and pollution from motorists passing by) but can laugh in the face of adversity. I love this plant-but! It is not a plant you would want to plant where you do heavy gardening due to the prickly side of the 'pear'. This plant is native to our country and is very easy to grow. I got my starts from a fellow gardener who handled her prickly pears with long tongs and gloves. She told me, "Just simply lay the pad on the ground and it will grow.". Now four years later she was right and I have a thriving community of prickly pears growing on either side of my driveway. 


I chose to highlight the blooms of prickly pears because if there is one fault the prickly pear have it is that their blooms last but a day. They do have several blooms though so the show lasts for as many days as you have buds and blooms. The bright yellow is an eye catcher in the garden and alongside the roadway. Here I have paired my prickly pears with other tough perennials such as artemesia and 'Adam's Needle' yuccas. Let's look at the long shot of the driveway area.
100_3094
My driveway is flanked with large wagon wheels Mr. Fix-it and I picked up at an antique store in Enterprise Alabama. The south is the best place to find cool ornaments for garden decorations and I find Alabama to be a great state to find some really useful things for my garden. The entire area along side my driveway was torn up two years ago when the local water company installed a new water line. My garden seems to have recovered okay but at the time I did not think it would ever bounce back and in fact, the area has not totally recovered as we see in the next few pictures. The above picture shows the left side of the driveway as you enter it from the roadway. The house pictured is my neighbor's house. She has moved away now and I do miss her. While my neighbor lived there if I ran out of spots to garden I would go over into her yard. There are many plants in her garden compliments of Tiger Gardens. I smile knowing they have homes that I could not provide for them here.
100_3093
Here is the right side of the driveway looking toward my home. Both sides of my driveway are similar but not complete mirror opposites. The left side of the driveway has a shorter slope down to the drainage ditch whereas the right side has at least a four to five foot drop to the drainage ditch. I have tried to cascade 'Powis Castle' artemesia down the bank on both sides to help with covering the slope and to hold down erosion. Behind the artemesia are 5-6 yuccas on both sides of the driveway. They are in full bloom in these pictures. I love yuccas but wish they bloomed longer than one week. Again though, despite the short bloom times yuccas are right up there with the prickly pears in ease of care and structure in the garden. Both prickly pears and yuccas are evergreen and hold up year round. The 'Powis Castle' will stay looking nice until about January then it dies back a bit. To start the spring I simply give it a haircut. All three plants are the lowest maintenance plants in my garden-they require no additional watering and only the slightest bit of maintenance in the spring. (I cut the flowering stalks from the yuccas after the flower has passed by and trim the artemesia in February before new growth begins.)
100_3092


Do you remember when I told you most of the area where the water company dug up has recovered? If you look on the bank to the right of the gray artemesia you will see bare soil that is pretty rough. Nothing seems to grow here except the occasional weed. It has been frustrating to me that this area has not greened up because it was green prior to the waterline install. It is, however, the right of way belonging to the state so I can't worry about it too much. 


A favorite groundcover of mine (for the right spot) is this yellow sedum 'Acre'. It is another low no care perennial that looks good most of the year. It does tend to fade away in the winter but returns vigorously in the spring. Sedum acre is an adaptable plant and will spread given the right conditions. Here it is spreading but not to the point it is irritating. In a garden location it would be though so I do not recommend for it to be planted in a garden area. It is very easy to get rid of if you do not like it. 

There are gardens directly behind the entry way on both sides of the driveway (Driveway Garden on the left and Front Roadside Garden on the right) but I have not highlighted those plants today. They do add to the overall look of the entryway though and are all low care perennials and shrubs. The primary plants I use by the road in harsh conditions in my garden are: 'Powis Castle' artemesis, 'Adam's Needle' yucca, prickly pear, and sedum 'Acre'....


in the garden....

Words and Photos Property of In the Garden Blog Team, In the Garden

Friday, August 28, 2009

Update on the Waterline Dig Ups and Gardens

You may remember when I initially posted about the waterline installation along my road? If not do look at the post found here because the before pictures of these two angles in front of my home are found there. The changes are quite amazing-even to me and I'm the gardener!

Both sides of the road were torn up and a four foot ditch was dug into the hill and along the road in order to install a new water pipe. You can see in the two pictures exactly where the water pipe is located because the asphalt on the driveway is a different color.

The first picture shows the left side of my driveway when looking at the house. I am most happy with this little garden. Growing in it are: 'Powis Castle' artemesia, several yuccas, prickly pears, a few lavenders, and brown eyes. I smoothed out the ditch after the workers left and stacked some rocks alongside the bank. I actually gained about a foot of real estate once the ditch was smoothed back over. This is a flat area where I could not resist putting in a little garden. In order to stabilize the small hill lining the ditch on this side of the driveway I planted the 'Powis Castle' cuttings all along the bank. I think they make a great border and they have loved the location more than I imagined. This garden is a low maintenance easy going simple kind of garden since it is alongside a busy highway. I do not tend it much at all.
The right side of the driveway fared much better than the left in the major renovation. Other than having to move the prickly pears and the Angelina sedum it suffered little damage since the workers cut into the hill half way down it instead of into the garden. The grass has quickly filled in along side the bank and the sedum and prickly pears are looking great too! I did plant a few more brown eyes on this side and seeded the bank a bit. The hay is a result of the workers trying to fix everyone's front yards once they finally finished their work. I have added some 'Powis Castle' cuttings on this side too. Once they fill out they'll shine and highlight the driveway in a nice way.

So, all's well that ends well....

in the garden....

Thursday, June 19, 2008

What is Wrong With This Picture?


Can you see what is missing in the above two pictures? Back in December we had a sleepy driver take out the right side of our driveway, narrowing missing the wagon wheel (which was great), but decimating the split rail fence and the plants (all of them).

The split rail fence was fairly easy to fix. The man did take responsibility and helped Mr. Fix-it put it all back together. The plants took a bit more work and were not as easy to fix. The yuccas; which are doing fantastically on the left side of the driveway, look quite a bit different from the yuccas on the right side of the driveway. Yuccas? You can't see them? That is because they were ripped out and have not yet recovered. Some might not ever recover, but a few are coming back slowly. You might just be able to see one to the right of the wagon wheel. There will be no blooms from these yuccas this year. Time will tell what next year will bring.

You can't see the prickly pears growing behind the wheel on the left side, but they are there, and growing fabulously. Not so on the right side. The prickly pears were out in the middle of the road when I found them that morning. The damage from the errant car is just now really becoming evident. But at least there is a good excuse for the off balance plantings; a sleepy driver and 2000 pound hunk of metal. These two plants will happily grow back and no one was injured so all in all it is okay.


The last picture is also of the driveway and the 'Driveway Garden'. I just love coming home and seeing my little garden here, lopsided or not, so I had to post this view. The garden is coming along nicely. The shastas are blooming now, and it won't be long before the annuals and daylillies come into their own as well. Have a great day and I hope no mishaps happen to your plants!

in the garden....

Wednesday, October 31, 2007

Big Losses Bring Opportunities


This drought has been extremely hard on everyone. I have lost several shrubs, namely azaleas and hydrangeas, and at least one mature oak tree. This garden in the picture borders my driveway and parking area. In this particular area of the garden lived three big beautiful white azaleas. They perished this summer, most likely from the freeze and drought combined. I pulled the dead azaleas, built the little rock wall (donations from freecycle), and planted three oakleaf hydrangeas in this area. The oakleaf hydrangeas (Hydrangea quercifolia) were volunteers from a mature oakleaf hydrangea in my yard. This oakleaf was VERY generous as it has gifted me with at least a dozen baby oakleafs.

I think hydrangeas are my favorite shrub group, and without a doubt, oakleaf hydrangeas are one of the best to grow in this area. Oakleafs are able to do well in sun or shade, need not be pruned, bloom reliably every year, grow quickly, have four seasons (green leaves and lovely large blossoms which change color grace the shrub in spring and summer, red leaf color in the fall, and peeling bark in the winter) of interest and are not fussy plants. The oakleafs are somewhat drought tolerant. This year I did have problems with Japanese beetles attacking the blossoms but it is probably because the shrub was stressed or the beetles were just too hungry!

So, the loss of the azaleas (picky plants) actually brought me a good opportunity to plant something more carefree and beautiful. Now if they would only grow to four feet tall in one year! Ah, yes, that patience thing again. They will grow, it will just take time.

in the garden....