Showing posts with label Hypertufa. Show all posts

Wednesday, February 27, 2013

A Coach In the Garden Hypertufa Workshop and a Lucky Facebook Winner!

DSCN5866
There was a lot of scooping and packing and molding yesterday....
DSCN5870
as a group of very nice people came together for a Coach In the Garden Hypertufa Workshop. 
DSCN5871
All of these lucky folks like my Coach In the Garden Facebook page and were privy to this workshop being held. They signed up immediately for it via Facebook. This was only the first of many workshops I plan to hold so don't despair if you were not in on the first one. These nice ladies were very kind to help me out and be my guinea pigs for how to effectively operate my first large workshop. And make no mistake, hypertufa workshops are a pretty big deal and require preparation-and some patient guests. I hope to post a picture of the completed pots on my Coach In the Garden Facebook page as soon as they are ready....
DSCN5873
Front Row L to R: Yvonne, Barbara,Ann
Back Row L to R: Christy, Eddie, Donna

in the garden....

Now to the winner of the free ticket to the Nashville Lawn and Garden Show. It is Wendy Y.! Wendy is a local reader so she will get the free ticket and plans to attend the show this Sunday. She was announced on my FB page after the drawing yesterday. I used random number generator to generate a number. Then I took that number and counted down the people who like my Facebook page to the right number (5) to determine the winner. Thanks to all my friends and readers of this blog who liked my page. Much appreciated!

For me, the blog, my business, and gardening is all intertwined-hence the business postings. Just thought you'd want to know. 


Words and Photos Property of In the Garden Blog Team, In the Garden

Monday, March 8, 2010

Gourd Tree and Hypertufa Display and Storage Shelf

From In the Garden
I was finally able to get into the garden-at long last. I've missed gardening this winter because I've been very busy inside the house and with college. But now that garden season is near things are stepping up outside. Here are two projects I recently completed in the garden.

The first one is a gourd 'tree'. The 'tree' is simply a 4 x 4 with some dowels threaded through (drill holes) the 4 x 4 to hold ornaments or gourds. Each year I pick a different theme for my gourds but last year I failed to get around to preparing the gourds from the year 2008. I FINALLY finished them. No theme this year except maybe a natural one. I stained the gourds with a golden oak Minwax stain. I love the natural look and the gourds are well protected from the outside elements. I thought the gourds looked so pretty I could not put them all on the gourd tree. Two are safely hanging in my house for me to enjoy there.

From In the Garden

The next project is a favorite and my mother will recognize how I built this storage shelf for my hypertufa and sedum collection. After making SO many pots for a craft fair back in December I had no place to store them since they didn't all sell. In addition to empty hypertufa pots I have a small collection of filled hypertufa for my own use. This is the southern side of my home and the sunniest area so it is also the best area for sedums. Just displaying them laying out on the driveway was not going to work so I had to come up with a large shelf that could hold heavy pots and withstand the weather elements. Enter cinder blocks and pressure treated 2x4s stained with an exterior stain. I stood the cinder blocks on end and threaded a 2x4 into the holes. I then added the pots and continued up as far as the top of the chain link fence. My sedums are on the top shelf and get full sun, the extra hypertufa pots and some leaf castings are on the other shelves and are in an easy to find and locate area that is convenient to me for storage. As a bonus the shelf provides a bit of interest and screen for the backyard. I love it! I got the idea from some bookshelves my mother had built when I was a preteen. She still uses the bookshelves to this day, though they are more refined than mine. What an easy way to build an outdoor shelf. Now if I could just find some more fence space....

in the garden....

How do you deal with outside storage of pots and garden displays?

Words and Photos Property of In the Garden Blog Team,

In the Garden

Wednesday, November 25, 2009

Hydrangeas, A Mansion, A Craft Fair, and Hypertufa

From In the Garden
Forever and Ever Hydrangea Fall Color (Just look at the vivid red!)

From In the Garden
Unknown Hydrangea Cultivar (but it is a newer hydrangea) The blue of the flower with the lime leaves (fall color) is outstanding!

Hi all! Fall is looking mighty good here in Tennessee! I hope it looks as good in your neck of the woods too. Fall and winter are the seasons I try to complete some projects. It is not like I need more projects but the process of creativity and creating really gets me going. I take great pleasure in creating things from nothing. Hypertufa is one of those things that is so easy to create and SO rewarding for the gardener. Let me share some creations I have recently made with you.

From In the Garden


I've already showcased my concrete leaf castings but wanted to share a hosta leaf casting as well. This casting is destined for a good friend for Christmas in remembrance of a good gardening friend who died this year.

From In the Garden

Here are some hypertufa pots I've made as well as several leaf castings. I am beginning to feel like a one woman factory for making all of these but it is fun. I have the process down well and will soon be offering workshops for local folks interested in making their very own hypertufa pots. If you are interested, just email me at ramseytina5@gmail.com.

I used various recipes for the pots above but hypertufa is very easy no matter how you do it. I am showcasing the pots and leaf castings because the real reason I have been making so many is due to a craft fair coming up this Sunday.

From In the Garden
Skeeter, see the seashells??

The craft fair is scheduled for Sunday, 29 November 2009 from 12:00-4:oo PM at Lylewood Inn Bed and Breakfast. Lylewood Inn is located at 110 Camp Lylewood Road, Indian Mound, TN 37079. This inn is approximately ten miles from my home and actually right off my road. I posted on it last April when my garden club had the pleasure of having lunch with Mandy at the inn. The craft fair is geared toward local folks but all are welcomed and it has been marketed pretty well. In fact, there are more than 30 vendors signed up to sell their handcrafted wares at the inn. As a bonus, you get to see this beautiful and historical mansion right here in this tiny little town!

I thought this small craft fair would be a fine place for me to start selling my wares-on a small scale. Wish me luck....and come out and buy some great Christmas gifts for your loved ones. I'll be there selling these leaf castings, marker stones, and hypertufa pots. The craft fair promises to be a fun event....

And oh yes, have a Happy Thanksgiving! I think Skeeter has something nice cooked up for you all tomorrow...

in the garden....

Saturday, January 26, 2008

Hypertufa Troughs


Wintertime is a great time to do crafts for the garden. Another project I always wind up doing besides building flower carts, is to make hypertufa troughs. I have made several before but I find I can never have enough of these unique little plant pots.


Hypertufa is a manufactured version of tufa. Tufa is a porous rock formed as a deposit from springs and streams (Merriam- Webster's Online Dictionary). Like tufa, hypertufa is porous. I like the fact hypertufa is porous, but you would not want to plant moisture loving plants in them. I use mine for hen and chicks and sedums and other succulents.


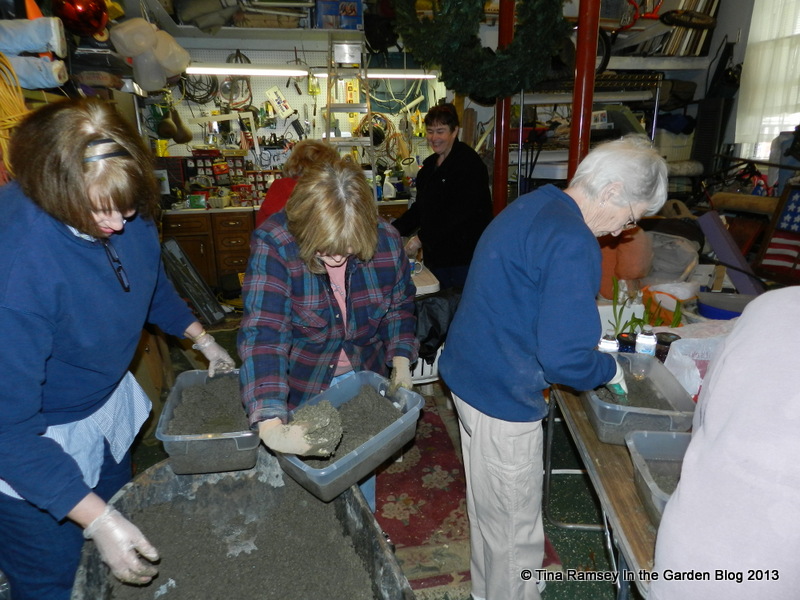
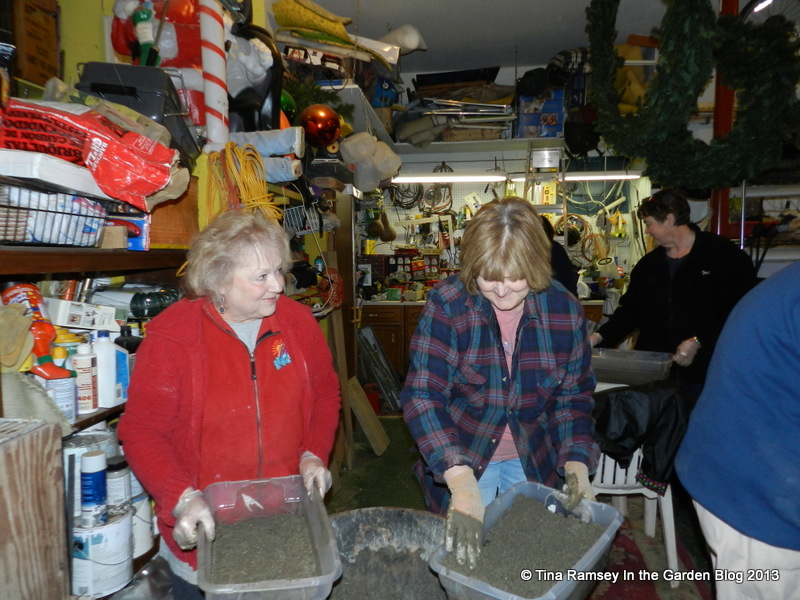
Previously when I have made the pots, I used a one part peat moss, one part portland cement, and one part perlite recipe. This time I used a 2 part peat moss, 1 part perlite, and 3 part concrete mix. I thought using less perlite would give my pots a finer texture, whereas using more of the concrete mix would compensate for not having straight portland cement, or so I thought. The first pot, pictured above still in its mold, fell apart when I finally tried to remove it from the mold. Darn! Lesson learned, use real Portland Cement.


My next attempt at making hypertufa went much better. I was successful in creating several new pots using Portland Cement. The recipe I used in making these pots was: 1 part cement, 1 part peat moss, and 1/2 part perlite. The pots are all in varying degrees of drying and the colors reflect the degrees. Normal hypertufa will dry a light gray. The two large rectangular pots in the upper left of the picture were colored with brown concrete stain. I am very interested to see how they finally dry. The other six pots were colored with buff concrete stain, though you really can't tell either from the picture or from the pots themselves. I think the darker colored stains work best on this type of pot and will not use the light colored stains anymore.


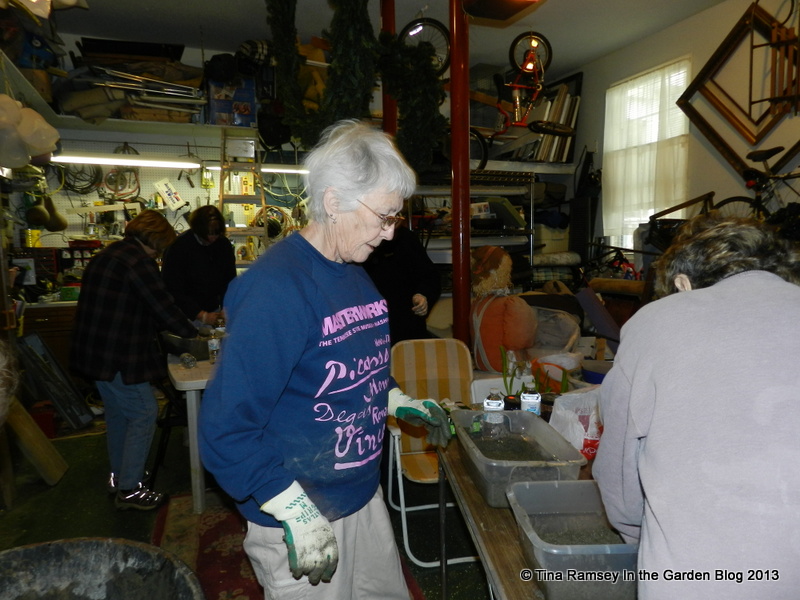
I have used flower pots, cardboard boxes stuffed with styrofoam, and plastic containers for molds. Personally I prefer using strong plastic molds. The cardboard tends to get soggy and will bend if not seriously reinforced, but it is handy and comes away from the pot easily. Plastic flower pots work out well, as do the plastic containers. While trying to separate one pot from its popcorn bowl mold, I had to resort to breaking the mold in order to get my pot out. Oh well, kitchen bowls can be overrated anyhow and we always have too many-don't we? Next time I will try building a wooden mold. I think the size will be more uniform and if I build the mold right, I should be able to dismantle it from the hypertufa pot.


After you mix whatever recipe you use together (there are tons of recipes out there), mold it to your mold but be sure to spray the mold with some cooking spray or coat the mold with plastic wrap. Poke a few drainage holes in the bottom of your pot. Add small stones and decorations as desired then cover the whole thing with plastic and let it sit for at least two days.


Gently unmold the new pot and place in the garden when fully cured. My new pots are currently safely enscounced in my garage to continue to cure. Curing can continue for several weeks, though curing can be accomplished in the garden. I only have mine in the garage because it has been so cold outside. These troughs should last for a long time and the designs are limited only by your imagination.


in the garden....making pots.