Wednesday, May 29, 2013

Vegetable Garden Update May 2013


2013-05-221
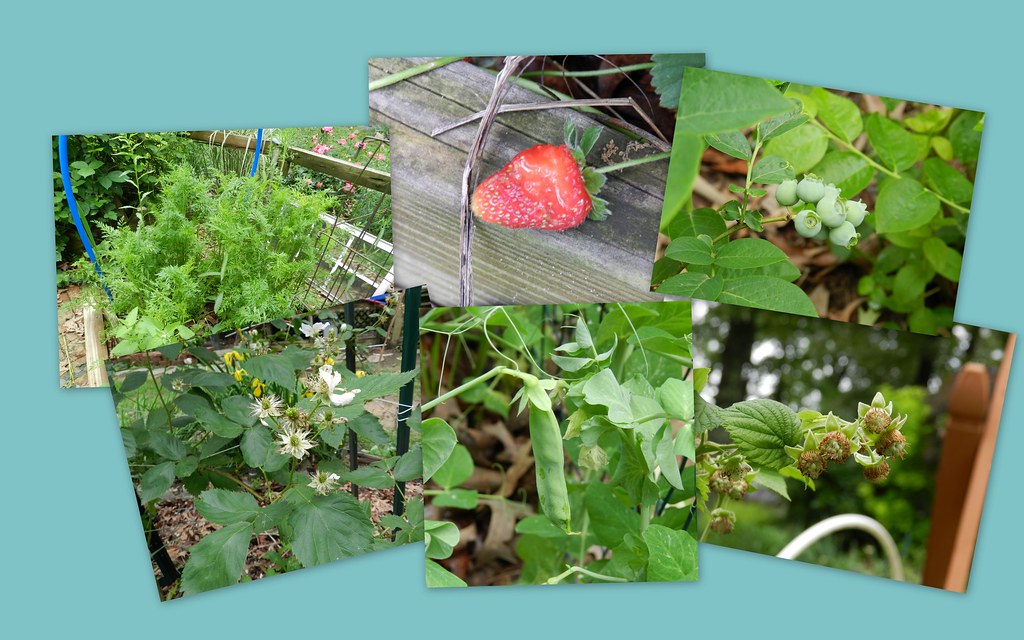
It's been forever since I've updated you all on my vegetable garden. The vegetable garden is doing well and is not totally neglected in my zest to get things moved to the new land. One thing I was hoping I could do was start a vegetable garden on the new land but, alas, that is not to happen until I know where the septic will go and a few other mundane things. I have promised myself not to move anything twice so the landscape must be done correctly--and slowly unfortunately. At any rate we still have a potager here. In the upper left hand corner of the mosaic we start with carrots, these were sown last fall and have wintered over. I am picking fresh carrots every day. Our bunnies and Jimmy's guinea pigs really enjoy the greens and carrots. Next up is a lovely ripe strawberry. Look closely and you will see there is a bite or two missing from it. The chipmunks, squirrels, and birds eat very well here. The blueberries are looking fantastic and will begin bluing up soon. Just under the blueberries are raspberries. I love fresh raspberries but will NEVER EVER plant the canes in my vegetable garden. These canes come up all over the garden! Yikees! I did not know they would do that and while it is easy to pull the unwanted sprouts it is an unnecessary evil. I plan to stake and trellis raspberries off by themselves in the new vegetable garden. They'll most likely be surrounded by grass that I mow. Next up are the peas! Yeah we have peas!! I planted these the first week of February and it took more than a month for them to come up. It was slow going. I just knew that it would turn too hot to get peas but because this spring has been somewhat cooler the peas are still doing well. I have been eating a few right from the garden. Lastly there is a picture of the blackberries. Blackberries are better behaved than raspberries but they will root wherever a cane hits the ground. They also get rather tall so they need to be trellised too. Not pictured but growing well are cucumber, tomato, and pepper transplants. I have yet to plant any seeds but will do so soon--I hope!
DSCN7128
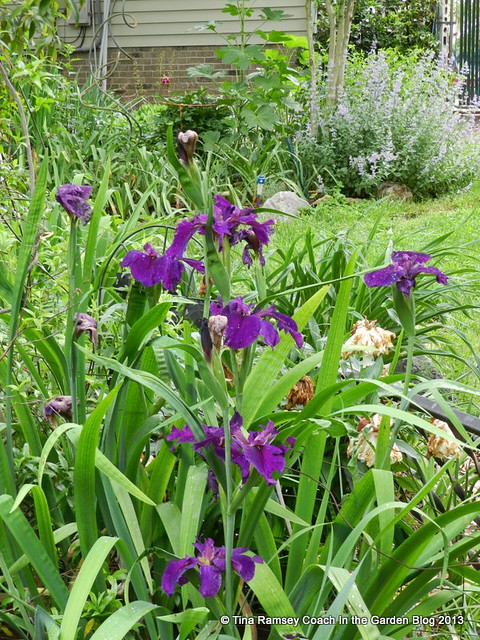
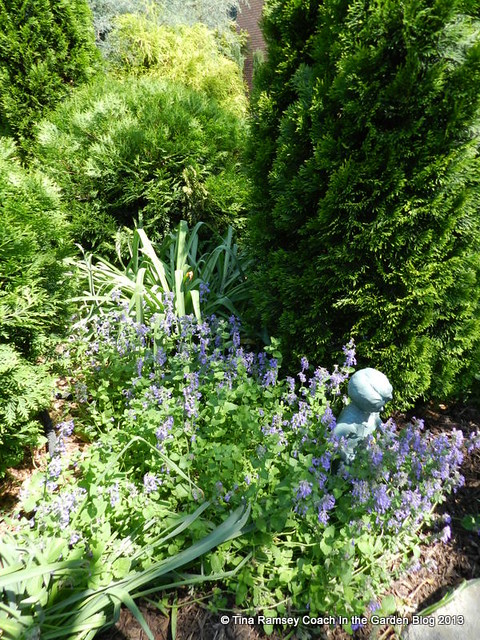
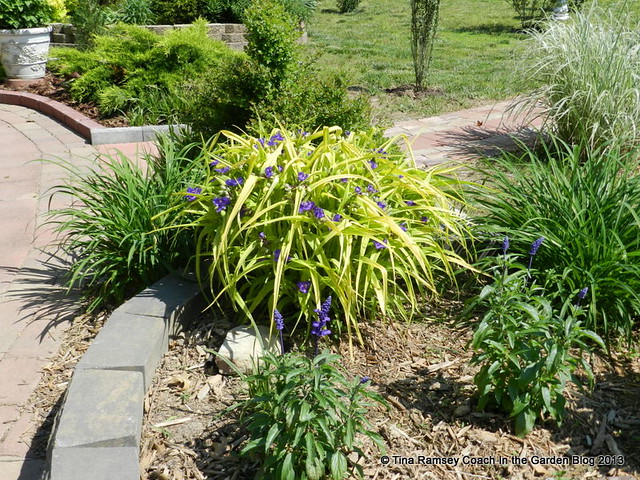
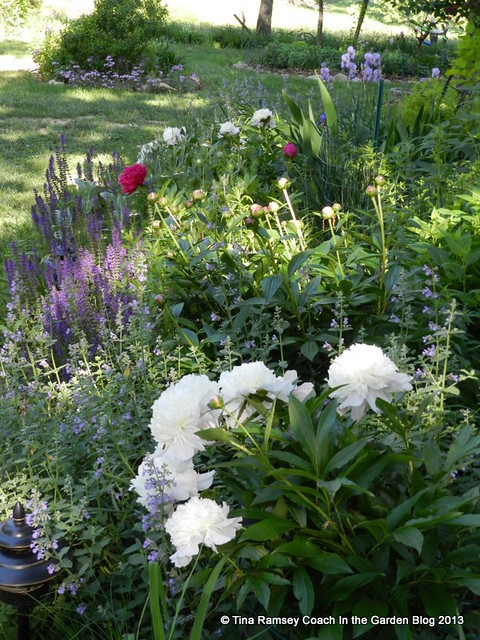
My potager is ornamental and being thus has many pretties growing in it alongside the fruits and vegetables. The above Siberian iris is a dark purple that looks great near some yellow Knockout roses.
DSCN7126
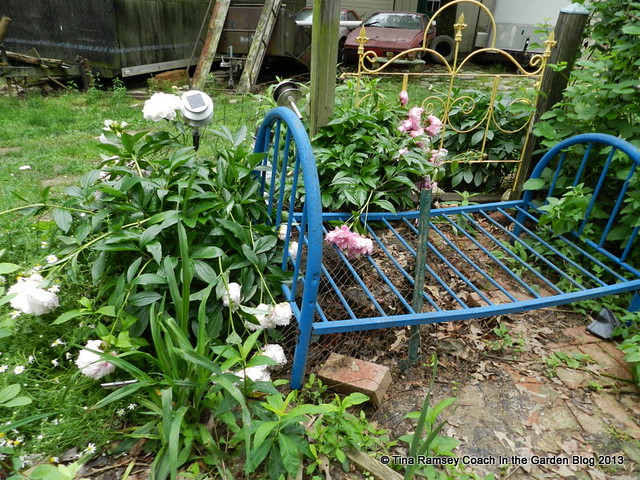
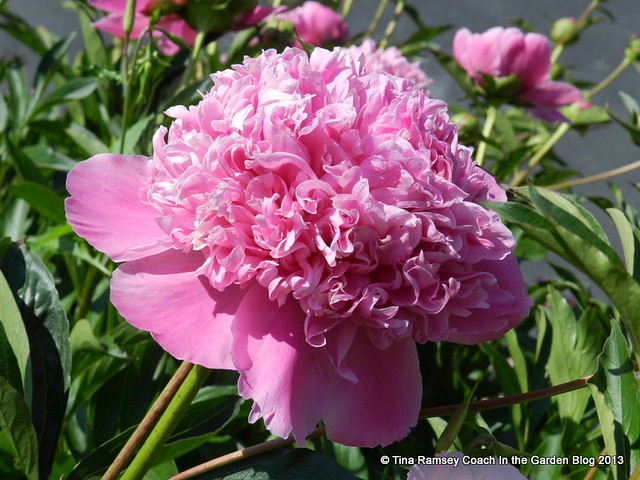
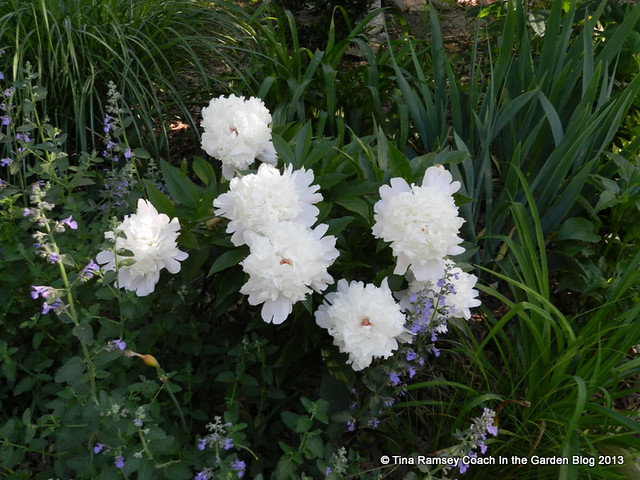
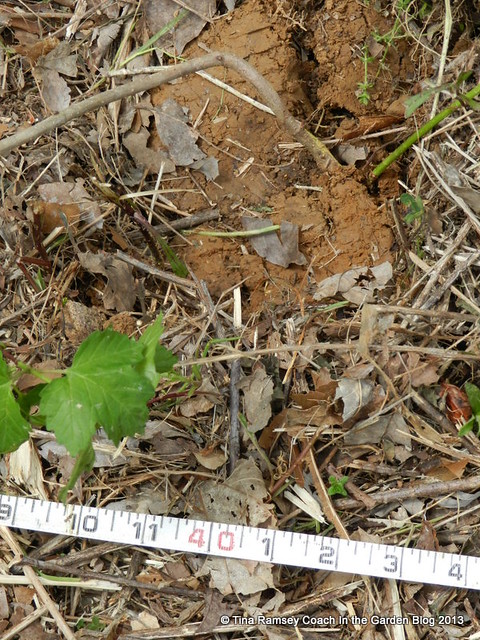
Peonies are blooming but there is one missing! I had three very large peony bushes growing around a stump in the potager. Did you know chipmunks like to live around stumps? My dogs know it. I have two labs, a yellow one and a black one and they are the best darned chipmunk killers I know--even better than the cats I think. They''ve killed eight so far in the past two months. That is on average one per week but still the chipmunks come. We are cursed with them. It must be all those good strawberries and vegetation they enjoy. At any rate, in their zeal to decimate the chipmunks one or both labs literally shredded a huge peony (Bowl of Beauty). I found a two foot deep hole and pieces of the peony tuber all over the brick in the potager. It was not a good day for me. To help save the other two peonies I put down wire with a 'garden bed' frame over the top of the wire. My labs are both about one hundred pounds and can easily move wire when the fancy strikes. The bed takes a bit more effort. In an attempt to change their behavior I have purchased a remote trainer. It seems to be helping. There is nothing like punitive punishment to get a dog's attention when they intent on destruction. Labs can be rather destructive as I've found out.
DSCN7149
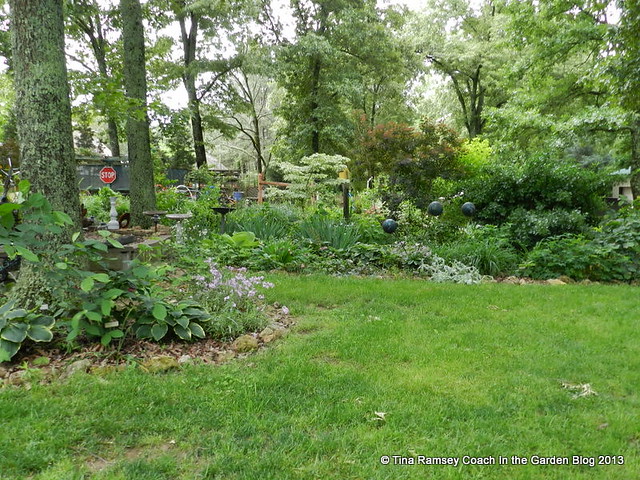
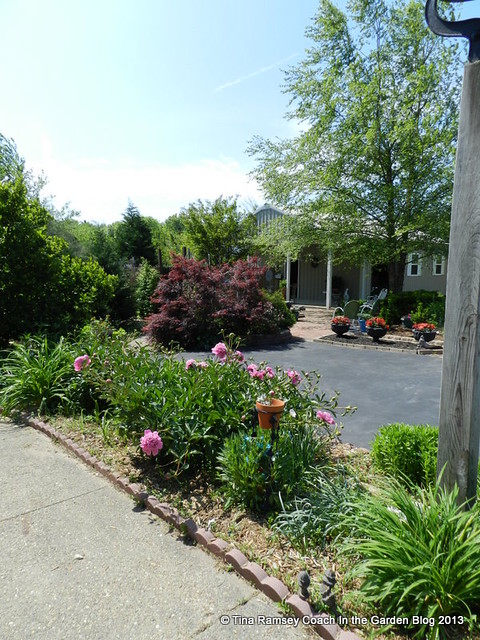
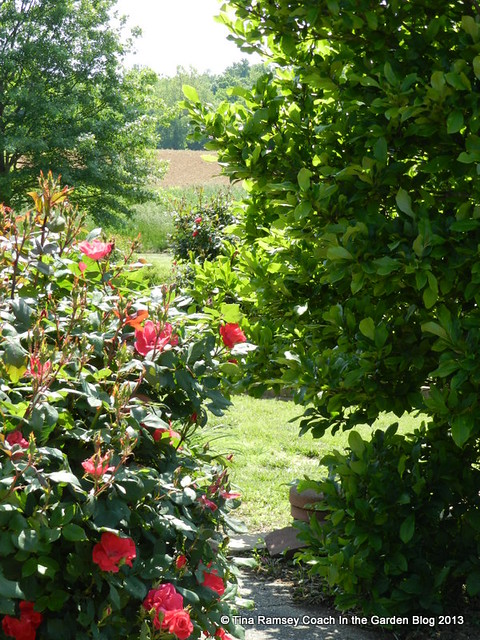
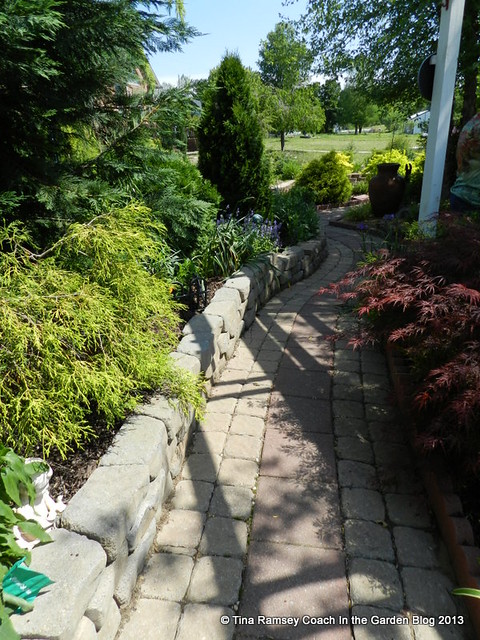
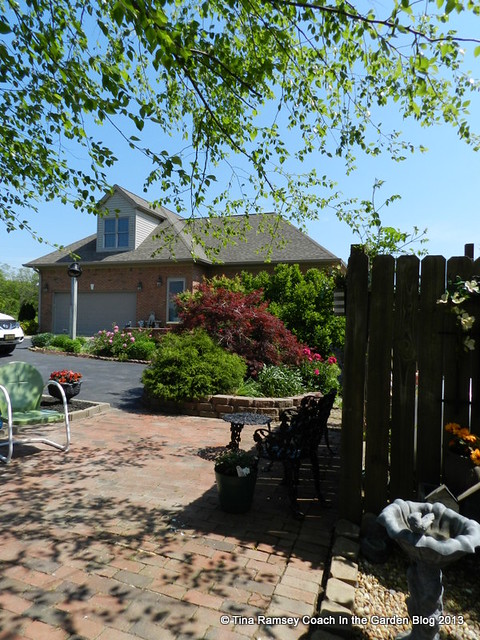
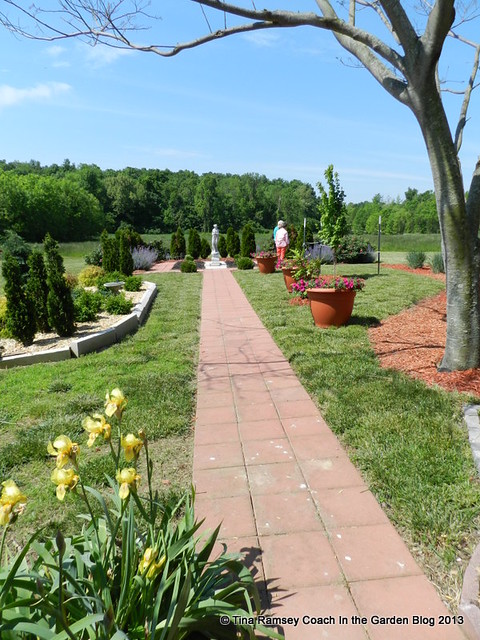
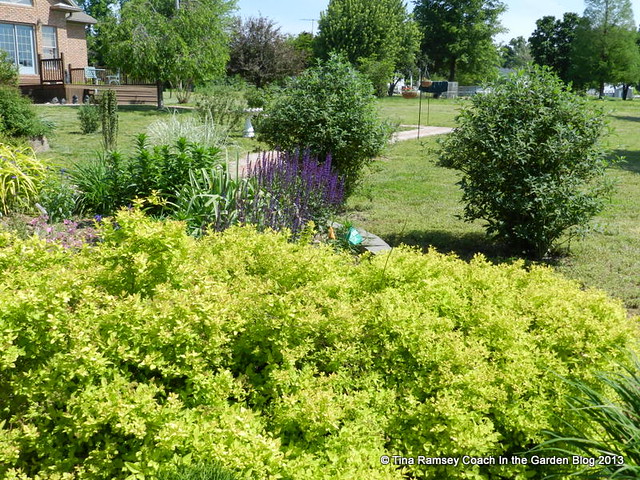
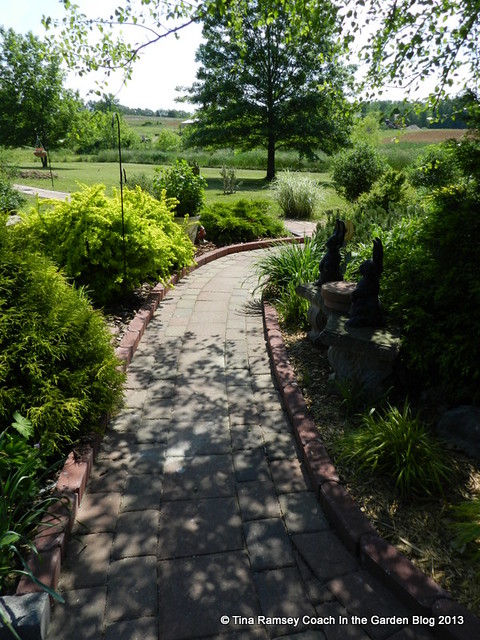
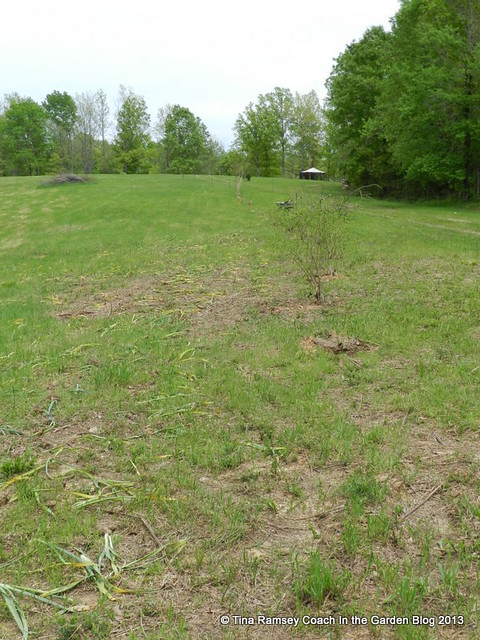
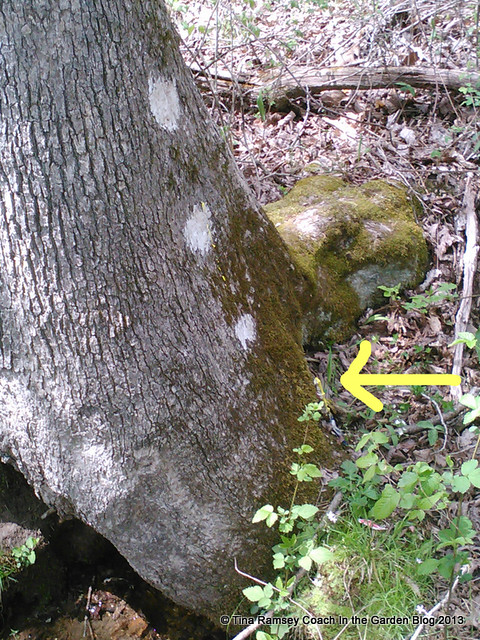
Lastly a good picture looking toward the potager through the Rear Center Garden. The Vegetable Garden is on the other side of this garden. This year the garden is looking better than ever despite being somewhat neglected. I have been spending a lot of time on our land making gardens and bushhogging. I hope someday our new land has gardens like I currently enjoy in my current gardens here outside of Clarksville. Would you like to see a sneak peek at a new garden? Here it is. It is no where near to looking like the above gardens but I promise it will in time. The new gardens will be similar to my current gardens but they will be missing shade. That is something that I will have to get used to. You can see the field in the background. There are a few saplings but that is it. This new garden is quite large (40' x 25') and gets the full west sun. On the east it is shaded by mature oaks and hickories which also shade a small pond. This garden will be prairie style with big drifts of color of mostly native plants. Easy care plants that don't need coddling and that the deer won't eat. Oh the possibilities! I am excited can you tell?

DSCN7198
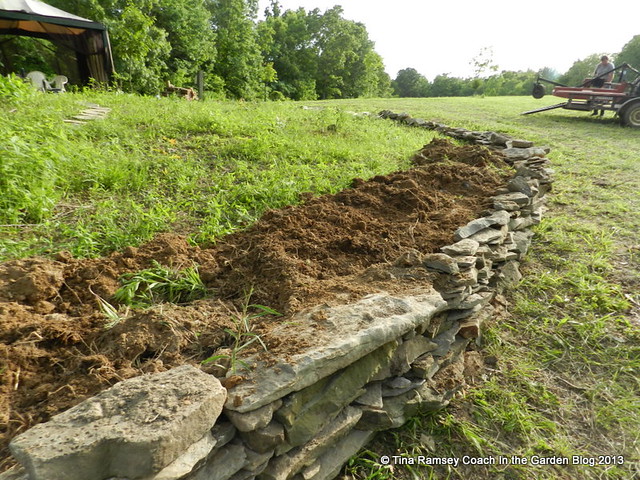
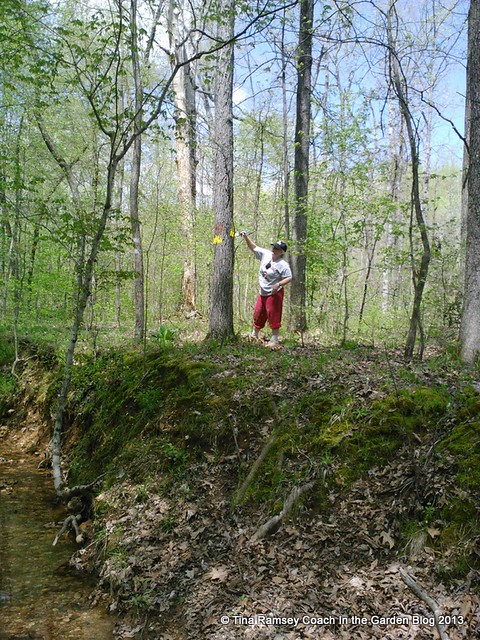
I built this thirty five  foot stone wall out of stones I removed from Tiger Gardens. I love stone walls and this one will be visible from the back of our home. Mr. Fix-it and I have started backfilling it with soil from the land. It is a slow process but it is a process. Sometimes it takes time and that is just what the move of the gardens is taking. But at least you know why my Vegetable Garden and other things are being a bit neglected. 

I think I have maybe one more post in the hopper to post but I plan to slow down on blogging for a while. I don't know how long. I don't think I'll ever leave blogging because I enjoy having the record of my garden and also of what I am doing in the garden and my life. This is like my photo album and diary (though not really a diary because I don't put juicy stuff on here:). It may not seem like I am busy but I feel like I stay busy all the time and staying on the computer is not really where I'd like to be....

in the garden.... 

Even though I plan to slow down here for a bit blogging goes in cycles for me. Sometimes more, sometimes less. Readers have always stuck with me and I appreciate that. I do plan to stay active on my Coach In the Garden FaceBook page. You all can always message me there or here on the blog.

Words and Photos Property of In the Garden Blog Team, In the Garden

Monday, May 27, 2013

American Columbo Blooms...In Tiger Way Gardens


DSCN7110
(May 19, 2013)

I wanted to share some pictures of the American Columbo, aka Frasera caroliniensis. When Mr. Fix-it and I purchased our land a friend of ours (the Saint) noted a neat plant growing on it. I posted about that neat plant here. You can see this majestic native wildflower as it comes up on the other post. Today's post is the progression from bloom and back. The above flower is a perfect flower. This means it has both female and male parts and is self fertile. Many seeds will be set from this plant as it dies. Yes, the plant will die because American Columbo is a monocarp; which means it blooms once then dies. But don't worry, there are tons of nearby plants waiting to take its place. No one knows for sure just how many years it takes for an American Columbo to bloom but various estimates say between seven and fifteen years. I plan to try to research it a bit by marking new plants and cataloging them.
DSCN7106
(May 19, 2013)

The above flower is but one of many. You must also look from below to see the flowers as they hang down from a very tall plant. These two are over four feet tall. According to my wildflower book Wildflowers Of Tennessee, The Ohio Valley and the Southern Appalachians, American Columbo is one of the tallest wildflowers in Tennessee.
DSCN7107
(May 19, 2013)

I began recording the bloom process on May 2 and finished it up on May 22. So within a period of less than three weeks this native wildflower set buds and then progressed through its bloom. The plants are still blooming now and still look good. I hope to record American Columbo as it slowly fades away and then I will also post a picture of the cool seedheads. They are quite distinctive!

DSCN6981

(May 15, 2013)

I was a bit worried about what pH our soil would be since all of this American Columbo was growing on our land. I have read where American Columbo grows in lime glades and calcareous soils. I had to look up calcareous and found it is a soil that is usually high in pH. According to our recent soil test our soil pH is actually quite low at 5.3! The soil is not limey though it is formed from limestone. I will easily be able to grow blue hydrangeas and blueberries but will have to add lime if I wish to have a good vegetable garden. Most vegetables will want a pH a that is higher. But it appears American Columbo is quite happy in an acid soil.

DSCN6985
(May 15, 2013)
Here the buds are just forming. That is a lot of flower buds!

DSCN6770


DSCN6771
(May 2, 2013)
Prior to the buds getting really big they look like the above two pictures. They had me avidly watching this particular plant quite closely because I was very excited to see the bloom. The pictures on the Internet and even my pictures don't really replace seeing the flower and plant in bloom. It is quite a unique plant....

in the garden.... 

Happy Memorial Day to you all. Take time to remember your soldiers. Today I remember my uncle who lost his life last April due to Agent Orange. 
Words and Photos Property of In the Garden Blog Team, In the Garden

Friday, May 24, 2013

Garden Tour Week in Hopkinsville Concludes


DSCN7061
We'll finish touring Bill and Linda's garden today. I hope you have had as much fun as I did visiting this garden. The above pictured peony has to be the most unusual peony I've seen. I'd love to know its cultivar if anyone knows it. It was beautiful and did have the peony scent.
DSCN7060
In my last post I showed a long view to the house from the garden house. Here I show you the view from Bill and Linda's house toward their garden house. What a view!
DSCN7062
Here is yet another lovely view. Bill's garden had a great deal of hardscaping in the form of mini patios and many sidewalks to make wandering the garden an easy thing to do. You can just make out the sidewalk here. Isn't it a nice walk?
DSCN7064
Now this had to be my favorite walk. It was in the shade and yet so full of color and texture and plants. A lovely place to garden.
DSCN7065
Here you can clearly see Bill's knack for mixing up trees, shrubs, and perennials with some garden art. The vignette works.
DSCN7066
We'll finish with people pictures. Oftentimes I don't show people on this blog but I think people are special to show and am glad all of my friends did not mind me posting their pictures. Here is Linda, Bill, and Sandy in the garden.
DSCN7070
We finish with a group picture of the attendees from the Beachaven Garden Club and guest....
They are from left to right: Tina, Sandy, Irene, Diann, Helga, Naomi, Christy, Charene, Donna, Lili, and Vonna....

in the garden....
Words and Photos Property of In the Garden Blog Team, In the Garden

Wednesday, May 22, 2013

Bill's Garden Part II


DSCN7027
Continuing our tour of Bill and Linda's garden we see how he artfully mixes up perennials with his shrubs, trees, and hardscaping. This is a perfect picture to see the design of the mixed garden. Here we have an evergreen arborvitae, daylilies, a pine tree in the background with a 'Forest Pansy' in the foreground, as well as a sidewalk to the right of the display. Just lovely.
DSCN7049
Here is a long shot of the side of Bill and Linda's home. Bill's garden is set off center to the right of the home when looking at the house. The garden was a destination very close to the home with its own little secret hideaway in the garden--which you will see.
DSCN7051
Whimsy was done up right in the garden. There were tons of sitting areas with nice garden artwork to look at while one relaxes in the shade. I especially liked a huge full length mirror hung on a fence. It enlarged the garden nicely and made one want to go and peer inside of the mirror.
DSCN7043
Here are some of the lovely ladies who enjoyed the garden tour. We have from left to right: Naomi, Irene, Charene, and Vonna. They are peering inside the adorable garden shed/retreat.
DSCN7038
And you too can peer inside of the garden house. It was fully finished and had electricity, pergo floors, and a lovely wooden finish on the walls and ceilings. I can see myself spending many hours and even sleeping out here.
DSCN7025
Do you all know what this plant is? Many of you do but many don't as well. This is 'Summer Beauty' acanthus, aka Bears Breeches. This is a nice architectural plant in a garden. Give it room. If it is a happy plant it will bloom and may even spread out for you. I have one in my current garden and one on the land. The one in my current garden has suckered out a bit and I've been able to share these suckers with some of my friends (Sandy--I'll save you one). Mine has not bloomed but I suspect it might one day. Bills' grew in a mostly shade but I have seen them grow in sun or shade. In my gardens I have planted my plants in about half and half.
DSCN7028
We'll finish with this long sidewalk taking us to a formal garden complete with a beautiful statue. We'll look at a few more pictures Friday....

in the garden....
Words and Photos Property of In the Garden Blog Team, In the Garden

Monday, May 20, 2013

Garden Tour Week: Bill's Hopkinsville Garden


DSCN7021
One of the benefits of being in a garden club--and a fairly active one at that--is the ability to meet new gardeners and to tour gardens. One of our members (Sandy) is from the Hopkinsville/Clarksville region and knows many folks around the area. One of her childhood friends (Bill) happens to be a very good gardener. Sandy had been wanting to visit his garden for a while and wanted to take our garden club (Beachaven). Well, the garden tour finally went on the calendar this year and eleven lovely ladies went for a nice convoy along some country roads to Hopkinsville Kentucky to visit Bill and Linda's garden. What a treat!
DSCN7022
I would call Bill's garden a mainly mixed garden consisting of trees, shrubs, perennials, and hardscape. There is a heavy emphasis on trees and shrubs; which is my kind of garden! All of the specimens were artfully sited to titillate the senses with color and texture. Being that it is spring chartreuse was a big color factor so I started this post with a lovely spirea and the spiderwort in the above picture (with blue flowers) is 'Sweet Kate' tradescantia. Blue and chartreuse colors work very well together.
DSCN7023
I believe the above shrub to be a 'Tiger Eyes' sumac though I did not ask Bill so can't be 100% sure. 'Tiger Eyes' is a highly sought after shrub that is quite in vogue right now. It and elderberries seem to be all the buzz.
DSCN7016
Hardscaping was a major element of the garden. Bill has been very hard at work making numerous paths, formal gardens, a water feature and even a delightful garden retreat. A picture of that will come in a later post. There are three posts on Bill's garden this week. After that I suspect I may take a blogging break or slowdown.
DSCN7014
This mock orange was the prettiest mock orange I have ever seen. Maybe because it was growing in full sun it was very happy. I am not sure. The flowers were only slightly scented but did have a nice scent. When shopping for mock oranges always buy them in bloom so you can be sure you get a scent. Even if you buy a shrub with a nice scent, sometimes scented shrubs don't always have a scent each year. I think it depends on growing conditions. I have noticed this with a sweetshrub I purchased last year. It had a good scent then but doesn't have much of one now. This mock orange was unique in that the flowers were really large and it was simply gorgeous!
DSCN7007
Bill and his lovely wife were kind enough to set up a little table in the shade with all sorts of bottled water and drinks. It was a delightful little spot to relax and chat about the garden.
DSCN7004
Another long view shows some of the conifers mixed with deciduous shrubs. Bill chooses his shrubs for texture and color. Conifers, Japanese maples, and other shrubs fit in nicely together in this garden.
DSCN6998
I started this post with a spring picture and I guess I am ending it with a spring picture too. Peonies are a staple of spring gardens. I think Tennessee is getting close to their southern limit but anywhere they can get a good cold spell will ensure your peonies do well. Bill's peonies were bursting with color on this sunny day when we visited....

in the garden....
Words and Photos Property of In the Garden Blog Team, In the Garden

Friday, May 17, 2013

If I Grew Only ONE Rose It Would Be.....And Good Companion Plants for Roses


DSCN6988
If I could grow only ONE rose (it's impossible I know!) it would have to be the climber called 'Zephirine Droughin' (ZD)!

I do not take lightly my choice and have given it a great deal of consideration. There is really no contest in my garden (I have several cultivars and varieties including the ever popular Knockout roses). Nope, hands down ZD beats them all.
DSCN6986
ZD is a climber that will bloom sporadically all season long. It gives its main flush of blooms right about now. My ZD is two years old and receives no special care whatsoever. Gosh, I don't even fertilize it! I do have to train the canes. I decided last year once I saw how vigorous it was growing to train the canes to not only grow over my small arbor but to grow over the adjacent chainlink fence. That was a success as you can see! ZD is fairly thornless, has an old rose scent, does not get any defoliating leaf diseases, stays looking good well into the winter, and is an overall excellent rose. It would be my ONE and only if I could grow only one rose. Thank goodness that is not the case!
DSCN6969
Blooming nearby are several other perennials. Anything that blooms at the same time and looks good with other plants can be good companions. I just happen to think that some of these perennials are good companions for roses. The first is iris.
DSCN6989
Next up are baptisias. This one happens to be 'Carolina Moonlight'. It will be moving to a new home very soon on our land but for now it looks great in Tiger Gardens 1 near ZD.
DSCN6960
Peonies. Peonies and roses and irises and baptisias alone can make an AWESOME spring garden. Throw in some salvia and wow!
DSCN6954
More peonies in the garden. These bloom with catmint. Catmint is an excellent companion with all sorts of roses and perennials. As a bonus catmint is drought tolerant, looks good all season, repeat blooms, and makes a fantastic groundcover under roses.
DSCN6953
Finally a long shot of some of the dozens of peonies in my garden. This is the rear center bed. Here you see some of that salvia ('May Night' shown here but there are many good types) I talked about, catmint, irises, and peonies. There are also roses nearby (directly across from this garden in the Sunny Perennial bed. All are super good bloomers....

in the garden....

What is your ONE and only rose?
Words and Photos Property of In the Garden Blog Team, In the Garden

Wednesday, May 15, 2013

Measuring the Land for a Landscape Design


DSCN6768
I've been busy lately working on a labor of love. That labor is working on our newly purchased land and trying to move my current Tiger Gardens to the land. This feat alone would keep me busy for months but I've also undertaken the task of designing the property.

Well, one part of design you can never get away from is measuring the area you plan to design. For a 600' long field that is on average 150' wide, the measuring can be a daunting job. But! With the help of one Mr. Fix-it, a compass, measuring wheel, 300' measuring tape, and several hours of work we were able to get the job done a few weeks ago

I have found over the years that I have been designing landscapes that the best most accurate way for one person to measure a property is to use a baseline. When I measure homes and their yards I normally set up a baseline parallel to the house and take all measurements off from that one baseline. It is then very easy to be accurate back in my home office because I know precisely where my baseline is in relation to all of my measurements and in relation to the house. On our property since we have no house I ran my baseline down the center of our large field. Once this was done I used my handy dandy Army compass to give me the heading of the tape measure. In my case my heading was 250 degrees (looking west) and 070 degrees looking east. Our field is somewhat on a slant which is something I am not too happy about. Mr. Fix-it and I want our home to face due west (270 degrees) with the back facing due east (090 degrees). The difference is a mere 20 degrees but this difference makes a big deal with natural lighting inside of a home. Many folks prefer their house to be oriented on a north/south axis but we do not. Our current home faces east with the back heavily shaded by oak trees facing west. We love it! Gardening on either the east or west sides of a home in Tennessee is very easy because there is usually lots of good lighting. East exposures are preferable to west exposures. Gardening on either south or north exposures has its challenges and I find when I visit homes with that orientation I simply do not like it. At any rate, the orientation of the field does not matter at this point. It simply means our house will be a different direction than facing straight down the field. But even that is not yet determined since I have not completed my design. 

Once I have my baseline oriented properly I begin taking perpendicular measurements off from both sides of the tape measure every 10' feet or so. I annotate all measurements on graph paper I carry with me. Mr. Fix-it and I found our field to be a full 600' long. It started at the west end to be only 87' wide but at the east end it was about 300' wide. The east end of the field (the direction we are looking in the above pictures) will be where we'll build our house. Both the above picture and below picture are looking east from the west end of the field. You can just make out the top of our gazebo in the far distance. That gazebo is our 'home away from home' while we work on the land and once we begin the house build. Looking at the gazebo you can see the field slopes down slightly on the eastern side. Our house will be built on the high point of the field to the left of where you see the gazebo.  
DSCN6777
I included this picture to also show my other labor of love-moving my garden. To date I have planted approximately 6200 daffodil bulbs of several different varieties. Some are late blooming, some are very early, some are white, some are doubles, some are yellow or a combination. Some bulbs are newer cultivars and some are very old cultivars. If you look closely you'll see the yellowing foliage of some of the daffodils I recently planted. Daffodils can be divided and transplanted at any time of the year. You should always leave the foliage until it turns yellow. Unfortunately these bulbs had their foliage turn yellow prematurely since they were dug up and transplanted. Transplant shock will get bulbs as well as plants. The bulbs will be in a bit of shock for a while but should still bloom next year. I have learned a few lessons in my current gardens regarding daffodils. You do not want them planted too closely to shrubs. The shrubs will quickly overtake the daffodils as they grow large. It is very difficult to dig out the daffodil clumps once the shrubs get large due to the roots. To prevent this issue I have left a 10' buffer between the daffodils and the shrubs. All along the driveway I planted hydrangeas, crepe myrtles, and some grasses. Right now the shrubs are not much to look at but they will do well with time. On the northern side of the field next to the forest I left about a 15' foot buffer between the daffodils and the forest. This is for mowing and walking purposes only.
DSCN6767
I don't think (in fact I know) I will be able to take all of my garden to the land but I am making a good valiant stab at it. It seems whatever is in bloom and can be moved reasonably easy is what I am moving. Besides the hydrangeas (11 PG, 7 oakleafs, 5 eight foot crepe myrtles, and three clumps of plume grass) I have moved some Japanese snowball bushes. I was able to dig up more than a dozen from around my very large Japanese snowball bush. I could not dig up the mother plant as it is much too big and probably would not survive the move. I am just as happy taking the smaller plants anyhow as they will settle in much faster than the bigger plants. I planted eight Japanese snowball bushes at the west end of the field. The large white 'snowball' blooms will be a focal point from our house. One that we will easily be able to see when looking all the way down this field.
DSCN6776
Since the field narrows at this end I used my handy cloth measuring tape and curved it around a perimeter of the field set back 15' from the woods. I then measured every 10' along the tape measure and sited my Japanese snowball bushes. I put five on the outside border and three more offset on the inside curve. When looking at the 'hedge' of snowballs from the house it should look like one solid mass of snowball bushes. But! I will still be able to mow around these bushes and they will have plenty of space to grow. 

This is just a long post but sometimes to get all the info of my thought processes out there posts need to be long. I oftentimes look back at posts to see what I have done and why because as I get older my memory fails me. Thank goodness for records, designs, and blogs....

in the garden....
Words and Photos Property of In the Garden Blog Team, In the Garden

Friday, May 10, 2013

Blazing the Land to Mark Our Property Boundaries


Blazing the land sounds like I am setting fire to land doesn't it? Well, not literally, but perhaps figuratively. Mr. Fix-it and I want our adjoining property owners and their guests (read hunters) to understand where their property ends and ours begins. Blazing is a term used when people paint their trees in such a manner that you can see the 'blaze' all along the property boundary.  In theory people will understand that property is private property and if it is posted hopefully those people will not trespass.

We own just over 59 acres which is in two tracts separated by a dirt road. There is a seventeen acre tract bordered on three sides by three roads, then there is the 42 acre tract bordered on two sides by two roads. It is the other two sides that run through the forest that we recently blazed. Property along a road is easy to identify but when in a forest there are no lines and all the trees look alike! Blazing is the solution and what a job! 
land blazing


There is no easy way to blaze land. You must walk the whole property line. For us it meant walking down the center of a running stream (you can see the stream in the left corner of the above picture), climbing hills and ravines, and traversing several hills in the undergrowth of a forest. The whole process to blaze those two sides took us five hours but what a wonderful five hours! Just being a part of nature and enjoying that stream and knowing we marked our property very well is a good day. Mr. Fix-it and I will never forget our fun!

Tools required to blaze include: survey of the property, paint (the color your choice--we used 'Taxicab yellow'), 'Posted' signs, stapler, a paintbrush, range finder, and perhaps a metal detector to find the property pins. At first I thought I could get away with a basket that had wheels to haul all of our supplies. It did not take me long to trash that idea. Plan on backpacking all of your supplies. You cannot easily roll wheels over the rough terrain you will normally find when blazing a property in Tennessee. 

IMG242-001
Property pins are normally rebar or fence poles. In our case all of our pins were 1/2 rebar. This information is noted on the survey. In the above picture you can see one of the property pins (it is where the yellow arrow points to). Just above the pin on the tree is the blazing our adjacent property owners had done to their property. This property is owned by some kind of corporation and is leased to a hunt club. There should be no reason why any hunters would pass this blazed property boundary and it is possible the hunters don't (does a bear poop in the woods??)--do you get my drift? I would hope that the hunt club owners/operators would brief the hunters as to what property they can hunt on and what kind of marking annotates the property, but I don't know if they do or not. To be on the safe side we also marked this tree with our very own taxicab yellow paint.  


Generally you mark the trees on the side facing away from your property. This is assuming you know where your boundaries are. We blazed two slanted yellow lines on the trees facing out from our property. On the back side of the trees we painted a dot so we would know the tree was the boundary from our side. If we found a tree with a property pin in it we painted a P for pin on our side so we would be able to find the pin easily the next time we had to walk the property. 

We were very fortunate with our new property in that we received a valid survey (less than ten years or so--ours is only five years old). I actually was able to call the surveyor who told me to look for his marks on the trees from when he blazed the property five years ago. He blazed the property using red paint. This red paint along with the adjacent property owners white paint made it quite simple for us to find our boundaries and all of the property pins. You can actually see some of the red paint on the tree I am blazing in the above picture where I am painting the tree. These were also the trees the adjacent property owners had blazed-primarily.  We wish we had known that before carrying the metal detector with us for a mile through the woods! 

In addition to blazing the property boundary if you do not wish for hunters and others to come on your property you must post a sign stating that fact. We used yellow signs like the one posted below. These signs should be posted to trees or other immovable objects about chest height every 150 yards. The signs should face outside of your property and not be obscured by trees. We posted these probably every 150 feet or so. Even if they by chance get ripped off the trees the fact that the trees are blazed will not allow anyone trespassing to have the excuse they did not know they crossed property boundaries. A good to know bit of information in the Tennessee hunting guide:

In Tennessee, state wildlife laws have always required hunters and trappers to obtain permission from landowners to use private property. In fact, it is advisable to get written permission to hunt and is required to trap. 

 Therefore, if your property is blazed it is clear it is a different property and most likely NOT the person's own property--therefore you should not--must not enter the private property without permission. On our land we will not give permission and have posted signs to that effect. Signs like this may disappear but ensuring they are posted on all entry ways to your property along with your blaze marker puts the onus on the trespasser-I would think. We have posted these signs and our two yellow stripes on all entrances to our property as well. 


Now that the hard part of blazing the inside of the big tract is done I am looking forward to finishing the blazing of the land along the road and on the 17 acre parcel. Blazing is really not all that hard and judging by how well our adjacent property owners have their property blazed I think it is most effective to help keep trespassers out....

of the garden....

Let it be on record Mr. Fix-it and I are not against hunting. We are against strangers traipsing all over our property with guns and these same people have shown they have little respect for the land or for the owners of the land. They seem to be on a mission and to heck with anyone who gets in their way. Many hunters may well be responsible but from what we've seen on our property this is not the case. There are many carcasses, shotgun shells, and trash and litter everywhere and also damage. It is not a responsible hunter that kills a deer only for the antlers. We have found evidence this is happening in our area and on our property. So as to prevent any confusion amongst not only hunters but the wildlife enthusiast the 'No Trespassing' signs are the way we have decided to handle the situation. No trespassing will clearly mean no hunting. Most responsible people will understand that and for the most part Tennessee has fairly responsible hunters in that they are safe and mostly law abiding. For those who are not law abiding, then no matter how much blazing we do or how big a fence we put up there would be nothing that would stop the trespassers-until they are caught. At any rate, this is how we have decided to handle the situation with our property. Any positive experiences with blazing private property would be greatly appreciated! I will not entertain negative ones from hunters and the like. It is not my problem you have been hunting the land for years and it is great property or whatever. We pay the taxes, we own the land, we choose how we use our land like any property owner can choose to use his or her land. 'Nuff said.      


Words and Photos Property of In the Garden Blog Team, In the Garden

Thursday, May 9, 2013

Bicycle Flower Basket

BY SKEETER
 Last year I added a bit of Whimsy to my GEORGIA GARDENS. Click HERE to see how this bicycle came to be...
 I notice the wicker basket is starting to warp and break down after a year of Summer heat and Winter cold. Time to make an adjustment.
 Not happy with having to water this basket practically every day during the heat of summer, I may have come up with a solution.
A new ($2.00) piece of Coco Liner.
 A new ($3.00) Railing Basket.
 A new ($.60) Plastic Tray.
 And a Pot of Mixed Plants found on the Bargain Bin for a mere $3.00.
 I cut to size and put the Coco Liner into the Basket. The Liner should hide the pot of Flowers.  
I secured the Liner with Black Pipe-Cleaners.
  I placed the Tray inside. The plan is for the tray to keep moisture on the Plants for less watering this summer.
 I set the entire pot of plants into its new home.
 Lastly, I attached the Basket of Flowers to the Bicycle. Easy, inexpensive solution to the failing basket. Which now sits by the bike until the Pansy and Viola within perish. The Basket on the back of the Bicycle has a Red Geranium, Yellow Pansy and a hanging plant which are doing fine for now.   
Under $8.00 for this BICYCLE FLOWER BASKET, In the Garden... 
Words and Photos Property of In the Garden Blog Team, In the Garden