Funny thing about those gardens. We enjoy the blooms in the garden so darned much and wish they would last longer but are not always sure how to make it so. Well, if you grow hydrangeas it is pretty simple to dry the blooms and bring them in the house. The above pictures show 'Annabelle' hydrangeas. They were dried in two different ways. I'll briefly discuss the two ways I used to preserve the blooms.
I know of two basic methods for drying big head hydrangeas (this will include mophead hydrangeas (macrophylla) and also the paniculata hydrangeas (Limelight, PeeGee, Pink Diamond, Tardiva, etc) as well as the Annabelle type hydrangeas (arborescens). I know there are more than two methods but these are the simplest ones in my opinion. In the first method I cut several blooms from the shrub when the blooms were mature. That is, they were just passing their prime and beginning to dry. I placed the bouquet in a vase with about 1-2" of water. Over a period of about one week the blooms dried on their own.
In the second method I left the blooms on the shrub to dry naturally. Just prior to the blooms turning brown is when I cut the blooms. These can be placed directly in a vase with no water. Nothing more needs to be done to have these hydrangeas preserved.
I sometimes paint my blooms. Michael's Hobby Store sells a mist aerosol paint specially made for blooms. It is a very fine paint and will not weigh down the flowers. This paint works great and comes in a wide variety of colors. You might also spray the flowers with hairspray if you don't want to color the blooms. The hairspray will help the petals hold up a bit longer.
Flowers dried in this way can last for many years but do tend to get covered with dust. It is difficult to dust dried flowers so I usually throw my old flowers out. One thing to note, if you are into feng shui you do not want dried flowers in your house at all. I tread a fine line because I do like feng shui and try to practice it, but I also love my hydrangeas in the house as well. My compromise is to not have as many dried flowers as I'd like and to toss them in the spring. Your choice for sure.
I know this is an easy question, but which hydrangea was dried in water and which one was dried on the shrub in the above picture? The green or the white? And can you see the oakleaf hydrangeas outside the window? They dried naturally on the shrub. I'll enjoy those blooms from inside the house when it is icy outside.
in the garden....
Friday, July 31, 2009
Thursday, July 30, 2009
Gladiolus and Daylilies and Non-Gardening Husbands
From In the Garden |
When is a daylily not a daylily? Well, when it is a gladiolus of course! Mr. Fix-it and I ventured out to Guthrie Highway and The Tin Barn for a blackberry picking jaunt and daylily purchasing trip at the Tin Barn. I thought it would be fun if he picked out a daylily he really liked and I too would pick one. Keep in mind that Mr. Fix-it does not garden. He does enjoy the garden but does not garden and claims to know nothing much about gardening.
Mrs. Oakes, our local daylily breeder, gave us a handful of orange flags so we could flag the plants we liked. I always purchase seedlings since they are the most economical way to increase my daylily holdings. For $10 I can get a very large clump of great looking daylilies. I would like named cultivars but at $10 per fan I think that it is not the smartest move for me so we go the thrifty way and buy only seedlings. To the fields we went on our venture to get the right un-named daylily.I picked a tangerine looking daylily with orange petals. It was in a separate field from where Mr. Fix-it was looking for his daylily. He picked his 'daylily' much faster than I picked mine. When Mr. Fix-it and I found one another again he mused that he was not sure if he flagged a daylily since the 'lily' had flowers all up and down the stem. Ha! I knew right away what he had done. Mrs. Oakes' daylily beds had gladiolus interspersed in and amongst the daylilies. I must say these glads were brilliant and most pretty. No wonder he flagged one! All is well that ends well though. Mrs. Oakes kindly gave us the gladiolus-no charge-and Mr. Fix-it found himself a nice tall raspberry colored daylily too after quite a bit of ribbing from me. You know how it is when husbands make really silly mistakes? Non-gardening or not! Poor guy. To be fair to him though now that I look at the pictures of the two plants I can kind of see a resemblance. Kind of:)
What kinds of flowers have you or someone you know confused the identification before?
in the garden....
P.S. We now have nightly lessons on flowers in the garden. Nah, just kidding. ;-0
Labels:
Daylilies,
Family,
Gladiolus,
Mr. Fix-it
Wednesday, July 29, 2009
Sea Foam Artemesia
Artemesia is such a cool plant. My favorite is 'Powis Castle', but I am always open to new cultivars. I purchased this little one in Maine on my summer trip up there last summer. It is Artemesia versicolor 'Sea Foam'. Mr. Fix-it and I thought it looked cool and picked it up at a local nursery in Maine.
The gray color of artemesia is a great color to show off all the busy greens of most perennials. I try to use gray a lot in my garden. Why am I telling you this? At the time of purchase I knew nothing of this plant but knew I liked artemesias. I have since done a bit of research on 'Sea Foam'. The research says Sea Foam artemesia is a small artemesia which will NOT do well in high humidity areas. I thought mine would be doomed at some point in the future. Then wonders of wonders, Frances posted a picture of hers! I was so happy to see it growing somewhere else here in Tennessee. She told me it does well in her garden. What a relief.
This plant is great for xeriscaping and this was my view when I bought it. I thought that with its wiry feel it would be rather drought tolerant and do well. So far it has done well planted in my driveway garden under an oak tree facing the setting sun. I have never watered it and it is not languishing from either the lack of water or the tremendous amount of water (humidity) we have in the air. Good drainage is probably essential for successfully growing this artemesia though. Mine is planted on a slight slope so no drainage problems for it.
This new to me cultivar has been lots of fun. It has put on growth and is doing well. It is even pretty cool and quite a different type of plant that I like it very much....
in the garden....
Dave has asked that we post about our worst weed on his Worst Weed Wednesday. I've already posted about mine in a recent post about poison ivy. You can read it here. Check him out for more worst weed posts. You know we all have them!
Today is my sister Dawn's birthday. Happy Birthday to you and may you have a great one!
Labels:
Artemisia,
Birthdays,
Sea Foam Artemesia
Tuesday, July 28, 2009
The Chicks with a few Friends
By Dawn
Thank goodness it stopped raining long enough for my daughter and I to get a much needed project done. It seems like we have not really had a summer this year as it's been really cool and wet. I'm hoping for the dog days of summer to show next month. Anyhow, this is a small set of steps and the end of my backdoor porch. It allows access to under my deck, and it is a very damp and shady spot. The large rock to the left is permanent. In fact, we have a deck post attached to this rock by drilling rebar into the rock then placing the deck post on top of it. What you can't get to you work around.
This is a new wall from this past spring, I thought it being in an undisturbed place (no plowing or mowing) it would be perfect for hens and chicks.
How wonderful since I was too late last year in planting these four in the ground. They sprouted beyond the tray and were in dire need of something to be done to them.
I removed six large hens from another wall I made years ago. My daughter and I were astonished about how many good sized hens and chicks could grow in a small hole. All I had to do was pull a little to get them out! They are virtually growing in the evergreen needles that had washed over the rocks.
The hippo, the frog, the hen and the cow have my houseplants growing within them.
I have grown twin flower vine over another wall and it was gorgeous! Especially when it flowered. It looked like confetti scattered about on top of a green mat. The excavator covered it up when we added to our septic system. I hope to find more growing in my small neck of the woods. It is a dainty little wildflower that goes unnoticed a lot of the time.
and I can't wait! In the Garden.
Monday, July 27, 2009
Backyard Corner Garden
Posted by Lola
This area was a flower garden some years ago. With all the things going on at the time I could no longer maintain it. The grass grew and it just became part of the lawn.
But now with more time I began to play with the idea of making it a garden again.
So slowly I began to make that happen. I transplanted a flowering almond from another area. I planted a canna on each side of the flowering almond. If you look very closely you can see them.
I found a red crepe myrtle for pennies at the local big box store. That is it in the edging circle. I wanted this garden to be larger so I placed the newspaper down and spread the leaves that I had raked up from the trimming of the azaleas on top of the paper. This is helping to enrich the soil as well as marking the garden area.
Notice my other version of the tipsy pots. I used colored pots. They seem to hold moisture better than the original terra cotta pots. I used complimenting flowers in each pot. This is what I mentioned Skeeter.
While working on this garden to help it look more like a garden I have placed pots of flowers around. Notice the gourds growing up the fence under the window box.
This is something new that I'm trying this year. It's a potato bag. You put soil in the bag then plant your potatoes. As the potatoes grow you add more soil until the plants are done. We'll see how well it works.
This is one of the cannas that was planted beside the flowering almond. I believe it's" Bengal Tiger". If someone knows for sure I would appreciate the information.
It will take some time for this garden to be complete {update later} but in the meantime it will be a garden in progress-------
In the Garden.
Sunday, July 26, 2009
Serena Angelonia
By Skeeter
The name Serena Angelonia caught my eye on the Bargain Rack at Lowes. I thought that was such a pretty name and bloom to boot. I have never heard of this plant before but at a dollar each, (BARGAIN) maybe my Georgia Garden would like some.
The tag read, annual and my normal annual additions are pretty much petunia and marigold each year. I decided it was time to broaden my horizons and add this annual this spring! I picked up a dozen Serena Angelonia in colors of white and purple. Yep, 12 plants for $12.00. Now where to plant them? I am bad about picking up plants and then deciding where they will go. I know I am not alone in this as I have heard many gardeners say, "I will decide where it goes once I get it home." Does that sound like any of you? hee hee... This pot above was empty except for the spike plant which over-wintered in the pot in the yard! I was shocked it survived the winter but we don't get too many freezing days in the deep south. I planted 2 white and 2 purple Serena Angelonias in the pot.
Here is the pot now! To my surprise, the Wave Petunia from last year popped back up as well. I am glad I left it in the pot when planting Serena. So this pot only cost me $4.00 this year!
Remember the 3 I had planted in the ground on the second picture above? Well, here they are now!
I am so confused as the tag read "Spring Bloomer"! It did not say blooms all summer long or until frost or anything like that. I thought I was getting a spring only bloomer! Don't we just love surprises? Here it is intermingling with the Yellow lantana which returns each year. The tag also reads, "Cold Hardiness to 32 Degrees" I sure hope that is incorrect as well as I don't want to lose this beauty this winter. Maybe it will return next year, I say with fingers crossed.
I put the remaining plants in other planters that you may see in the future. I don't have as much color in the Garden as in past years but this sure is a nice colorful view. Purple, white, yellow, gold, [ink, etc. Let's move in for a closer look in the distance.
Note: We are still away helping our friends so we're off the Internet. Hope you all are having a Great Day!
Ah, the pink and yellow coreopsis I planted last year giving quite a show indeed! It is great along with SERENA ANGELONIA, In the Garden...
Note: We are still away helping our friends so we're off the Internet. Hope you all are having a Great Day!
Labels:
Coreopsis,
Serena Angelonia,
Spike Plant,
Wave Petunia
Saturday, July 25, 2009
Strange Happenings In the Garden
By Skeeter
Last year, I had a voluntary Butterfly Weed pop up in my Georgia Garden. I can only assume I am the lucky recipient of a seed dropped by a bird. How ever it got here, I sure enjoyed it last year.
To my surprise, it returned again this year growing stronger and larger. I was afraid of loosing this plant over the spring as it is located in a real soggy area of the flower garden during rainy times of year. We had a lot of rain last winter and spring so it's feet were wet for a long time.
It bloomed one time for me last year but is putting on a much better show this year with still giving me blooms!
Here is a very blurred picture of what I assume to be a seed pod on the plant. Sorry for the blurred picture but it is too humid for me to attempt another picture. I spotted one "seed pod" last year and I do believe it has produced a second butterfly weed nearby as the foliage looks the same. It is too small to tell at this point. This years plant has several seed pods so I am hoping for more Butterfly Weeds in the garden next year.
Here is something I do not recall seeing on the plant last year! I am not sure if these are insects, or some sort of egg. With last weeks posting on the caterpillars munching on the dill, I did a bit of research and saw some butterfly eggs which looked similar to this. Could these be Caterpillar Eggs?
If these are Caterpillar eggs, then they would destroy the plant once they hatch as happen to the Dill. I planted the Dill for the caterpillars but I really don't want anything to eat my Butterfly Weed as I enjoy it way too much. I want the Butterfly's to enjoy the sweet nectar but not eat the plant in the stage of a caterpillar!
With the assistance of OJ kitty (Above) I took my fingers and rubbed each stem to rid it of this unknown stuff.
It left quit a sticky mess on my fingers but a little soap and water washed it right off. I sure hope I did not destroy something good for the plant. Does anyone know what this could be???
I also spotted these little stinkers on the foliage of a Gladiola. The Glads did not do well this year as they were spotted as they bloomed. Each bloom had black spots on them as if mold. Wonder if too much rain was in their beginning? Anyway, these caterpillars were only on one plant then gone the next day! Does anyone know what these were?
Here is a Canna which was given to me by Lola. Thanks again Lola! I will talk about the Canna another time as I am waiting to see if this one will bloom for me. See the perfect holes in the Canna Foliage? It looks as though someone has taken a Hole Punch and punched holes in it doesn't it? This happened to a few of the Canna last year but so far this year only to this one. Does anyone know what causes this to happen?
There sure have been some STRANGE HAPPENINGS, In the Garden...
Note: Some friends need our assistance so we will be off the Internet for the weekend. Everyone have a Great Weekend with family or friends!
Here is a picture of the Saints mothers Hydrangea bush. She wanted me to ask you all if anyone knows why it only produced one bloom this year when last year it had many more?What could have happened to my grass? Oh, wait, the Saint solved this mystery for me. He was spraying off the siding on the house and with the last bit of chemical in the bottle, he slung it out of the bottle onto the grass. Arggg, it kills grass! The bottle read, "okay for the environment and would not kill plants". Hum, maybe that only counts when the stuff is diluted and not concentrate!
Okay, I must tell on myself as well. I was spraying some weed killer on the walking path of my flower garden and a few days later, I spotted foot prints in the grass from where my shoes got wet from the stuff! I did not think to snap a picture of that but wish I had as it was funny.
There sure have been some STRANGE HAPPENINGS, In the Garden...
Note: Some friends need our assistance so we will be off the Internet for the weekend. Everyone have a Great Weekend with family or friends!
Labels:
Butterfly weed,
Cannas,
Hosta,
Hydrangeas,
Insects
Friday, July 24, 2009
Impatiens Tower
One of the gardens on the Montgomery County Master Gardener had a really neat tower of impatiens that everyone fell in love with. The gardener (David) was kind enough to share instructions for it with me. I have the instructions available if anyone would like them, just email me. There is also a picture of David's tower in that post where I talked of the tour of David's garden.
There are some of the supplies above for our very own impatiens tower. It has taken me about one year to finally get around to making one. It is not a complicated thing to make, just time consuming and we needed a special hole drill bit to drill the holes into the thick PVC. That took time to find. Mr. Fix-it actually made the tower for me. He is such a sweetie and helps me so much in the garden. He is really the brains behind mechanical things and without him I'd be lost. There he is drilling the small holes into the inside pipe of the tower. I had the bright of idea of drilling bigger holes so the water would drain into the outer tube faster. He said no no. You actually want smaller holes so the water will slowly seep. Dave's instruction call for 1/8 inch holes. I actually think that size is a bit too big, but we went with it anyhow. We were fortunate in that we had the PVC pipes laying around. A fellow Freecycler had passed them along to me. I think PVC works in the garden really well. It will not rot, rust or decay. A good thing. The smaller pipe with the water holes goes inside of a larger pipe. The larger pipe has 2" holes drilled in it wherever you want the flowers to go. I finally found what I think is a good spot and dug a hole about 2' deep in order to 'plant' the tower. Once the pipes were stabilized I hand filled the gap created by the inner and outer pipes with a good mix of humus and soil. I then planted the impatiens in each hole. Be sure to add Osmocote or some other slow release fertilizer to each hole. You can use other plants besides impatiens. I think begonias, marigolds, petunias, calicabroas, or sedums would look great as well. I have a lot of shade so impatiens make sense to me.
The impatiens are happy in their tower. My only complaint is with watering and the fact I might have drilled the holes closer together so the plants would grow together faster. Theoretically filling the inner pipe with water will water all of the impatiens. Not so. The water drains out faster than I can fill the pipe so only the bottom flowers get water from the inner pipe. I usually just hand spray each impatiens as necessary. It has not been a big deal but if I had to do it all over again I'd make smaller holes all over the inner pipe. I'd also make the planting holes a bit smaller. Maybe about 1.5 inches. Simply because once planted the roots will take over inside of the pipe and spread out, thus holding in the soil. Right now the soil sometimes washes out. Dave's tower works better for him though, so maybe the problem is just me. At any rate, I do really like this impatiens tower. Everyone who has come by is drawn to it. It is simple to make and a fun way to get a lot of plants in a small space....
in the garden....
in the garden....
Thursday, July 23, 2009
Your Garden Style
Rear Center Garden
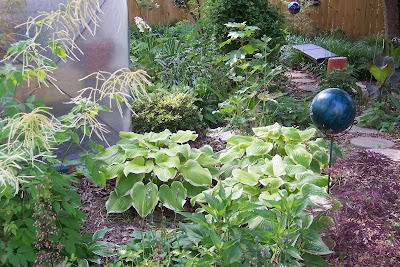
What is your gardening style? Do you have one? Do you even want one? Aspire to a style? What is it?Heuchera Garden
Oftentimes we speak of and hear about gardening styles. What exactly is a style and how do you choose a style of gardening?
Front Sidewalk Garden
Well for me I think my style of gardening is considered cottage, eclectic, and maybe a bit crowded. Can that be considered a style?
Front Foundation Bed-Right Side
I find I garden in this manner because I am a bit of a plant collector. I not only want every plant I see, I also want A LOT of those plants.
Sunny Perennial Border
I like lots of color and I want color all year long. As such, I must pack in a lot of plants in order to have something blooming all year. These plants must be planted in big enough drifts to make an impact when their neighbors are out of bloom.
Greenhouse Garden-Sunny Side
At the same time they must be close enough together so that they can carry the color when their neighboring perennials are out of bloom. A hard mission for any garden let alone the numerous ones I have here at Tiger Gardens.
Northside Shrub Border and Walled Garden
I want lots of textures, foliage, and blooms too. The whole garden should work together but how do you get the look you want? I really crave a succession of blooms and can anticipate when the next plant will bloom but putting it all together is a challenge. I do not want to see any ground in between the plants and the less grass I have to cut the better.
Crabapple Garden
So I keep packing in the plants wherever they seem to fit and wherever I think they'll do well. Some things work and some things don't. Then of course I have to adjust my style. I dig plants, I throw out plants, I move plants, I simply abuse my plants in my quest to get the perfect garden according to me.
Greenhouse Garden-Shade Side
Did I mention my garden is sun challenged? No where on this one little acre of dirt does the sun shine for more than 6 hours at a time. That one little spot is in my driveway. Ha! What fun!
Spa Garden
So I garden with shade and shade plants. I enjoy the shade yet I yearn for sun loving plants. I adapt. As do the plants and that is a great thing.
Front Center Garden and Part of Forest Pansy Garden
I try to garden to please me and to find my exact specific gardening style. Gardening is an art that is never really complete. It must always be worked on and oh yes, let's throw in the fact that the gardener will change. We are not static. Just because I garden in a cottage type style now does not mean I will always garden this way. So I adapt and still I strive to find my garden style, but really the whole thing with gardening styles is misleading. The type of gardening you do should be called the "Piece of Me" gardening style. Because no matter what your style is it is uniquely yours and you leave a piece of you in your garden each time you tend it, plant it, edit it, prune it, weed it, well you get the idea.Northside Shrub Border
Don't get wrapped up in garden styles, just enjoy your garden for the reasons you do. And don't ever let anyone tell you what type of style you should have in your garden. Strive to be you and leave a piece of you in your garden. This is what makes all gardeners have a special connection to their gardens. A garden is uniquely the gardener's. You can have ten thousand gardeners gardening in a formal style and I guarantee you not one single garden will be the same. Forget about styles and garden the way you wish to garden. Find your own style...
in the garden....whatever it may be.
Subscribe to:
Posts (Atom)