Wednesday, August 28, 2013

Moving the Raspberries and Blackberries to Their New Home and Some Garden Pictures


DSCN8491
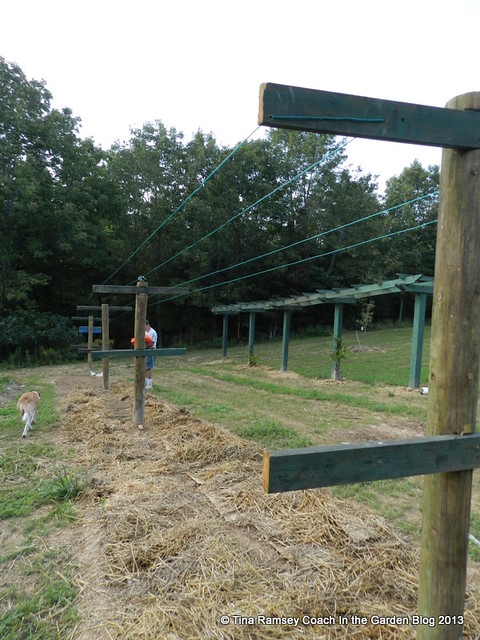
Good morning everyone! Today I will share how Farmer Fix-it and I made our blackberry and raspberry trellis. We started with our area; which is 48' long by about 4' wide. We 'planted' four fence poles 16' feet apart in concrete. Next we notched these fence poles at about 3' and 6' above ground level. Farmer Fix-it installed the cross beams which are pressure treated 2" x 4"s in the notches. The next step involved tilling up the bed area. Farmer Fix-it also did this and he used a small cultivator to till up the area. Normally I use my trusty shovel to turn the whole area over but timing just did not work out for me to get the area turned over so he did it his way. I much prefer the soil after my shovel has worked it over versus how a tiller works over the soil. While a tiller will pulverize soil it does not get really deep into the soil bed and so pulverizes the soil that I think the soil can wash away and compact faster than when I use my method of turning the soil with a shovel. When I am done turning the soil with a shovel the soil is raised up about 4-6" and has varying degrees of clumps in it. I feel air and water can reach the lower depths much better but that is just my way. Since you can eat raspberries and blackberries Farmer Fix-it took over and he was a big help. 

Once the soil was prepared we purchased 50' coated cable packages at Lowes. We looked at cable but they were quite expensive so opted for the packaged clothesline type cord. I requested two lines on the 3' crossbar to hold the canes up at mid height, and four lines on the top crossbar to allow the canes to rest on. My reasoning is that lower down on the canes the area is not as wide as it is at the top of the canes. My blackberries are predominately 'Apache' and my raspberries are 'Canby'. Both types are thornless and are semi erect in that they grow up then grow laterally. The blackberries in particular can grow 10' across easily at a 4' level. 

The dog you see in the above picture is our little 'adopted' dog called Buttercup. She actually lives on the corner of the road about 600' feet away. We noticed she was a bit on the skinny side so we began feeding her-down by her house and not on our land. Now she has become our dog it seems. We love her and she is most sweet and gets along with our Deacon but every night when we leave it is an ordeal. She jumps in the truck and we cannot get her out! She chases the truck and it really breaks our heart leaving that old gal. Her owner does not seem to care about her at all as she is always outside and he never misses her--even when she is gone all day visiting us! We do not want to take on another dog and perhaps we should not have fed her but she was really hungry and not being fed. We felt it was the right thing to do. At least when she is with us she has been safe in that she is out of the road (except when we leave at night) and is fed and has water. She is a comfort when we are out on the land because she is also an alarm dog if anything or anyone comes around. Normally I would be most upset about dogs running loose but do understand it often happens and have really softened up in my old age because it is not the dogs fault. Once we move here I suspect she will be moving in.
DSCN8495
Farmer Fix-it spent an afternoon digging the bramble out of my potager. It was a big job for him because beside the fact he is not much of a gardener, he found that things were planted very closely in the potager. He had to do some detangling and pruning. Farmer Fix-it is very afraid to prune. I don't know why folks are afraid to prune because pruning is a good thing! After he dug out all of the bramble and had it laying on the ground in a tangle I had to go out with my pruners and lop off all of the long pieces. This was just to get the canes to a manageable size and to limit stress on the canes. You see, when you dig plants and they come up with barely any soil the roots can quickly dry out and will not support a great deal of leaves. Removing those leaves helps to relieve stress on the plants. Most of our blackberry canes were cut down to 3-4' feet. The raspberries (closest to you in the picture) were left a bit longer. 

We already had a soil test in this area and know our pH is much too low for raspberries and blackberries. Ideally the pH should be about 6-6.5 and ours is about 5.2 so we added lime. I also added greensand. Greensand is an organic amendment that will help to break up the clay soil in this area. I would rather have gotten a trailer load of manure to add to the beds but it just wasn't meant to be due to time constraints. I will most likely come back and fertilize with cottonseed meal once we get a few good rains in the area. I plan to use organic amendments on the field because this field slopes down to our pond and I do not want to damage the pond in any way. 

Once all canes were planted we mulched with cardboard, newspapers, and wheat straw and watered everything. We wound up with about 30 canes of the 'Canby' raspberries; which are planted between the first and second fence poles, and about 35 canes of the 'Apache' blackberries. They are planted the rest of the way down the row. One last step saw Farmer Fix-it tying the long canes to the trellis system. The canes you see here are primocanes, we cut off the florocanes prior to planting. Primocanes grew this year and should flower and bear fruit next year. The florocanes we cut off of course were primocanes last year and bore fruit this year. They die after they bear fruit. My plan is to keep the two types of canes separated with them growing in opposite directions on the trellis; which will make pruning and picking easier. We will have to prune the berry bramble each year after fruiting in order to maintain a good stand of berries. Air flow will be perfect because the row is oriented south to north and the prevailing winds flow west to east. I suspect these canes will settle in nicely and give us lots of fruit for many years to come. The only problem we next have to contend with is how to keep critters out of the patch-both the four legged type and the flying type! We'll tackle that next year.
DSCN8505
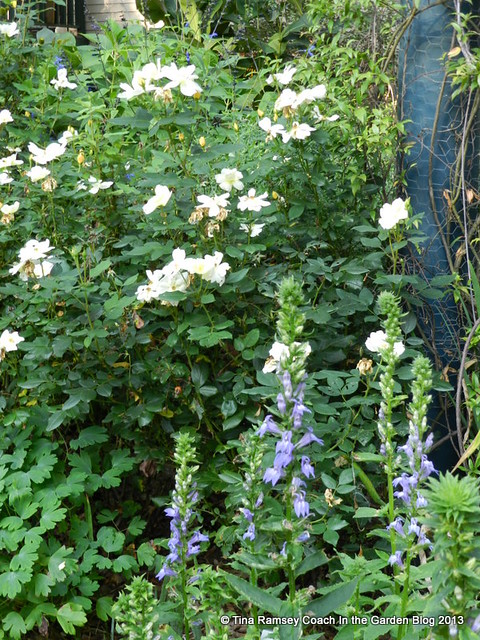
A few pictures from Tiger Gardens I show the Great Blue Lobelia, Sunny Knockout roses, and Black and Blue salvia blooming strongly.
DSCN8509
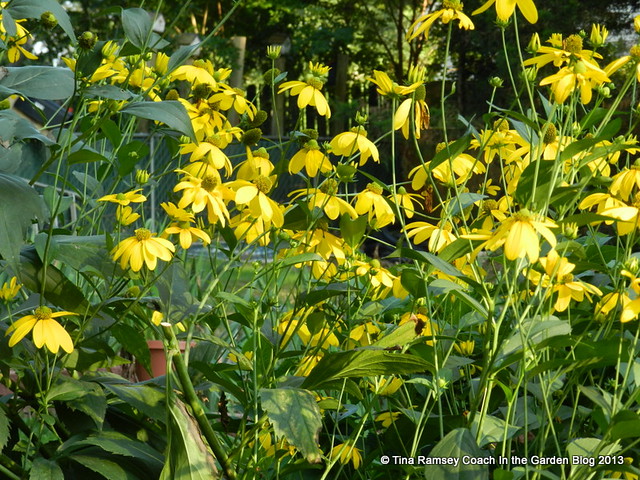
The cutleaf coneflowers are STILL going strong. These are such a sunny yellow and make a huge impact in the garden. They will, however, be moved to the wildflower field within a few weeks. I will miss them here.
DSCN8508
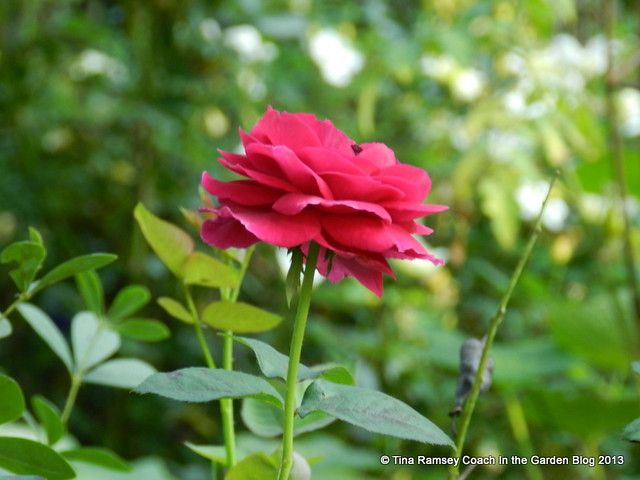
Lastly we have 'Falstaff' David Austin rose on its second flush of blooms. This year really did not see an Japanese beetle invasion and the roses have enjoyed it mightily, as have I. Next up will be a vegetable garden update. We have veggies both here and on the land and I hope I can show some good things with them both. You might notice the baptisia seedpod in the background. I think baptisia and roses go together like peanut butter and jelly so I often plant them side by side in the garden.

Here's hoping you are....

in the garden....
Words and Photos Property of In the Garden Blog Team, In the Garden
Monday, August 19, 2013

A New and Amazing Pond Resident


DSCN8288
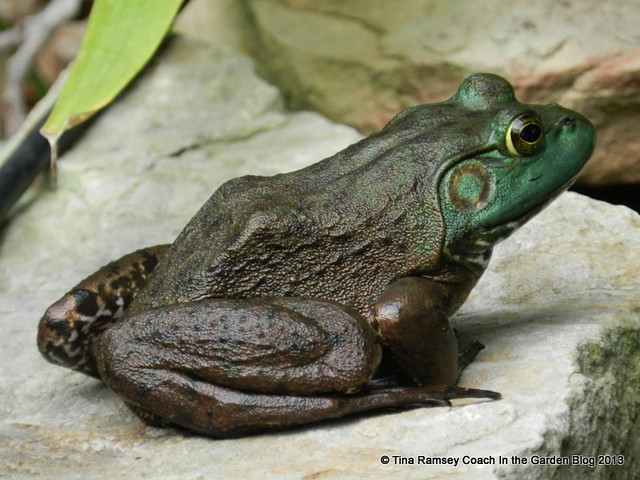
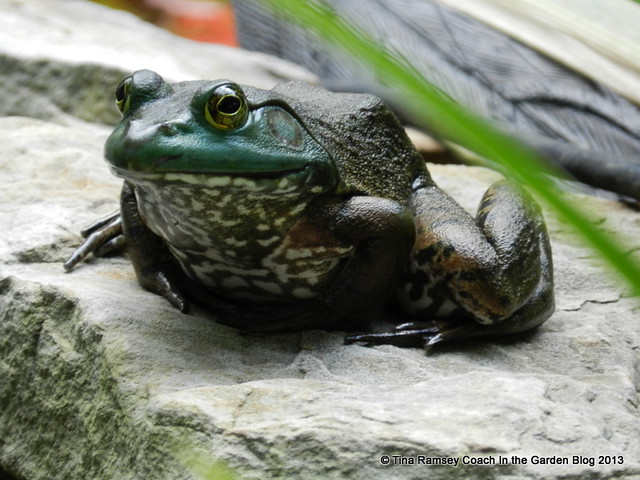
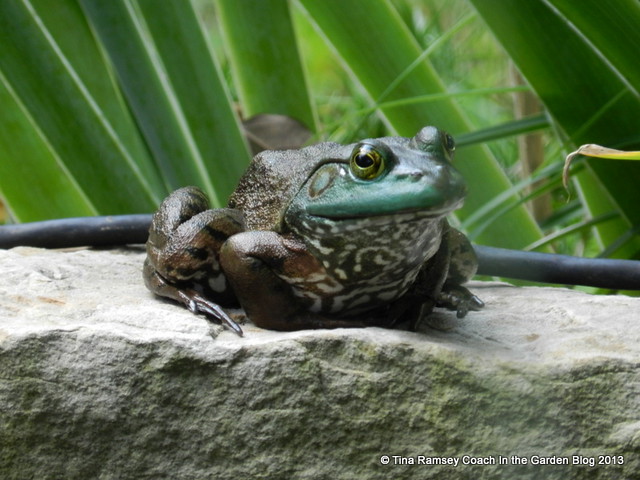
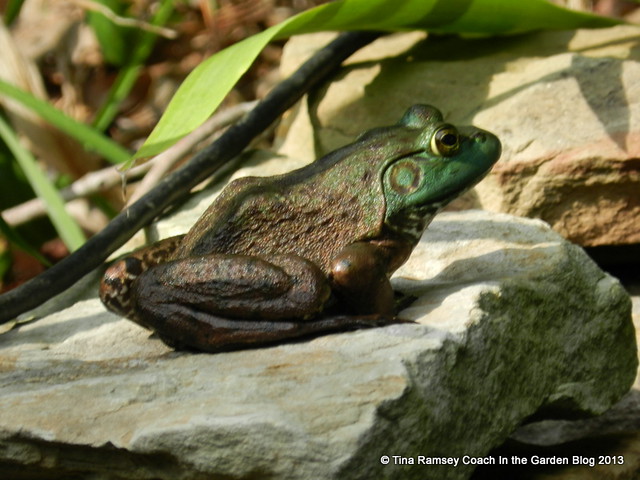
We've had an exciting but elusive friend living in our koi pond for several months now. This elusive friend is a green frog (I'm pretty sure anyhow!) It is finally getting accustomed to us so much that it is allowing me to take several pictures and also allowing visitors to view it. Two nights ago when my daughter was here she spotted it under the rocks and told me to put my finger down by it. Uh-huh!! This frog is as big as my hand when balled into a fist and these kinds of frogs can eat fish and other prey and my finger just might look like a good snack. Instead I brushed my camera strap by its nose and this finally prompted it to jump into the pond and swim across it to its hiding place amidst the rocks.
DSCN8286
When the weather first warmed up in the spring we kept hearing a huge kathunk from a frog or two in the koi pond right outside our living room windows. The noise was so loud it almost overpowered the television but we sure enjoyed the sound. After some investigation online we found the call to sound just like the one in the video below. 
DSCN8284
So when this frog began being more friendly and not jumping and swimming away upon our approach to the pond each day, we were pretty sure we knew what kind of frog to investigate. But boy oh boy I never knew these kinds of frogs would live in a small 750 gallon koi pond! In the past we've had pickerel and leopard frogs take up residence in the ponds and while I don't have any problem with the situation; I worry that over the winter the frogs will not have a safe place to burrow due to the vinyl liner in the koi pond. Last spring when I was setting up this pond I decided to divide a water plant from the bathtub pond and when I opened the pot up there was a frog hibernating! This is probably not a good thing for the frog. Lucky for it last spring was rather mild. I guess this year I just need to beware and not mess with the aquatic plants until the pond warms up because I don't guess the frog will be so stupid it will not find a safe place to hibernate over the winter. It's not like I can catch it and relocate it so I plan to enjoy it. 
DSCN8279
 I think this frog looks kind of like Kermit the Frog. A day before my daughter came for a visit this frog jumped into the pond and then surfaced and stared at me. I actually thought it was fake because it looks so unreal and was so big floating above the water, but isn't it handsome?


in the garden....
Words and Photos Property of In the Garden Blog Team, In the Garden
Monday, August 12, 2013

Joe Pye Weed Sure Brings in the Butterflies and a Helpful Visitor


DSCN8125
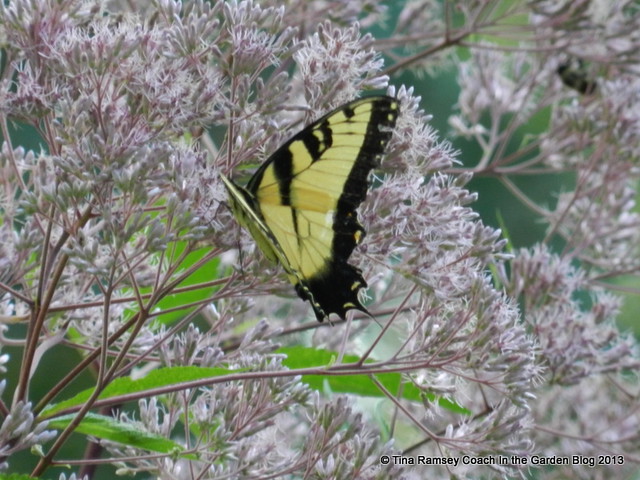
When I am not working on the land and establishing the orchard and gardens there I can sit on my back deck and watch a flutter of movement on the massive Joe Pye weed (Eutrochium (used to be Eupatorium) purpureum) growing my garden. What a delight!
DSCN8154-001
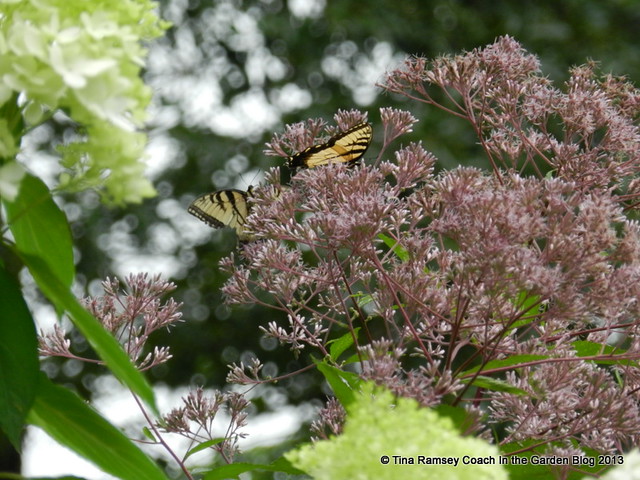
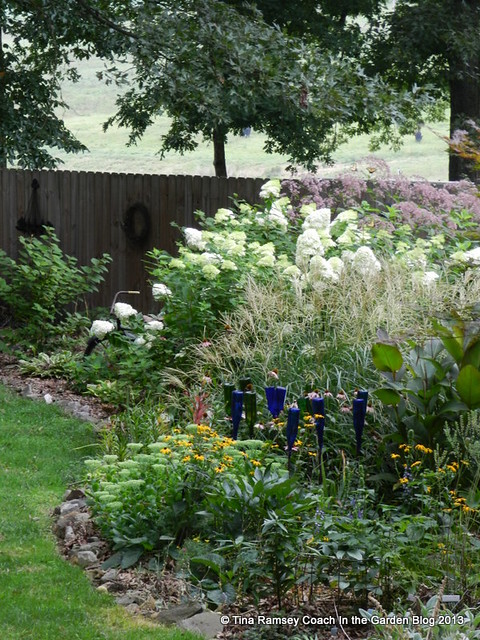
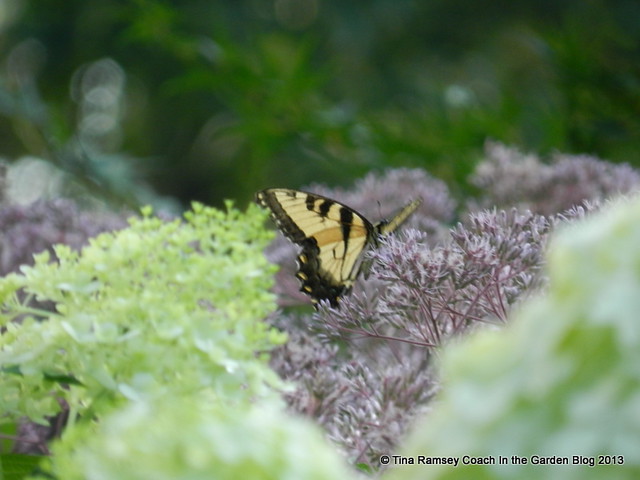
I have never seen the Joe Pye get as big as it has this year. I am quite sure all of the rain has had a lot to do with that but I also think my siting of the Joe Pye worked out well too. I have it sited in a low area behind some 'Limelight' hydrangeas where it will get part sun. These Joe Pyes are fully seven feet tall and in a clump about 6-7' round. The amount of swallowtail butterflies is staggering. I can't even count them all.
DSCN8151
Looking closely at this picture of the garden along with Joe Pye weed you can see several swallowtails on the Joe Pye Weed even at this distance; which is on my deck and is about 100' away.  More on this garden later. 
DSCN8159
Not Joe Pye weed but a fascinating creature all of its own. While moving some hay bales on the farm I was introduced to this critter. It was happily sleeping under a hay bale I rudely moved. Thinking is was a mass of slugs at first I almost took my shovel to it. I am so glad I did not! This is what I believe to be a rat snake and rat snakes are a gardeners friend. They eat rodents; which is very important in my garden. Additionally, rat snakes are not dangerous to humans. Farmer Fix-it and I simply looked at it and moved on. When we next looked at the hay bale this snake had quietly disappeared. We did a little research on the blue eyes and believe them to be because the snake is getting ready to go through a shed cycle. We found that most interesting.
DSCN8124
Finally, one last picture of a swallowtail on the Joe Pye weed. If you like butterflies you will surely want to plant Joe Pye weed. I have always grown it in my garden but I have never recommended it to clients because its bloom cycle is rather short and because Joe Pye can get rather straggly. That will change now....

in the garden....
Words and Photos Property of In the Garden Blog Team, In the Garden
Friday, August 9, 2013

Moving the Wisteria Arbor: Now Renamed the Grape Arbor and a New Grandbaby


DSCN8178
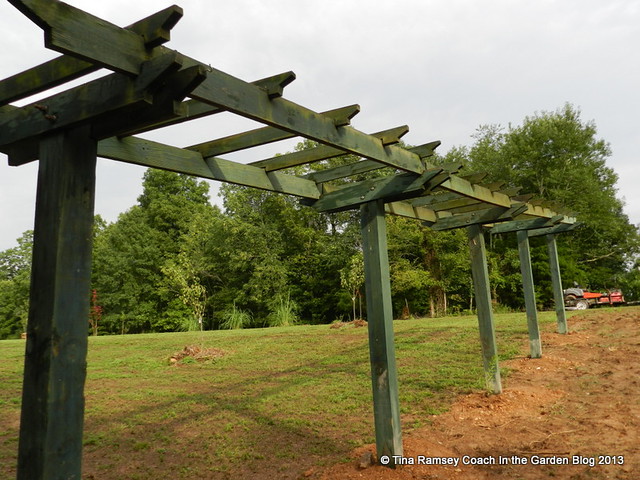
The farm is coming along mighty nicely! It helps me so much that Mr. Fix-it is on furlough and has been able to do some real work on the farm; specifically in the orchard area. Due to the shortfalls in the government budget Mr. Fix-it's job has not been funded so he has been home all the time and it is a joy! Our most recent project was taking down the wisteria arbor and moving it to the orchard area to now become a grape arbor. The results of several days work (in the rain I might add) are pictured above. I think it was worth it what do you think?
DSCN8176
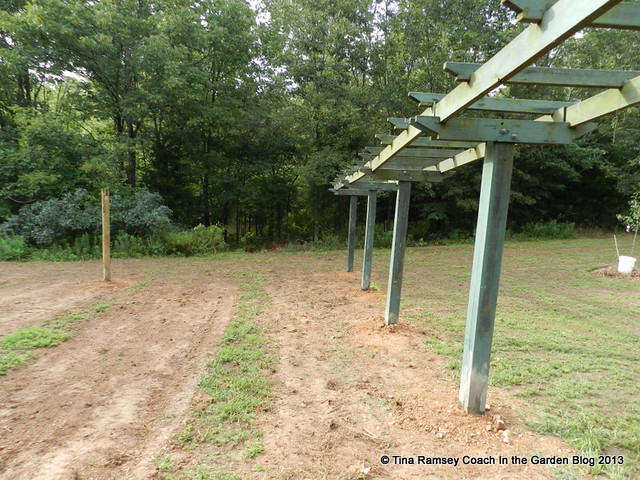
This picture and the one above are looking south. Our huge field is oriented basically west to east with a slight slope to the north. In order to maximize sun and air flow I oriented the orchard on a north/south axis. The hill you see slopes slightly to the north which is toward me (the picture taker) and our pond. We are looking south in the picture. Orientation of fruit and vegetable producing gardens is a very important thing so that is why I am trying to explain my reasoning for how I oriented my area. I really did not want rows downhill toward the pond due to erosion but this orientation simply made the best sense to me. I have seeded the hillside and will establish the beds with mulch very soon so erosion is not really a big problem. I do have to be careful about any chemicals I put on this field though since all runoff does go directly into our pond. Rows on a east/west axis would have helped to slow down water run off a bit but then again the lower plants would be very sun challenged. I simply liked the orientation this way.

The disturbed soil is where Mr. Fix-it box bladed the turf so that I can easily turn over the beds with my shovel. Once all of the soil is turned over and amended (organic material such as cottonseed meal and greensand) I will then begin planting and mulching and establishing the beds. The plants and fruits are all waiting at Tiger Gardens 1 and are really looking forward to being able to stretch out-as is the gardener!

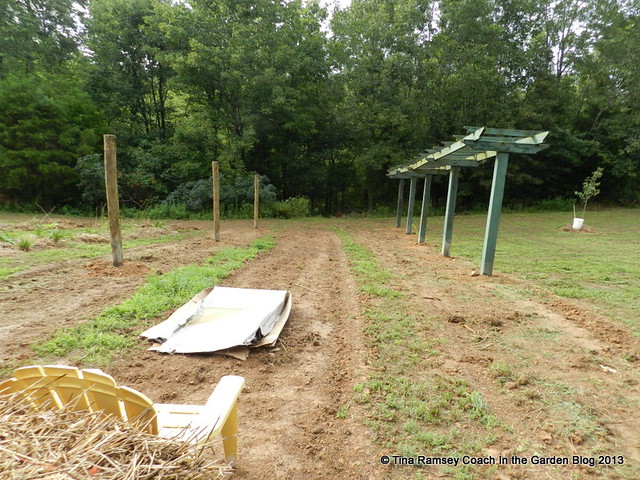
You can clearly see three beds in this picture. The first bed is under the grape arbor. I will plant two muscadine type grapes on the second and fourth poles with the plants planted on the south side of the 6"x 6"s. The cultivars are 'Cowart' and 'Dixie'. Both of these muscadine grapes are recommended for the south and I am hoping with my research that I will not have to spray these grapes in order for them to be productive. Both grape cultivars are self fertile but by planting two different varieties I increase the chances of good pollination of these grapes. Muscadine grapes need 20' of trellis per grape vine. The grape arbor is about 35'; which will mean each grape will have about 17.5' of trellis. It should be enough for them depending on my pruning techniques. Ideally each grape will cover the top of the trellis within a few years. I suspect that will happen quite rapidly and before I know it I will be posting a picture of the mature grapes! 

The next bed is a flex bed. I have not decided what I will plant in this bed. It will be flowers in the form of perennials or bulbs, or it will be a collection of hydrangeas. I just haven't decided yet but whatever I plant there will be fairly low growing (under 4-5') because I don't want the grape arbor or blackberry/raspberry trellis crowded. 

The third newly dug bed has four fence poles placed in it spaced 16' on center. This area will be the blackberry and raspberry patch. I have a ton of 'Canby' raspberries in my current garden as well as thornless blackberries that are dying to get out of their crowded accommodations into the new 48' long bed. I have not installed the trellis system yet but it will be made of cabling that will be threaded through the fence poles. The trellis will be permanent as are the fence poles since they are all concreted into place.

DSCN8180
Here is the view looking north. If you peer closely you will see the pond way down in the woods. It is the background between the cleared tree trunks. Mr. Fix-it and I are working so hard on doing so much that we find we only get a little bit done at a time. The pond has not been a big priority but we are slowly cutting a path down to it and clearing the undergrowth away from the water so we can see the pond and have some room to enjoy it. The grape arbor points to the path entryway down to the pond. This is where Mr. Fix-it likes to spend his time when he cannot help me. On this day Mr. Fix-it caught seven little fish (bluegill--thanks Skeeter!). Our pond has been fished out it seems, but we hope to restock it this fall and next spring.
DSCN8181
A longer shot looking down the rows. The raspberry/blackberry patch is not done yet. I still need to turn the soil then install the trellis wire. More on it later. The grape arbor is complete but we have not planted the grapes yet. We do have both plants and will soon plant them out. The little tree to the right of the grape arbor is one of our three pears. We planted a 'Moonglow', 'Bartlett', and 'Kieffer' pear tree about a month ago. We purchased them at Rural King when they had their big sale and got a pretty good deal on them ($10 per tree). These cultivars will work with pollinating each other and in a few years we hope to get some pears from the trees. More on the fruit trees later. So far since the house is not built we really can only play on the land where construction is not anticipated to be. The orchard is a big part of it so we are really focusing on it.
DSCN8051
To get to this point we had to spend a few days pulling down the wisteria arbor from Tiger Gardens I. The original arbor was designed primarily as a privacy screen from the adjacent property owners. As a bonus it supported two wisteria vines and a 'Dropmore' honeysuckle vine. The whole thing worked very well for many years. Once that neighbor moved I really did not need the privacy as much and I had already cut down the wisteria (two years ago but it is STILL coming back to this day) so it was time for the wisteria arbor to turn into a grape arbor. A ready made one for the new land! We used the tractor to pull the large 6" x 6"s (a tough job since they were concreted in) and took the rest of the arbor down using primarily a drill since it was mostly all screwed together. Big kudos go to Mr. Fix-it since he did most of the work because I was out of town this past weekend visiting my daughter and granddaughter in Louisville. 

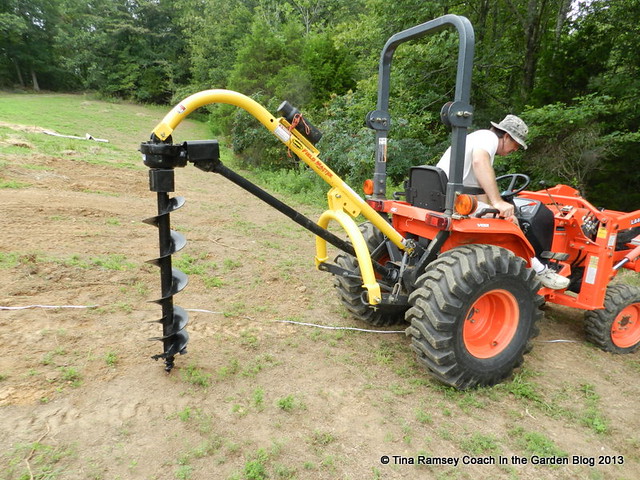
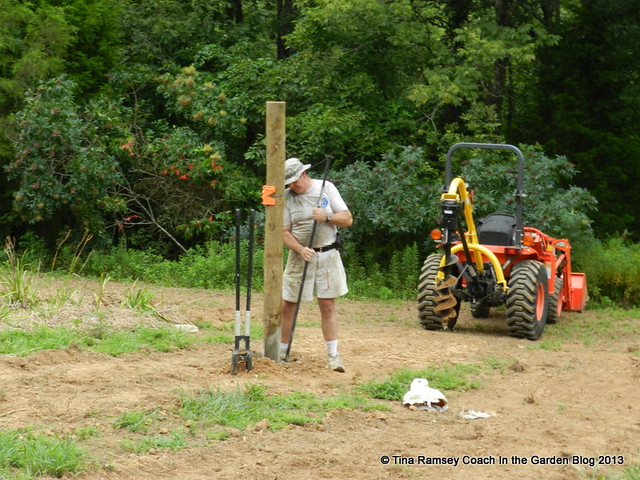
This past Tuesday Mr. Fix-it and I were able to dig nine holes and install the five 6"x6"s as well as the four fence poles--all in one day! This was a big day as digging deep holes is hard work but we cheated. We purchased a power auger for our tractor and I can't tell you what a lifesaver this auger was for us. Here is Mr. Fix-it (official tractor man) getting ready to drill his first hole. The first hole went quite easily but on the second one we hit some rocks and had a tougher time. The rocks have the capability of causing a shearing of the shear pin on the auger. This happened two times and Mr. Fix-it actually had to leave the site for a few hours to go buy some more shear pins. Once he got the hang of it all though it was smoother sailing.
DSCN8057
After the holes are dug you must of course insert the poles, level, then pour in the concrete and water and tamp it all down. We always use fast setting concrete that we pour into our holes dry, then add the water and mix it all real well with a very heavy tamper. That is what Mr. Fix-it is doing on the raspberry/blackberry pole.
DSCN8048
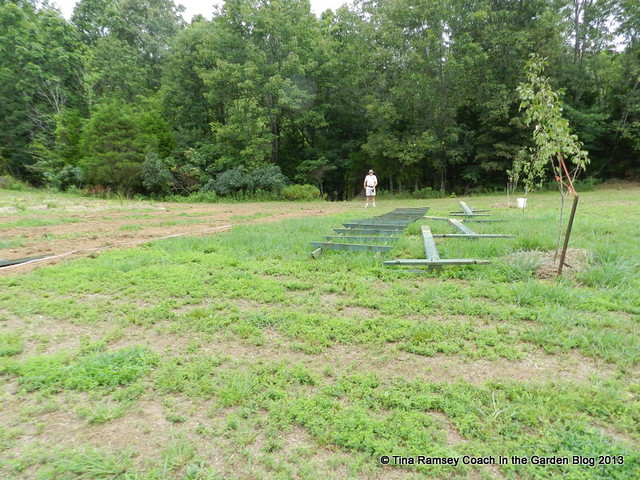
Prior to beginning the job we laid everything out near its final location. The arbor was a very well built trellis and held up well on the move. Not only that but when we put it all together again it fit perfectly!
DSCN8054
Each of these crossbars and support poles are eight feet on center. There are two crossbars per support pole and each of them is notched to accept the overhead trellis. Once everything is in place it is all screwed together tightly.
DSCN8146
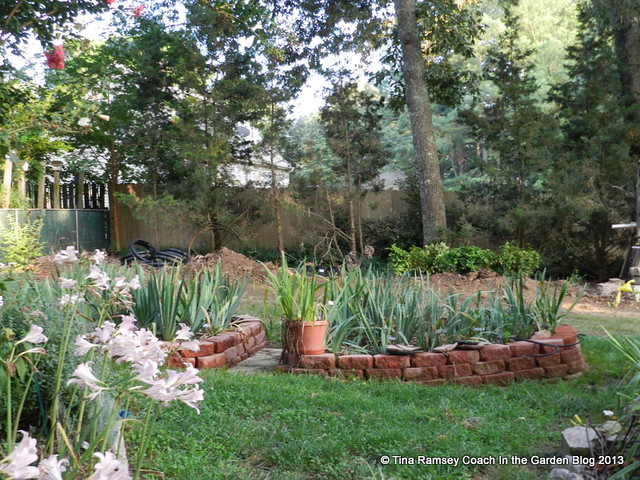
I did not take a picture of the wisteria arbor before we took it down but here is the after photograph. We had to level the ground below the arbor because there was a raised bed there. The dwarf nandinas were all dug up and are awaiting transfer to the new garden. The raised planters in the foreground contain about 40 cultivars of bearded irises. Those are slated to make the trip to the land soon too. 

It has been raining a lot here in my area of Tennessee. Not really a lot of rain but a lot of annoyance. Once the ground gets good and saturated on the land (it is not as of right now) we next plan to aerate our back 40 and seed with Kentucky 31 grass seed. There is an erosion problem on the big hill that needs to be fixed before winter and I think the grass seed will help. I may also plant some ditch lilies and Joe Pye weed back there too. We also need to finish clearing by the pond, dig and mulch the beds, move the plants, and establish the wildflower garden. All of this will need to be done by fall. Once the first freeze comes we will move to our driveway area. It is a mess and full of glass and rocks and all kinds of trash. It will take some time to clean it all up but we can't do it now since the poison ivy is so lush and happy and mixed with the trash. In other words it is always something.
DSCN8084

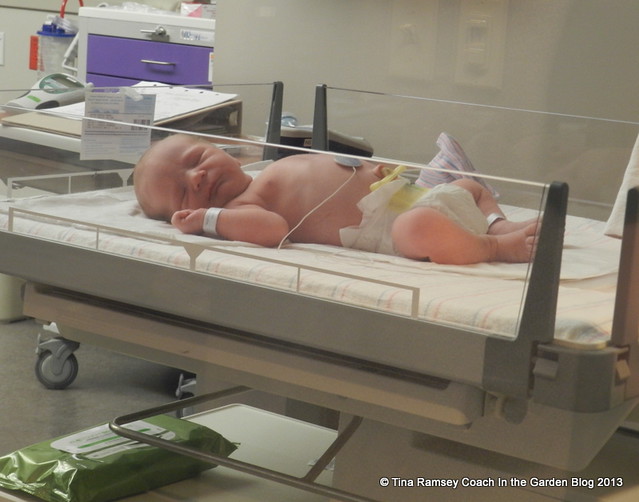
On the day we spent digging those nine holes and installing the poles we were gifted with a fourth grandchild. This one is Riley. The other three are: Joshua (6 years), Adella (20 months), Everleigh (4 months), and now Riley. Riley came into the world big and healthy and we are all excited and happy for good things in life like new grandbabies.....

in the garden....

Words and Photos Property of In the Garden Blog Team, In the Garden
Thursday, August 8, 2013

Shed Ramp

BY SKEETER
Preferring "Before" and "After" photos for documentation, I looked for an older Shed photo. I could not believe that I had never taken a photo of the shed in the past. I also could not believe I did not snap a "Before" photo of the shed with this new project here in my GEORGIA GARDENS! Well, Duh.... So I had to dig deep into some files and find a photo to Crop therefore, a Blurry Photo Finish.
 
When we purchased this house in 2001, we were lucky to have a shed in place. We love this shed but not the drop off at the door or the lack of power hook up. We had told ourselves at the time, that we would have electricity run to the shed and build a ramp as soon as possible. Instead, I put in pavers and a hard plastic step as a "temporary" solution.
 
Jumping 12 years ahead, we have no electricity run and just now getting around to building a ramp! We had a makeshift step that got us in and out of the shed so it seems, a ramp was put on the back burner. Does this happen to anyone else out there? Ha...

Removing the old step, The Saint discovered two Scorpions. 
This one tried to hide under the lava rock. Resembles a Cricket to my eyes, until you see the curled tail complete with stinger. We have two different types of Scorpions here in Georgia and a third type is moving northward from Florida. Click HERE to see more about these creatures. 
I believe I was stung by a Scorpion a while back when digging in the Compost Pile with naked hands. I know better and will never touch the compost heap again without wearing gloves! Anyway, being a bit upset at the sight of Scorpions and little knowledge of them, these two are no longer on this earth. Sigh, I regret that choice after reading the link above. Scorpions like most critters do have a place on this great Earth so I shall never place harm upon another Georgia Scorpion.
It was a hot and steamy day but the Saint, with the aide of a neighbor and his cordless tools, built a Ramp! 
It is now so easy to guide the Push Mower into the shed verses, lifting and fighting the doorway. Not to mention, will be much easier on aging knees and backs.
With removed stones, I have another project on mind. I shall wait for cooler days to tackle that project. (Just look at those Stinking Sweet Gum Tree Seed Pods. Grrrrrr...) Hopefully that project will not take 12 years like it did to get the SHED RAMP, In the Garden...
 
I shall be MIA for a bit. Happy Gardening!

Words and Photos Property of In the Garden Blog Team, In the Garden
Tuesday, August 6, 2013

Formosa Lily

BY SKEETER
  The Beach Planter continues to grow here in my GEORGIA GARDENS. Click HERE to see a follow up and link to its beginnings.
 A bargain find Flamingo has landed.
 These bargain found Frogs call the planter home as well.
 This photo was snapped on June 4 with the Formosa Lily about the same height as the Palm...
 This photo was snapped July 22 with Formosa Buds showing as well as a Sweet Gum Sapling in the middle of the Palm.
 This photo was snapped on Aug 2 while the Saint held up the top heavy plant. Ha, the sapling returned in the Palm as I have failed to pull the root but rather snapped it off.
 These beauties came to my garden by sneaking into a gift of Canna Bulbs passed along to me by sweet Lola! 
 I do believe this Formosa Lily is about ready to be divided.
 We stabilized Lily to the stake so it does not fall to the ground.
 She is full of Pollen.
 And holding onto raindrops with our plentiful Summer rains.
I cannot Thank Lola enough for this FORMOSA LILY, In the Garden...

Words and Photos Property of In the Garden Blog Team, In the Garden
Thursday, August 1, 2013

Plant Loss

BY SKEETER
 Look at the beautiful Phlox photographed on July 3 in my GEORGIA GARDENS 
 Same spot today. Sigh, they are no longer with us.
 Just behind the Phlox, you will see some of the St John's Wart looking sad.
 Newly planted Angel Trumpet has lost most of its leaves.
 A few feet to the right is another Angel Trumpet which is yellowing.
 This photo also snapped on July 3 shows Vinca happily creeping along in the vicinity.
 Today, the Creeping Vinca is loosing its leaves.
 Nicotiana, no more. 
 Periwinkle is yellowing and looking mighty sad.
 Dusty Miller, dying a slow death while Ivy, Iris, Lily and Weeds thrive.
Mediterranean White Heather is not looking too well.
 Creeping Phlox is not happy.
 Schizophragma Moonlight is starting to yellow.
 The above photo of Butterfly Bushes was snapped on June 24.
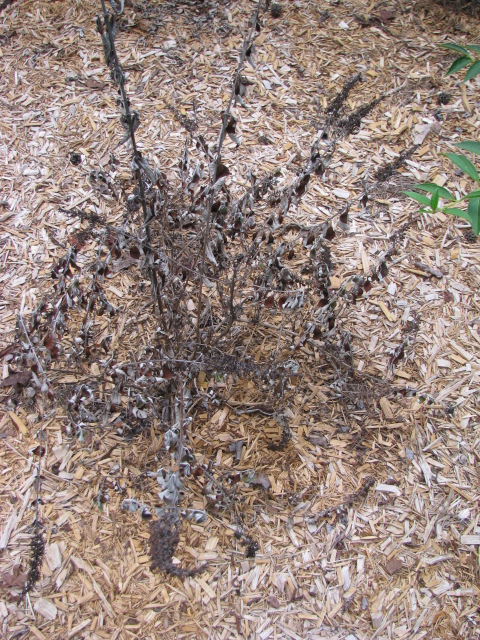
 Today, the same Butterfly Bushes that I fear are totally Dead while Elephant Ear and Forsythia flourish nearby. 
 Yellow, Pink, White and Purple all gone. I shall leave these in place just in case a root remains alive.
 Red Twig Dogwood not looking good as the weeds enjoy moisture.
 Leaves dying and falling to the ground. 
On the way to the Mower Shed, the Red Rider sank into the soggy grounds and became stuck for a day. I know better then to plant things in the path of water run-off. When you have more drought conditions then rain, well, I seem to forget what can happen when plants stand in water too long. The Rains have been happy to the grass, evergreens, elephant ears and other things while I have had much PLANT LOSS, In the Garden...


Words and Photos Property of In the Garden Blog Team, In the Garden