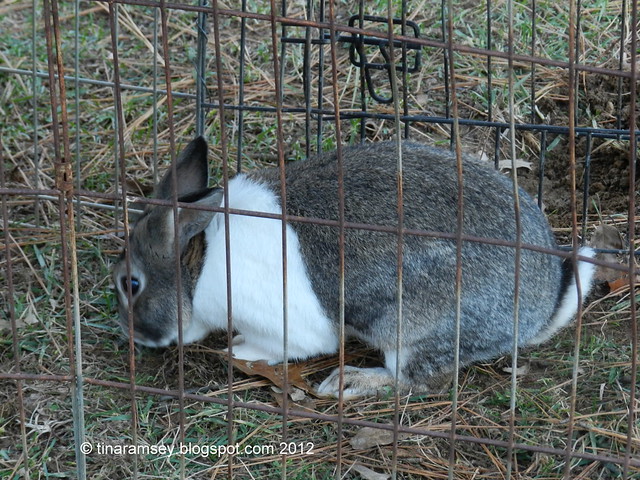
Digging of the pond has been the easy part of building my new pond-and Cuddle Bunny-our resident Fertilizer bunny agrees! He is my constant helper in the garden while I have been working on the pond. I thought I'd share some pictures of the frontyard transformation and also document my pond building experience. Today's post in only on digging the pond and digging in the new broken concrete patio. I do have a nearby broken concrete patio but putting in another nearby patio where I can set up a table to relax and read my morning newspaper seemed like a good idea to me. I'll show you the digging of the pond and of the new concrete patio today.

November 30, 2011
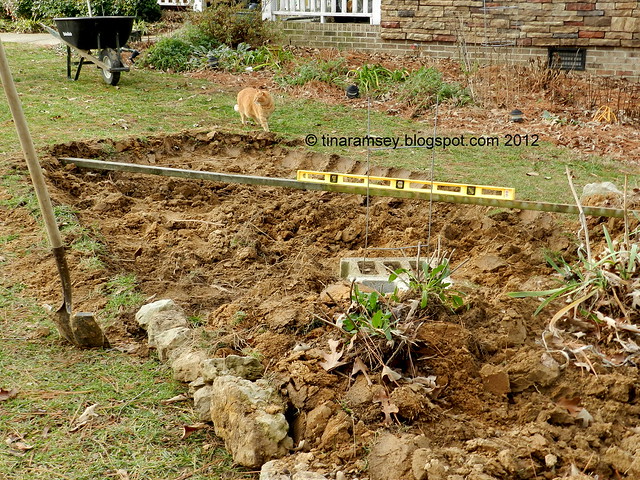
This is the initial area of the frontyard looking north from the front porch of the house. My criteria for choosing this location for my new pond was simple. I wanted the pond to be visible from as many points as possible which included views from both inside and outside of the house. I also wanted a patio nearby to set up a small patio table which would not block my view of the pond from inside of the house. This was a challenge since the frontyard slopes towards the north and since the frontyard is mostly landscaped already. Nonetheless I found a spot right next to the existing Redbud Garden. The Redbud Garden is the garden on the other side of the hose in the above picture. This garden will be transformed quite a bit by the building of the new pond mainly due to the grade change and rearranging of some of the existing perennials and shrubs in this bed. The hose signifies the new prospective pond's location. By default the concrete patio was planned to be closest to the camera in this shot.

December 3, 2011
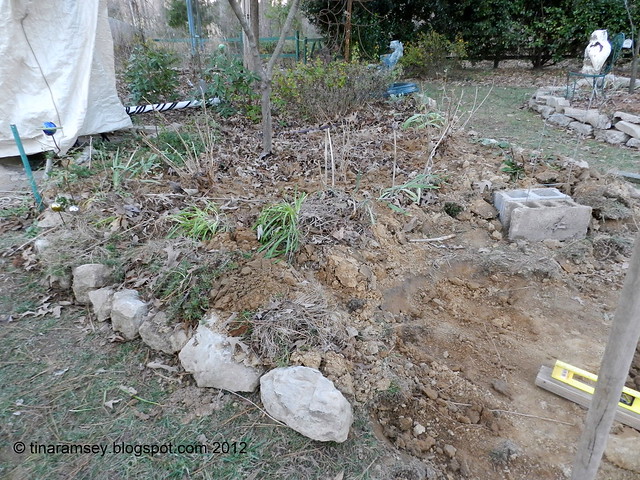
The first step I had to undertake once I selected my spot for the pond was to remove the rock edging around the Redbud Garden. Let me say this about the pond location simply because it seems important to note the site criteria. According to all the literature I read on siting a pond the pond should not be in full sun if you can help it, and it should not be sited under trees that will drop leaves and other debris in it. This was a hard one for me because I have lots of trees. This location I selected will receive a good 4 hours of sun and is near a deciduous tree but not too near that the tree is directly overhead and that the tree roots will interfere with the pond. I lucked out with the siting. Okay, on to the rock edging, I moved it out trying to envision where my pond edge would tuck into the Redbud Garden. Once the rock was moved out I began digging. All initial soil was moved into the Redbud Garden in order to build up that garden edge since it was lower on that side versus the side closest to the camera.
December 3, 2011
Here I am standing on the other side of the garden/pond area which is actually the north side looking west at the house. This pond area has trees on the east side and the house on the west. There is enough of a gap in the canopy in order for the pond to get a bit of sun but not full sun. I suspect I'll have trouble growing plants that require a lot of sun but that's okay since I plan to grow a select few number of plants and as far as I know they are all shade tolerant. My resident orange cat we call Orkin (for pest control) joins Cuddle Bunny in the frontyard and likes to see what I am up to. She is a sweetie! I found a long 2x4 board that would span my pond length and placed it in place to help me see how much I had to build up the low side of the pond. I guestimated the pond would be about 10' long by 8' wide. This is the same size as my daughter's pond she had built and I loved the size and the pond itself. It is what inspired me to finally build a pond for myself and family.
December 3, 2011
As you can see I made quite a lot of progress on December 3rd with digging the pond. I am very lucky here in my garden to have stone free soil with very few roots in the way. I love digging in the dirt so I did not mind this part of the job at all. All soil was repurposed in the garden elsewhere. I used a good amount to build up the lower side of the pond area, to enlarge some frontyard gardens, to fill in holes in the backyard that the new dog AJ dug, and to build up some low areas in the yard. It is amazing how much soil can come out of a little hole but also amazing that if you try hard enough you can find a spot for all of that soil in the garden. I never like to bring in extra topsoil preferring to use only soil from my garden. I have had topsoil brought in before (three times) and two of those times saw the soil contaminated with weeds. One load had tons of bulblets (which I found out later were Star of Bethlehem flowers) and the other load was full of wild garlic. I am still working to get rid of that wild garlic but gave up the fight on the Star of Bethlehem. Since my bad experiences with topsoil I don't think it is a good idea to bring in outside soil if there is an alternative.
December 3, 2011
I placed the two cinder blocks in place to simulate the orientation and location of my proposed waterfall. This is a small and simple pond. I am not into elaborate major renovation in the garden so did not feel the need to build a big stream or a waterfall with multiple falls. My waterfall will be quite small and in scale with my pond vision-I hope. Deciding up front where the waterfall will go helped me to select the skimmer location and this in turn helped me to site the new broken concrete patio. I had a small metal patio dinette set I found while junking and while it had a perfectly good home on the Secret Patio in the backyard it was not getting any use. Of course that may have been due to the fact the chairs had no seats. lol I really need to fix that situation soon!

December 3, 2011
This angle is looking southeast away from the northern edge of the house. This area is the lower area of the front yard and you can see in this picture how the pond elevation angles up. This lower edge is becoming an issue for me and I am not quite sure how I'll deal with the grade change at this point.

December 21, 2011
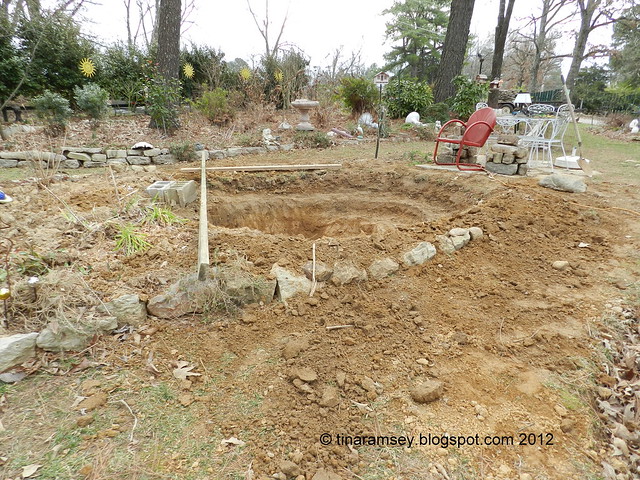
This shot if from the southern edge looking north toward the pond area. My dear husband Mr. Fix-it and my son Jimmy helped me gather some concrete chunks from a local renovation project just two miles from my home. I wanted huge concrete chunks so that the chairs and table would sit would on solid ground without sinking into the soil. Getting the chunks proved a challenge which took us two trips on different days in order to gather enough chunks for the patio. My vision when first starting this pond was to make a small seating area around the pond for a bench. I quickly changed my mind when I thought of how much I love to read my morning newspaper outside. I decided on a table and a corresponding patio in order to accommodate the reading of the newspaper. This meant the second trip to gather more concrete blocks was needed because the initial amount of chunks we gathered were only for a small patio to accommodate a bench. These chunks are very big and weighed more than the three of us could lift even when working together. We wound up using a dolly and lever to move most of the chunks around due to the heaviness of them.

December 21, 2011
I began digging in the concrete patio on the 21st of December. It happened to be the day our new heat pump was installed. Our upstairs heat pump had really been on its last legs since last winter but finally quit working early in December. While losing that heat pump was a blow it was actually a good thing. Our local electric company has a low cost loan program for customers who need a new heat pump and we really needed a new heat pump. Our old heat pump had lasted over 20 years; which I think is great! But being so old it was pretty out of date and used the old style refrigerant which is isn't even sold anymore. Bottomline was we got a new energy efficient heat pump for a low cost and for the first time in five years all three upstairs rooms are the same temperature. That's a nice thing! At any rate the two men who installed the new heat pump were good sports and helped me to move some of these concrete blocks. They were a big help because I got a lot done that day that I wouldn't have otherwise.
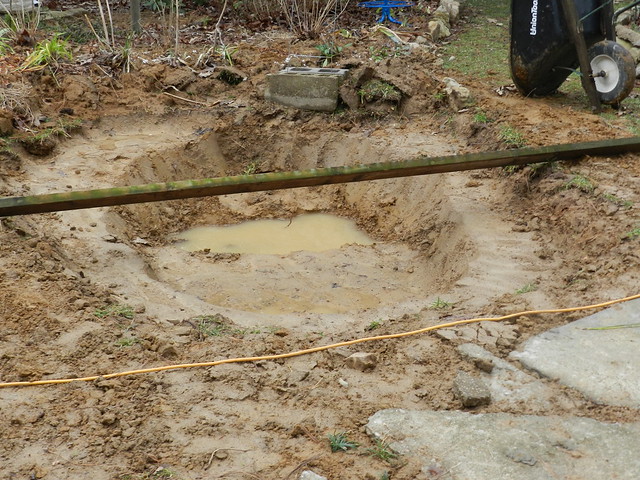
December 27, 2011
I had almost had the pond completely dug out when the rains came. And boy did they come. The ground became saturated and even when I pumped out this water the hole kept filling up with more water. It was a frustrating time trying to get the pond dug but I kept on digging even in the muck. You can just see the edge of the newly dug in concrete patio here. Right in this corner where there is a niche between the concrete and pond is where I plan to put the skimmer. We shall see how that goes when the time comes-I'm not yet to that step yet.

December 27, 2011
Here is a longer shot of the concrete patio with the little dinette. Notice the missing seats? I need to make a template and cut out some plywood very soon as I've been a bit negligent on taking care of this set (Completed!). But hey, what can you expect when you find a whole patio set on the side of the road? It certainly won't be in perfect shape and this one needed some work. There was also no table top but I lucked out and found a piece of tempered glass for $30 in an antique store in Evansville Indiana that fit the table perfectly. I love glass in my garden and home. It is so shiny and in this case works well so when I am sitting at the table I can still see the pond through the tabletop! The seats will be plywood with pre-made cushions on them when I finally get around to making them.
January 6, 2012
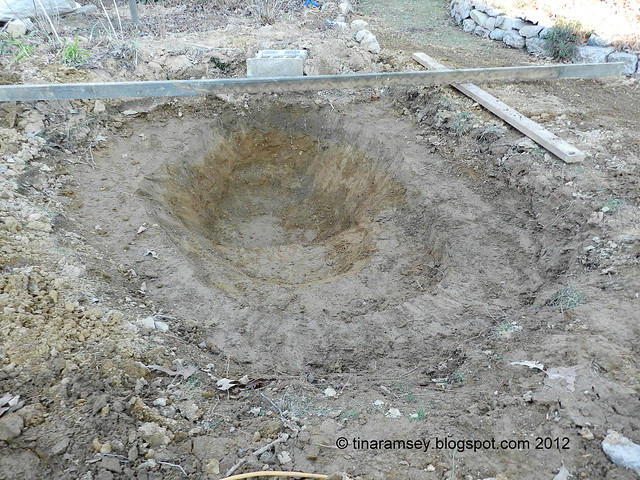
When this past Friday came I was very excited to finish digging the pond because it was predicted to be an excellent spring day (in winter??); then I had to work:( At any rate I got off work early and came home to hopefully finish digging the pond. It was vital I finish the hole since the weatherman was calling for rain this weekend and digging in a hole with water is like bailing out the ocean-a losing battle. Since the days are getting longer I actually had plenty of time to finish digging the pond and here it is Friday afternoon-complete-or so I thought.

January 7, 2012
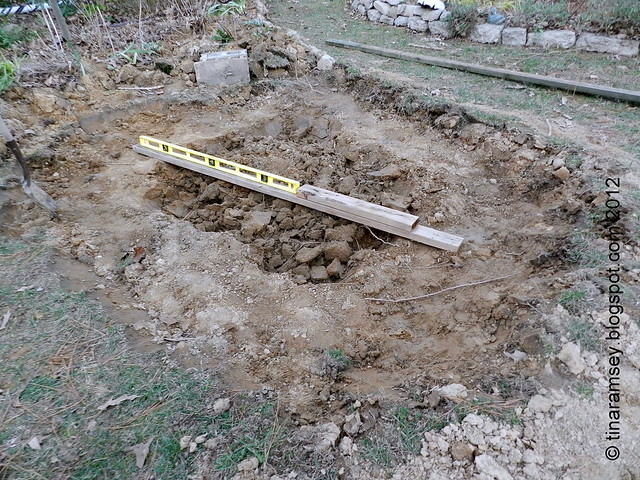
When I spoke to an expert on ponds (a pond store in Louisville) on the phone he suggested I dig a few more shelves (this was while he was looking at my pond on my blog from the previous post-blogs sure can help you out in many ways in that you have pictures online that professionals in other locations can see!). That is why I added the third and lower shelf to the pond as shown in the above picture and the one below. My dear husband however, said I needed even more shelves and that I should dig another one or two. The final result is as above. I added a niche in the upper left corner of the pond for plants.
Initially my plan for plants was to add them to the upper shelf in only two corners-the upper left and right corners on either side of the waterfall. Water garden plants need varying depths though and the upper shelf in my pond is actually what most pond folks call a coping shelf. It is where the rocks will go and I guess it will add interest. It is not really where plants are supposed to go but I will be putting some plants there. My plants will come from my bathtub pond in the backyard. My bathtub pond has two kinds of plants growing in it. The two are horsetail rush (Equisetum hyemale) and Louisiana irises (Iris brevicaulis or versicolor)? I plan to split them since they have done so well in the bathtub garden and add them to my bigger pond. I have not done anything special for them at all and I believe these two plants are the key to maintaining my small 35 gallon bathtub pond. I hope they will help to filter the water in the new big pond as well. I don't think I'll add any other plants. I might add water lilies at some point but they need still water to bloom so I'm not sure they would be a good choice. My friend Naomi plans to give me some pickerel rush so I might try them. This pond's purpose is to be more of a water garden pond than a koi or fish pond. I want it for ambiance only so it may morph into something more as time goes along. I am taking it all step by step.

January 7, 2012
The lowest part of the pond will be about 34-35" deep depending on where the water level comes up to. I cannot really envision it all right now. I had a grade change and built up the lower side. In doing so my pond seemed to grow a bit. Hopefully my 20'x25' foot liner will still cover the entire hole when it arrives sometime today or tomorrow (hopefully!). Not being an expert at pond building but being a pretty good hole digger I did not stay within my initial boundaries. This is problematic for me because planning is having to be off the cuff. We'll see how it goes soon enough. Fortunately my dear husband has a better capacity to envision things out than I do and he is helping to guide me a bit.
January 7, 2012
These last two pictures show the big picture and the grade change. Here we are on the north side of my home looking up at the pond. The rocks are my way of building up the lower side of the pond. Of course I expect to put a garden alongside the pond on this side as well. For me it is all about gardening. I am not sure how the liner will fold down into this area and how I'll edge it. That is the problematic situation I am having now. On the right side of the pond area is a small grassy path then the foundation gardens. I am having issues keeping enough of a grassy path which is vital if I want to get my lawn tractor around here in order to mow the front yard. It would be a good thing to make the entire front yard a garden but I'm not ready for that step yet. I like my grassy areas and they make perfect backdrops for the gardens so I think I'll keep them for now anyhow.

January 7, 2012
We're still on the north side of the house but closer to the road bordering my property and looking back at the house from the road area behind the Redbud Garden and broken concrete patio. The area slopes down to where I am standing and gradually raises up to the front of the house. Hence another grade change here on this side of the pond as well. The elevation change is gradual and not too great but it is still a change. The high point of the pond area is just to the left of the tulip chair you see on the new concrete patio. This is another grassy path around the gardens that I use for mowing the front yard. To the left is the Front Center Island Bed. The new pond is separated from this bed by the grassy path. It seems the longer I love here the less grass and more gardens I seem to have. But it's all good as I manage to make them work. I think gardens are a lot of work but are not as labor intensive as grass so if you find a good balance that you can manage you'll always have a beautiful spot of landscape. Problems come in when you can't maintain the grass or gardens and you get overwhelmed. It's easy to be overwhelmed but if you just take it one step at a time it all seems to come together.
Next up will be the pond itself. I still have a lot to do. I ordered a complete pond kit custom tailored for my size pond and needs. It will come complete except I added a UV light to my kit. I expect it today or tomorrow. I will have to lay out the liner, finish digging the waterfall area and fill the pond. Once it is filled and settled I can then tuck the liner and add the skimmer (once I drain some of the water so I can cut in the skimmer). I chose a skimmer to filter my pond for ease of access. We'll see how that goes. It seems most of my friends have submersible pumps within their ponds. My daughter has an external pump in her skimmer though and I really liked the ease of access.
One more general note on building ponds, I am no expert and have been watching lots and lots of videos online in order to teach myself but they can only help so much since each and every pond is a different animal. One thing that has helped me tremendously with building this pond is finding a picture of a pond online that I feel I like. It has become my inspiration for my pond and is saved as my desktop. I look at that picture often for guidance in designing my pond because there is no 'one size fits all' instruction manual out there. There seem to be a lot of videos online but some focus on only some areas such as siting the pond, adding the skimmer or bottom drain, or making a waterfall. They are all helpful but each situation is different. Even with the videos and studying pond books I am still feeling pretty ignorant when it comes to building this pond. I have no idea how to do the plumbing but think once the kit comes in it should be fairly explanatory for me. I am taking it step by step but just know it will be a good addition to my garden. My friends all tell me I'll want to be nowhere else but by the pond once it is installed. Not sure about that because I love all parts of my garden and rotate around it for sitting-hence all the sitting areas-nine at last count. I know this post is long but it sure helps me to remember my steps and processes in the future so it is a good scrapbook for me.
8 January 2012
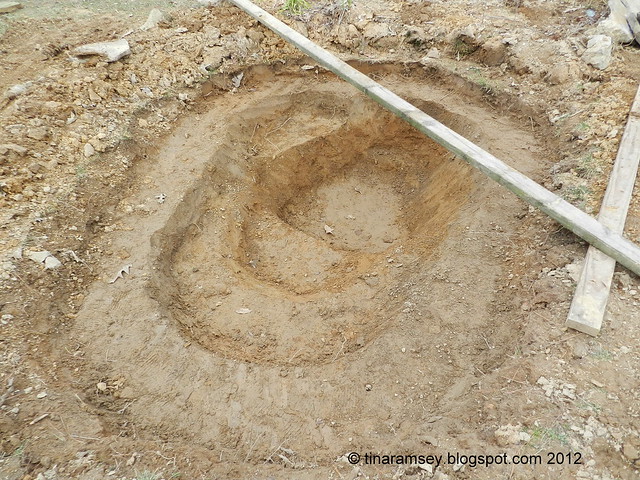
Okay, I lied about having the pond completely dug. In fact, the above picture is still not the finished product. While researching ponds some more tonight I read where you should not have shelves in front of the skimmer. I guess I'll be digging that area out tomorrow but that picture will have to wait a bit. The change in this picture and what I had to dig yesterday was the upper part of the plant/coping shelf where the waterfall is planned to be located. I had not dug that area down and while looking at my inspiration pond information I saw where the rock was stacked in front of the waterfall weir. I figured I needed a shelf for that and did not have one initially.
in the garden....
Words and Photos Property of In the Garden Blog Team, In the Garden
Oh my goodness, what a wonderful project you are working on. You are such an inspiration. I can hardly wait to see the end results, then watch the progress of gardens growing around it, etc. Your patio is nice as is your patio set.
ReplyDeleteThank you for sharing your pond building experience.
FlowerLady
Hello Tina,
ReplyDeleteI clicked on the link to the Pond That Inspired You. That is a truly beautiful pond! I envision yours to be beautiful, too, and uniquely yours. Are you going to have fish in it?
Love your bunny rabbit, too!
Lea
Tina, I am so impressed with all that you have accomplished! All that digging would be daunting to me, but I hadn't even thought of the details like the shelves and grading. You're an inspiration to all of us of what one woman can do if she puts her mind to it! I can't wait to see the finished pond--this will be a lovely place for that morning newspaper reading.
ReplyDeleteYour little bunny is so cute--how do the dogs and the cat feel about him?
Good Grief Charlie Brown! That is a lot of work. It is going to be such an eye catcher when you are finished..you know around here if we see concrete being broken and removed, if we ask for it the people removing it will usually bring it to our yard as they have to pay to dump it otherwise.....
ReplyDeleteLove the bunny!!!
Wow, that's a lot to take in! You've been busy. For the tree leaf issue try taking bird netting and covering your pond in the fall. Then you can just pull it up and remove all the leaves at once. I would love to install one of these but I don't think we have the right spot yet and having small kids makes water areas a big concern! I'll just live the pond project vicariously through your blog!
ReplyDeleteWow, that is a lot of work. Excited to see the final project. That will be a wonderful place to sit & read your paper.
ReplyDeleteAll the hard work and many hours of research will pay off many times over with he wonderful pond. I had bought a large fountain, spray thing for the swimming pool but then we always kept the solar cover on so the thing never got taken out of the box. I can send that if you would like it instead of a waterfall.
ReplyDeleteThat is a lot of hard work you are doing! You must be exhausted after all the digging and moving concrete around. You are being really smart by taking the time and doing it right. There are many things I wish we did differently. I love that inspiration pond picture, that is my idea of a perfect pond.
ReplyDeleteHoly smokes this is a long post! I didn't really realize until I had to scroll to the end of it.
ReplyDeleteHappy New Year Flower Lady! Thank you so much for your always very lovely comments!
Lea, I liked that pond very much and hope mine turns out half as well. I will have some small goldfish and maybe a few koi since my friend gave me two baby koi. I love the flash of the orange fish and hope they will not be shy like the ones I currently have or else they might not be around long.
Rose, Thanks! Dogs are bad bad bad. They are banned from the frontyard as they both gang up on the rabbit and the cat. It gets to be too much. The problem then comes in with what do I do with them. One is okay but our new lab eats everything-books, Christmas presents, plastic-you name. He is five years young so there can be no excuse. When I put him in the backyard he digs up everything. It is a dilemma for me so I try to rotate his attention around. We may get him a shock collar to teach him better manners with the other pets. Lady is not so bad. Our third dog, well, she just lays around barely doing much and could care less about any of the other pets.
Lucky you Darla! Contractors around here also pay to dispose of concrete but they tend to move rather slowly so don't think long term about delivering it to folks who want it. All will let you take it away as long as you promise not to blame them if you get hurt loading it. Can't say as though that is a bad idea! Happy New Year to you!
Dave, No pond for you until those kiddos are big! I don't blame you one bit as I'd be worried too. I will indeed net the pond and hope that works. The acorns and oak flowers are problematic for me though. I hear a shop vac will work to suck it out so that would be great.
Lola, I hope so! I can envision sitting out here reading the morning paper and having breakfast someday. I only hope the work to maintain is not too much but I hear it will be worth it. If you get up here again be sure to drop by for a visit here!
Mom, I don't really want a fountain in the pond and if it is the volcano fountain that I remember from pools it would probably go too high but thanks so much for offering it! You should put it on Craig's list soon and get someone to take it off your hands. I suspect the little waterfall will be enough for me. My trickler in the back bathtub pond works out well so the waterfall should be enough-hopefully to drown out the traffic noise too. Happy New Year to you!
Catherine, Not exhausted at all. I love digging and it's been fun but frustrating. Now I have to dig the ledge part out that is going to be under the skimmer. It is a never ending process it seems. All total I only worked on digging the pond less than a week's worth of days but it took me over a month to do it due to other things. Such is life. Happy New Year to you!
I am tired just looking at this project, but it is very inspirational to see you undertaking it. Can't wait to see the results.
ReplyDeleteWow what a project. You are certainly making good progress. I like all the "shelves." That will make it nice for different plants. Can't wait to see it filled. Those concrete blocks are big. I can't believe you got help from the heater guys. That is great. You have really chosen a great spot for the pond and I love the furniture. Even without the seats. Ha!
ReplyDeleteI admire your energy Tina. It's great you are able to get out in the garden already. The pond is going to be fabulous. Can't wait to see what you do with it.
ReplyDeleteTina,
ReplyDeleteWow a lot of work if this was Meg's project, I'd be the one doing all the digging while she talks on the phone.
I have had ponds and I want you to know staying leak free is very important, leaks are a huge pain to deal with. You mentioned cutting in the skimmer, be careful with that. One more item laying down padding to protect the liner is a good ideal, you will have to get into the pond and sharp objects under the liner can create leaks. Padding it with newspaper, card board, old carpeting any thing you can dream up to soften the area under the liner will help.
Oh my what a massive do it yourself project. I got tired just thinking about it.
ReplyDeleteAnd thanks for you kind thoughts for my Barb. She is recovering quickly from the surgery and all the indications are for a positive outcome.... :)
Isn't it amazing how great the new heat pumps are these days?
ReplyDeleteYour pond is going to be so great...I know you will love it!
Tina as you know I have a pond that i very similar to yours. Sited N facing the back of the house just off the end of the patio...half a day or more light and it does great. We have a waterfall and pump. If you look at my pictures i have 2 water lilies and they grow like a weed because the water moves slowly withe the waterfall and pump. No fish for me either...and mine is on a quite a grade change. We had to build up half the pond because the grade from the patio to the lawn. I can sen you pictures to help you see it if you want. I have the edge planted and different levels with plants in fabric pots...I learned a lot about planting in ponds. Happy to help in any way...and you will spend lots of time by your pond...
ReplyDeleteOh tina, what a big project! I so admire your hard work. You are really amazing! Looking at your photos, I feel embarrassed that I have always been complaining of weeding. I can't wait to see the irises in bloom in your pond!
ReplyDeletePS Oh your cat is very curious and so is my cat. He always likes to see what I'm doing.
You have really been busy! Your pond is going to be magnificent! I think the size is going to be perfect. Mine's a bit smaller, and I wish it were as large as yours is going to be. I love the idea of having a see-through table top so you can see the pond. I know you say it's not for fish right now, but if you ever get them, I think you'll love them. Be sure you dig down deep enough for them to have a place to overwinter, just in case you decide to go with fish at a later date. It depends upon your frost level, so I'm not certain if 36" is deep enough for your climate or not. Here in Texas it would be, but up north it may need to be 48" or so. Just throwing that out there! :)
ReplyDeleteAll I can say is WOW! Tina you are amazing and I can't wait to see the end result. Ciao!
ReplyDeleteThat is a big job Tina. I guess you lost lots of pounds in digging that. If only i am nearby i will help you at least scooping the soil. You deserve a big break after that. We will be here excited to see the finished product.
ReplyDeleteWow, what a lot of hard work. I'm sure it will be beautiful when it's finished. Ponds are a bit of a mystery to me so I found all your research really interesting.
ReplyDeleteWow that looks like a lot of hard work but clearly worth the effort. Happy New Year!
ReplyDeleteHow lucky we are having a mild winter for such large projects! Why is it, we seem to start one project before other projects are not finished? I have so many different things going on in the garden, house and shed. Gee, I need to get myself a list and put things in order to stay on tract. I think that is called prioritizing. Ha, what is that? I so need to get back to blogging as well. Some day I shall jump back into it….
ReplyDeleteThis is some big project you have and I cannot wait to see the end result. Will there be an end result? Pond, then patio, then who knows whats next. LOL... I have always wanted a pond but seeing all the work involved, I may have to enjoy your pond in blogworld only.... Oh, and the Saint said, "That is SOME hole Tina dug!" I can hear his foot steps backing away from such a project in our gardens. Ha ....
What a ton of work! It will be really gorgeous, though, and well worth the effort. I wish I had the space for a pond that large. My son and I dug in a teeny frog pond since we didn't have a way to connect a pump to an electrical outlet. Your patio idea is so clever. What a great way to recycle old concrete - a zillion times better than sending it to a landfill. :o)
ReplyDeleteI am amazed at your energy and how much you have accomplished. My friend at the farm is a pond builder and lucky for me, I never have to do that work again. I did a small pond/fountain at my house a number of years ago where I dug it out and built the whole thing. But I filled it back in about five years later because I tired of winterizing it and removing the pump. I do miss the butterflies and birds that would use it though. I never got any frogs, which was OK by me living in a city. Your pond is going to be beautiful and home to many critters. You are doing a great job.
ReplyDeleteLooking great! I would of made my husband finish it over the weekend. I wonder if the kitty will bother the fish?
ReplyDelete