January 15, 2012
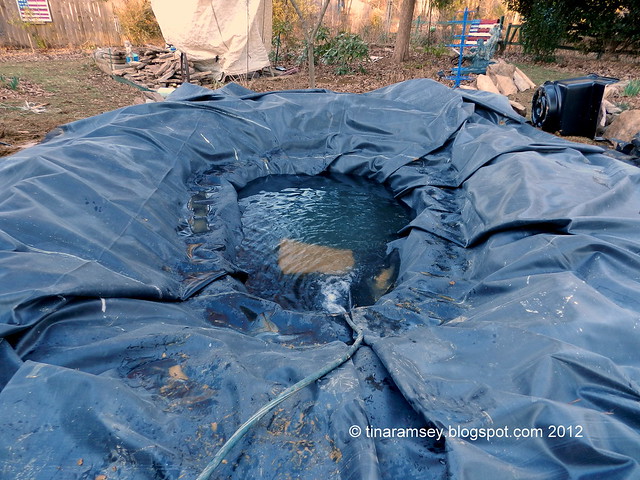
The pond is coming along nicely-with lots of struggles and challenges but it is working out. Today I'll show you how Mr. Fix-it and I spread the underlayment and pond liner in our new pond. The above picture shows the pond filling up-the last step of a long day. I wanted to fill the pond completely in order to try to find out exactly where the water level would be located and also to find out how many gallons my pond would hold. This was the biggest shocker for Mr. Fix-it and I. Using generic pond calculators found on the Internet I punched in the numbers that would tell me exactly how many gallons of water my sized pond would hold. My pond is oval shaped and on average 12 feet long by 7 feet wide. Its average depth is probably 18". This is based on the shelves with the deepest being 34" deep up to the coping shelf that is approximately 8-10" under water. I had the mistaken opinion that the calculators told me my pond would hold approximately 1200 gallons and so I ordered a pond kit for this sized pond. Ha! The actual number of gallons of water it took to fill the pond was 730. Oops. For the record I will suggest to anyone building a pond to make sure you use multiple calculators and make sure you have a good average depth of your pond. The fact that my pond is a few hundred gallons short of what I predicted will not matter in the long run. I have read that in filtration the larger the better so I am good on that matter and am actually over good but that's okay. The pump I purchased in my kit is an Alpine Cyclone PAL4000 pump. It is supposed to be energy efficient being 260-310 max watts. I think that is a lot of watts but by converting the watts and the number of hours the pump will run daily I estimate (using Webmath.com) the pump will cost me about .56 cents per day to operate in Tennessee. Of course I am jumping ahead because neither the pump nor the skimmer are installed as of yet. Right now we only have a lined hole in the ground with about 730 gallons of water. Let's move on now.

Installing a pond in the winter is not such a smart thing to do. I was lulled into safety and security thinking the mild winter would continue indefinitely. The mild weather enabled me to take my time digging the huge hole and figuring out what kind of pump, liner, and skimmer I needed. Then I ran into a problem. I finally figured out I wanted to buy the Gold Pond Kit from Pond and Fountain World and I ordered it. All seemed good but then the weather changed. Here I had a perfectly dug hole all ready for the underlayment and pond liner-but no pond kit. I had waited much too long to order the kit which caused a standstill in the progress on the pond. Not only did it cause it standstill it caused a lot of extra work and headaches for me. The pond kit arrived on Tuesday, January 10-a day when the temperatures were in the 60s but with a forecast of one to two inches of rain to come in that very night. After the rain the temperatures were scheduled to drop to the 20s-even to the teens. Brrrr it was cold! The weather caused my headaches because once it rained the hole I had dug then filled up with water and the water froze solid. Next, the soil froze. Ever see frozen frost heaved soil? The entire hole turned into a mud bath and a good part of the form of the hole had to be reworked as frost heaved sections of the soil fell apart and had to be removed. Yikes, it was a messy day.
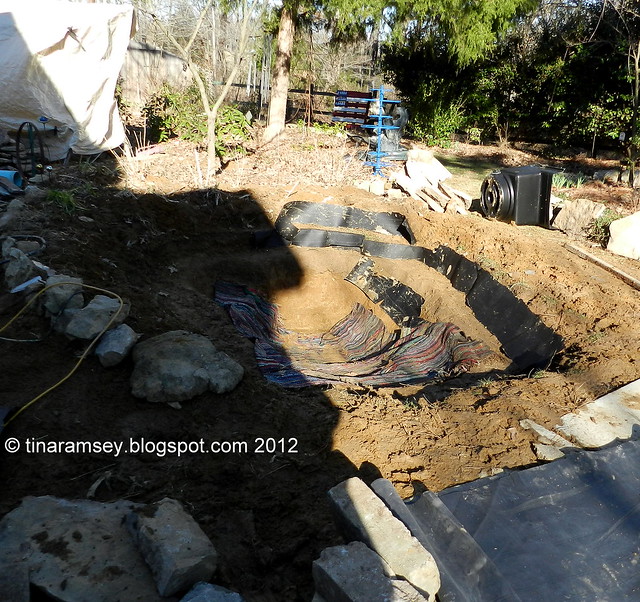
Here is a picture of the hole right before we put in the geotextile underlayment. I used tar paper on some of the shelves in the area where I was having the most problem with roots. I haven't read anything that says this helps and it may even hurt (I hope not!) but I figured an extra barrier between the oaks and pine tree and my pond could not hurt. I want my pond to last a very long time (who doesn't) so I try to build it right the first time. Once I put in the tar paper I had an old rag rug in the garden so I put it down on top of part of the hole. Once this was done the mud bath abated a bit. Mud baths in January in Tennessee are not fun at all.

Fortunately I had an old pair of Army rubber boots laying around that were perfect for the job of keeping my feet nice and dry and clean. The boots unfortunately could not help keep me from slipping on the muddy banks of the hole and I can't tell you how many times I expected to land face first in the hole. Mr. Fix-it said he'd make sure I was okay before he laughed. I sternly warned him there would be no laughing today.With a bit of sliding I did manage to keep my feet under me.

Here are the boots after the work had mainly been done. Once the geotextile fabric went in I was able to switch to soft tennis shoes in order to line the pond with both the geotextile underlayment and the pond liner.
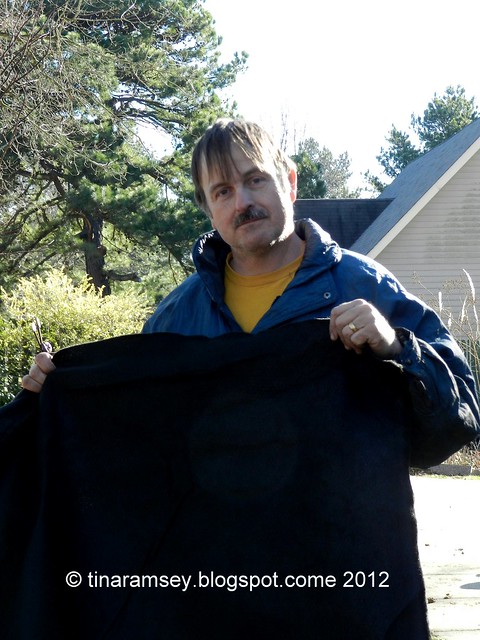
Mr. Fix-it and I had a quandary. We were not sure which side of the geotextile underlayment should be faced down. One side was more furry than the other. I searched online but could not find any instructions regarding the direction so we decided to put the furry side under the pond liner and the slicker side down in the mud.
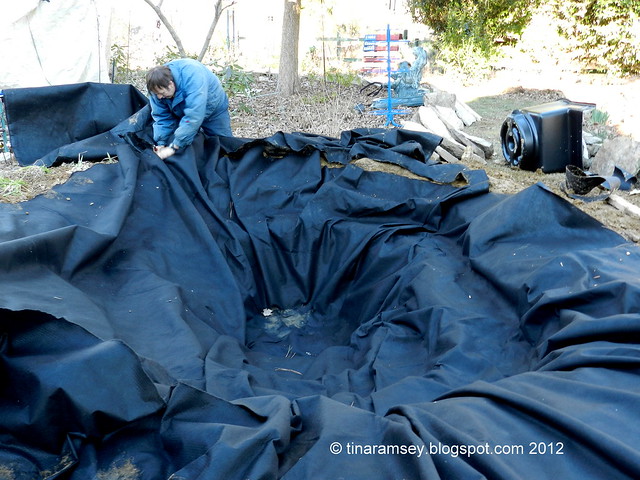
This is what the pond looked like with the underlayment in place. Mr. Fix-it is cutting away the extra underlayment in preparation for the pond liner. I read where you can cut the pond underlayment but NOT the pond liner-at least not right away. This geotextile fabric was good stuff. It was lightweight and seemed flimsy but when we went to trim it no scissors would cut through it. The stuff was heavy and dense but did not seem so. We both used razor knives to trim the underlayment. It was a fairly difficult job.
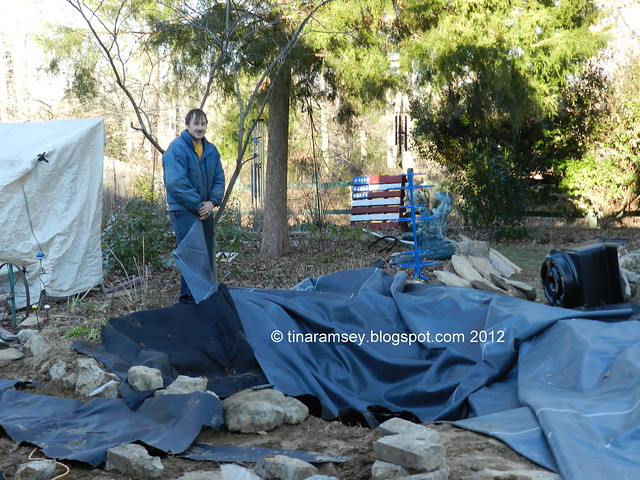
This last picture shows us laying out the pond liner. I was very nervous about laying out the pond liner. We had ordered a kit that included a 20'x25' pond liner. We got a 20'x 27' pond liner and it was more than adequate for the hole I had dug. I was very worried about the size because by the time you add in all the shelves it seemed like the liner had to be really big. I worried for nothing because we had tons of leftover liner.
The start of this weekend sees a lot of work still left to be done. Hopefully we'll get the skimmer and waterfall installed, the plumbing completed, and the pond edged. The weatherman is calling for rain off and on all weekend though so I suspect the weekend may become a washout....
in the garden....
Words and Photos Property of In the Garden Blog Team, In the Garden

