Showing posts with label Techniques. Show all posts

Monday, December 30, 2013

Moving Japanese Maples


DSCN9682
Sometimes we gardeners find we must move plants, including trees. The reasons to move a plant vary and can range from simply needing to move a plant to a new location in the garden because perhaps it has outgrown its location or is not doing well in that location, all the way to needing to move the entire garden due to an impending move. The latter is the reason I find myself in the position of moving plants, trees, shrubs, bulbs, grasses, and hardscaping. Our new farm is coming along and yes, I surely have my priorities straight-the garden goes in first. It is really a simple decision. You see you can build a house in a few short months up to about six months, but you cannot grow a plant in the same short time. Additionally, plants must be moved at the right time. The right time will depend on the plant and other factors I will try to outline here.

So far the plants I have moved from Tiger Gardens to the new Tiger Way Gardens include:

[Trees]
5 Japanese maples
5 10' tall crepe myrtles,
'Empress of China' evergreen dogwood
Korean dogwood (Cornus kousa)
  Korean maple (Acer pseudosieboldianum)
Chinese redbud 'Don Egolf'

[Shrubs]
12 Oakleaf hydrangeas (half of them died and the other half are being eaten by the deer)
14 PG hydrangeas
5 'Raspberry Profusion' abelias
7 rhododendrons
4 'Annabelle' hydrangeas
3 'Bella Anna' hydrangeas
2 'Great Star' hydrangeas
2 'White Dome' hydrangeas
32 Bigleaf Hydrangeas
5 Butterfly bushes
1 Leucothoe
14 viburnums
8 Japanese snowball viburnums (three died so now five remain)
Several spiraeas

[Grasses]
3 clumps of plume grass (Erianthus ravennae)
3 'Northwinds' switchgrass
Pink Muhly grass

[Perennials] too many kinds to count but they include:
Turtlehead
Heucheras
Helleborus
Japanese anemones
Irises
Approximately 100 or so cultivars of daylilies
Amsonias
Tatarian asters
New England Asters
Sedums
Catmint (my MOST successful move as the clumps all love the new location in full sun!)
Salivas
Coneflowers
Shasta daisies
Cannas
Mums
Joe Pye weed
Compass plants
50 or so Peonies
Pulmonarias (not sure if they will make it as they are difficult to move)
Carex 'Ice Dance' (I love this tough little grass like plant!)

[Bulbs[
6500+ daffodils
 Muscari
Scilla
Lycoris radiata

Note: I have only listed here what I have moved to the land from my current garden. I have not listed all that I have planted on the farm. That will come at another date. It includes a whole orchard and several trees. Gotta get that shade and grow your own food theme going! As you read this I will most likely be outside digging and moving more trees. Sigh, a gardeners' work is never done! 

 Today's post is focused on moving the Japanese maples, but based on the list above of just what I have moved from Tiger Gardens so far, you can see I am fairly experienced at moving plants. Each time I move a plant I always anticipate that plant will live and thrive and be happy. I never contemplate losing a plant but in the past I have lost some plants. It is to be expected at times. Most of the time my failure at losing plants results from: moving the wrong plant (evergreens do not move well in my experience), moving the plant at the wrong time, not digging enough roots with the plant, or not watering enough or watering too much! It is a fine line you cross when you chose to move plants.  

I have
thirteen Japanese maples growing in Tiger Gardens. Two are the dissectum types and are moveable even tho one is fairly large and has been here five years. I have not tackled these maples yet because the area they will move to is not ready. The remaining eleven Japanese maples are the palmatum type. They range in size from two feet tall to about 18' tall. The 12 and 18 footer trees are  much too big to move. Those two and one other Japanese maple in the front garden are the only Japanese maples I will not attempt to move. The rest average about 6-8' tall with a trunk diameter of about 1" to 2" with the exception of a short Japanese maple.
DSCN9681
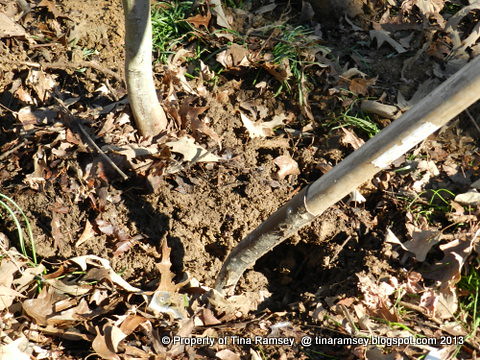
The above tree is the largest Japanese maple and the trunk is about 2". It is a named variety called 'Burgundy Lace'. I started digging this tree first because it is the largest tree here I thought I could move. I thought if I could dig it then I could dig anything. I have to be honest, I almost gave up the fight. This tree was pretty stubborn. One of the reasons I love Japanese maples is that I find they are quite resilient. This one was no exception to that rule. Its roots grew deep and strong. I started my dig about 2' feet from the trunk. I knew I would have to cut the main anchor roots in order to get the tree out. What I was not prepared for was that those anchor roots grew quite deeply into the ground. I started by making a ring around the tree just to feel out the root system. I slowly worked this ring all around getting deeper and deeper with my shovel at each pass. It would've helped me tremendously to have had a longer shovel. My shovel is only about one foot deep and I really could've used a spade about two feet long. To overcome the shortness of my shovel I removed soil and made a channel around the tree as you can see in the first picture. This enabled me to go deeper and with perseverance I finally got the tree loose from its spot.

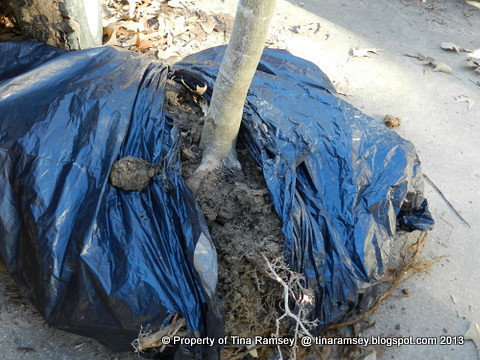
Once the tree was free I wrapped the root ball with some large black garbage bags. These root balls of the trees I am moving are much too large for any pots I have here. I have to tell you I was very happy when the tree came out of its location with a significant root ball such as the one pictured above. Of the five Japanese maples I dug on this day three came out with awesome root balls, two came out practically bare root. Fortunately enough for me and the trees this is an excellent time to move trees whether they are bare root or potted (still in soil). This is because the trees are dormant and will not have to be stressed by trying to support a canopy of leaves. Additionally, as long as the soil is above 40 degrees or so the roots will continue to grow and provide nourishment to the trees. The only reason I will have to concern myself with these newly transplanted trees during this time of the year is if the soil freezes for an extended period of time the trees may get dehydrated due to not being able to take up moisture. Additionally, since the roots are not established they are not able to anchor the trees in their new spots on the farm. To compensate for this I have staked the trees only temporarily. Since these deciduous trees have no leaves they most likely will not fall over but there is always a possibility of that. Also, it may take up to one year for the newly transplanted trees to finally get anchored well and once spring arrives that canopy of leaves should pop out. DSCN9689  
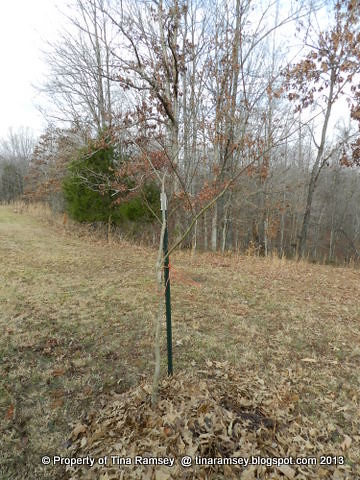
Technically you can move plants, including trees, any time of the year-as long as the ground is not frozen and as long as you are prepared to water. Just this year alone I have moved crepe myrtles in early spring, the cornus species in the summer, and several other trees during the fall. This is not the ideal way to go tho because when you move trees and shrubs and even perennials during the spring or summer you need to be prepared for some serious transplant shock as well as be prepared to water a lot. Fall is usually not a bad time to move or plant trees because by the time September and October roll around the trees are beginning to go dormant and rains have usually returned to ensure a good continuous supply of water.
Another way aside from timing the move of your trees to ensure the transplant job will be successful is to root prune your trees. I did root prune at least one of the five Japanese maples I just dug up. I saw no difference between digging that one Japanese maple versus the other four non-root pruned Japanese maples. Perhaps it will settle in faster but perhaps not. If you do root prune plan to do so at least one season prior to the scheduled move.
One more tip on ensuring success with transplanting large trees and shrubs. There are several products on the market that will help with stimulating roots and you can also purchase mychorrhizae to help with settling in the plant. In my case I use a liquid concentrate I add to the water I use to water in my newly transplanted trees. Any kind of starting solution or additive will work if used according to the directions. I also am a firm believer in the addition of organic matter such as compost, rabbit droppings, eggshells, and bone meal. I add all of these if I have them available at the time of planting. If they are not available, I will come back later and top dress the plant.
Only time will tell if I am successful with the move of my large trees but either way I can rest assured I have done everything in my power to ensure their successful transplant. During the winter if I am curious as to the health of these newly transplanted trees I will do a scrape test to check and see if they are still green under the bark. I am always reassured when I see green on my newly transplanted trees. The 20' river birch I transplanted from Alabama in November is still green so I am pretty sure it is okay. I bet these Japanese maples will be fine too....

in the garden....

Happy New Year Everyone! Be safe! 


Words and Photos Property of In the Garden Blog Team, In the Garden

Wednesday, May 15, 2013

Measuring the Land for a Landscape Design


DSCN6768
I've been busy lately working on a labor of love. That labor is working on our newly purchased land and trying to move my current Tiger Gardens to the land. This feat alone would keep me busy for months but I've also undertaken the task of designing the property.

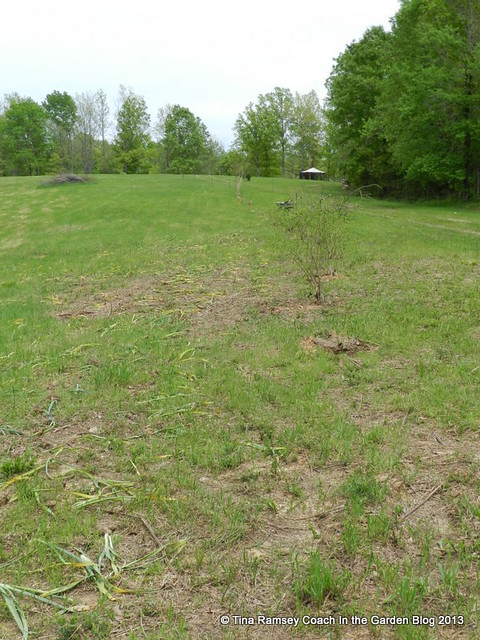
Well, one part of design you can never get away from is measuring the area you plan to design. For a 600' long field that is on average 150' wide, the measuring can be a daunting job. But! With the help of one Mr. Fix-it, a compass, measuring wheel, 300' measuring tape, and several hours of work we were able to get the job done a few weeks ago

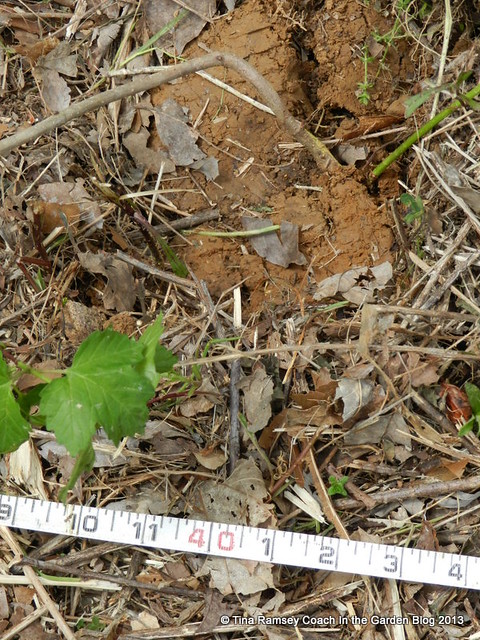
I have found over the years that I have been designing landscapes that the best most accurate way for one person to measure a property is to use a baseline. When I measure homes and their yards I normally set up a baseline parallel to the house and take all measurements off from that one baseline. It is then very easy to be accurate back in my home office because I know precisely where my baseline is in relation to all of my measurements and in relation to the house. On our property since we have no house I ran my baseline down the center of our large field. Once this was done I used my handy dandy Army compass to give me the heading of the tape measure. In my case my heading was 250 degrees (looking west) and 070 degrees looking east. Our field is somewhat on a slant which is something I am not too happy about. Mr. Fix-it and I want our home to face due west (270 degrees) with the back facing due east (090 degrees). The difference is a mere 20 degrees but this difference makes a big deal with natural lighting inside of a home. Many folks prefer their house to be oriented on a north/south axis but we do not. Our current home faces east with the back heavily shaded by oak trees facing west. We love it! Gardening on either the east or west sides of a home in Tennessee is very easy because there is usually lots of good lighting. East exposures are preferable to west exposures. Gardening on either south or north exposures has its challenges and I find when I visit homes with that orientation I simply do not like it. At any rate, the orientation of the field does not matter at this point. It simply means our house will be a different direction than facing straight down the field. But even that is not yet determined since I have not completed my design. 

Once I have my baseline oriented properly I begin taking perpendicular measurements off from both sides of the tape measure every 10' feet or so. I annotate all measurements on graph paper I carry with me. Mr. Fix-it and I found our field to be a full 600' long. It started at the west end to be only 87' wide but at the east end it was about 300' wide. The east end of the field (the direction we are looking in the above pictures) will be where we'll build our house. Both the above picture and below picture are looking east from the west end of the field. You can just make out the top of our gazebo in the far distance. That gazebo is our 'home away from home' while we work on the land and once we begin the house build. Looking at the gazebo you can see the field slopes down slightly on the eastern side. Our house will be built on the high point of the field to the left of where you see the gazebo.  
DSCN6777
I included this picture to also show my other labor of love-moving my garden. To date I have planted approximately 6200 daffodil bulbs of several different varieties. Some are late blooming, some are very early, some are white, some are doubles, some are yellow or a combination. Some bulbs are newer cultivars and some are very old cultivars. If you look closely you'll see the yellowing foliage of some of the daffodils I recently planted. Daffodils can be divided and transplanted at any time of the year. You should always leave the foliage until it turns yellow. Unfortunately these bulbs had their foliage turn yellow prematurely since they were dug up and transplanted. Transplant shock will get bulbs as well as plants. The bulbs will be in a bit of shock for a while but should still bloom next year. I have learned a few lessons in my current gardens regarding daffodils. You do not want them planted too closely to shrubs. The shrubs will quickly overtake the daffodils as they grow large. It is very difficult to dig out the daffodil clumps once the shrubs get large due to the roots. To prevent this issue I have left a 10' buffer between the daffodils and the shrubs. All along the driveway I planted hydrangeas, crepe myrtles, and some grasses. Right now the shrubs are not much to look at but they will do well with time. On the northern side of the field next to the forest I left about a 15' foot buffer between the daffodils and the forest. This is for mowing and walking purposes only.
DSCN6767
I don't think (in fact I know) I will be able to take all of my garden to the land but I am making a good valiant stab at it. It seems whatever is in bloom and can be moved reasonably easy is what I am moving. Besides the hydrangeas (11 PG, 7 oakleafs, 5 eight foot crepe myrtles, and three clumps of plume grass) I have moved some Japanese snowball bushes. I was able to dig up more than a dozen from around my very large Japanese snowball bush. I could not dig up the mother plant as it is much too big and probably would not survive the move. I am just as happy taking the smaller plants anyhow as they will settle in much faster than the bigger plants. I planted eight Japanese snowball bushes at the west end of the field. The large white 'snowball' blooms will be a focal point from our house. One that we will easily be able to see when looking all the way down this field.
DSCN6776
Since the field narrows at this end I used my handy cloth measuring tape and curved it around a perimeter of the field set back 15' from the woods. I then measured every 10' along the tape measure and sited my Japanese snowball bushes. I put five on the outside border and three more offset on the inside curve. When looking at the 'hedge' of snowballs from the house it should look like one solid mass of snowball bushes. But! I will still be able to mow around these bushes and they will have plenty of space to grow. 

This is just a long post but sometimes to get all the info of my thought processes out there posts need to be long. I oftentimes look back at posts to see what I have done and why because as I get older my memory fails me. Thank goodness for records, designs, and blogs....

in the garden....
Words and Photos Property of In the Garden Blog Team, In the Garden

Wednesday, July 18, 2012

Saving Plants For Fall Planting


DSCN3534
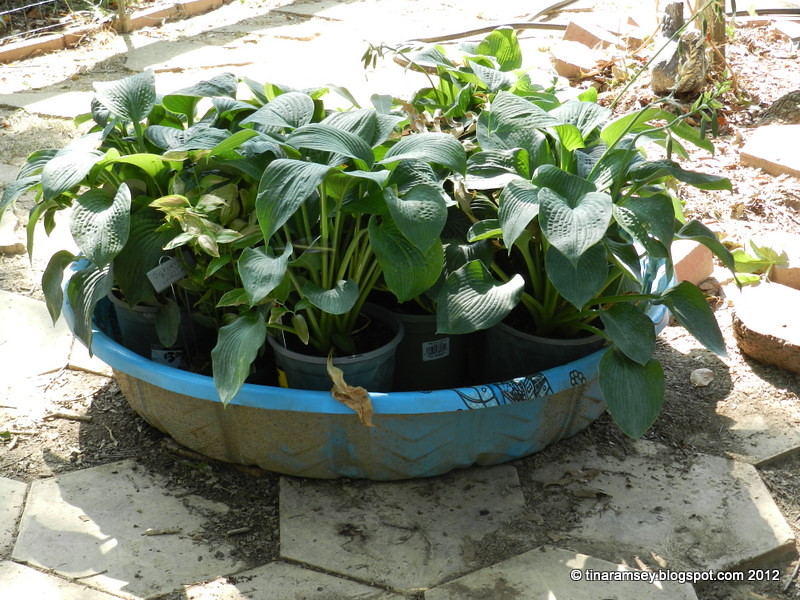
It is plant sale time in all the local stores. It seems that come summer when it is so not gardening time in Tennessee, that many stores that stock perennials, shrubs, and annuals find themselves with an overabundance of plants that did not sell during the big spring season. Additionally, even if plants are stocked for summer planting or even for fall planting, if they are in stores right now in all this heat they are not looking too good due to the difficulty of keeping everything watered. Being watered by a hose while sitting on a shelf on concrete just isn't all that good on plants. Markdown time here we come! This is the best time to find some good buys if you know what you are looking for. Don't purchase plants just because they are on sale if you do not have a location for them in your garden. A good sale is not a good sale if you can't use the item. If, on the other hand you have a great location for some very large hostas (like I do) you might want to pick up a few pots. Tip: always try to buy in groups of three, five, seven, etc in order to get a good display. I have learned a small trick to help keep plants alive that I find on sale in the summer until I can plant them in the fall. A hard plastic kiddie swimming pool placed in the shade does just the trick. Grouping the plants and ensuring there is an inch of water or so in the bottom of the pool will keep your plants happy until garden season returns....

in the garden....
Words and Photos Property of In the Garden Blog Team, In the Garden

Monday, July 16, 2012

Coloring Landscape Designs Using Alcohol Markers


DSCN3550
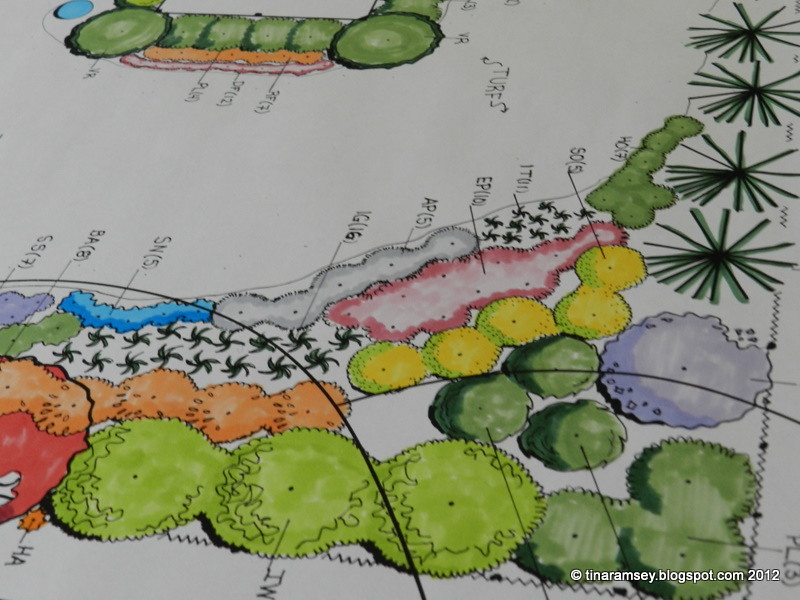
I recently discovered an excellent way to color my landscape designs using alcohol markers. Some of you may know of alcohol markers but for me they are a new and unique thing. When I began my design business I did not color designs, but as time went on I realized colored designs really help to bring them to life for the clients. I experimented using different colored water markers, even the high priced ones, but the results were not satisfactory at all. I next happened upon watercolor pencils. I liked this effect second best to markers but since I could not locate the appropriate kind of marker to color my designs I had to use the watercolor pencils. 


Watercolor pencils are different colored pencils that you can apply a small bit of water to in order to blend colors. The designs I colored really came out nicely but sometimes the paper would be wrinkled and I just did not like the vividness of the pencils. Pencils just did not compare to markers. Let me back up a minute, my landscape design books show pictures of designs colored with both markers and pencils. Both techniques can be used to good effect but I personally preferred the look of the markers.


I just happened to be at Hobby Lobby when I spied a clear showcase full of markers. "Hmmmm, I wonder what those are?" I thought to myself.  I asked the representative to open the case and I was actually able to try out the markers. Wow! Enlightenment never came at such a cost. The 'Colorific' markers work great and come in hundreds of colors. They are known as sketch markers and can be blended easily to create different effects. What a cool new tool I found. The only problem is that each marker has a price tag of $6.99. That price must be why the markers were kept under lock and key as paying this amount for one marker seems kind of crazy to me. But pay I did. I had to be very selective in what colors I chose for my landscape design palette. I tend to like to color plants in the natural color they will grow in a client's garden while differentiating them just enough to show they are a unique plant. Without buying one of every color what I was able to do was to purchase some color groups such as green, and other colors with only one or two colors that were simply one or two shades off from one another. The colors I selected have worked well for me. As I've begun using the alcohol markers I have learned you don't always have to use more than one color. You can actually layer one color over itself to get a completely new effect. These markers are really useful and excellent for creating beautiful landscape designs....


in the garden....

P.S. This design was not completely colored when I took the picture. Perhaps I'll post a picture of a completely colored design at some point. 
 

Words and Photos Property of In the Garden Blog Team, In the Garden

Wednesday, June 13, 2012

Making A New Garden

DSCN2180
If you are a gardener, as I am, you will at some point have to make a garden. I find myself all too often making gardens and like I am wont to do I usually share the news on this blog. My newest garden is in a location that has been a difficult location for me to deal with. And, even though the area is a garden in the making it may at some point become the chicken coop area. Only time will tell but in the meantime let's talk about making this particular garden. 


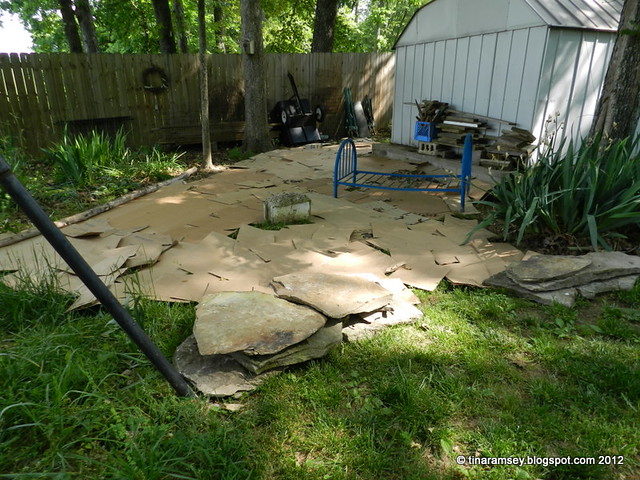
The area is my far back corner of my backyard. It is the northwest corner of the backyard with a western exposure under a huge hickory tree and several oaks and dogwoods. The area is very inhospitable due to the immense amount of tree roots and western exposure leaving the site open to prevailing winds all summer long. I guess that could be a benefit but in the case of this area it really is not a benefit for the plants. A shed is the eastern boundary (to your right) of this area, a privacy fence is the northern (straight ahead) boundary, to the west is a barbed wire fence where cows periodically congregate under the shade trees. The area has been a pain because I had to maneuver my lawn tractor around the shed and between some other obstacles in order to cut the grass behind the shed. Grass along side of the shed did not grow due to immense shade. I figured the only way I could really deal with the area was to make a new garden so here goes. 


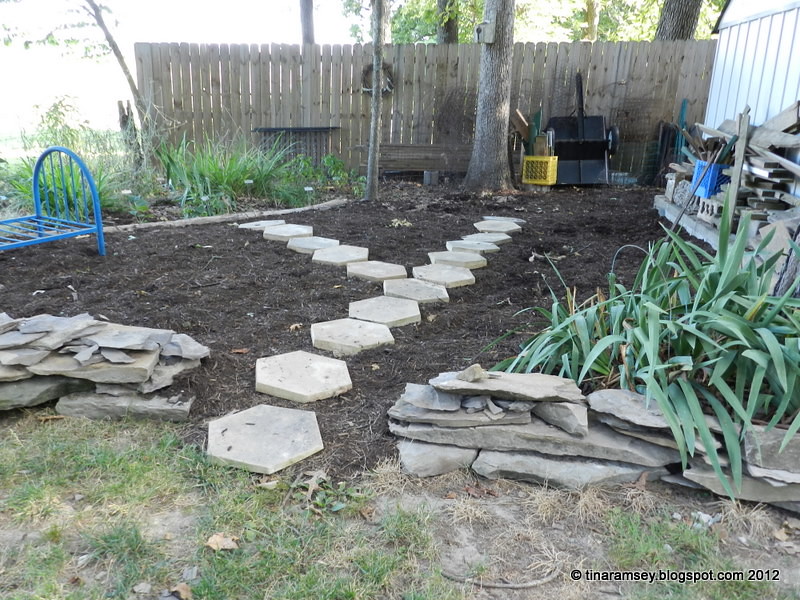
Because the soil is full of tree roots digging and removing sod was not going to be an option. My only option was to get some cardboard (thanks Terrie!), cover all exposed soil, then add mulch on top of the soil. I call this the 'Lazy Gardener' method of making a new garden. I chose a shredded hardwood mulch bought in bulk from Mr. Mulch here in our town. Four and one half yards later the job was done and the area almost now look like a garden.
DSCN3151
The plants are missing though. The soil here in my area of Tennessee is bone dry. Our fine heavy on the clay soils tend to turn into bricks once they are dry and baked by the sun. Digging in plants is not an option during the summer in Middle Tennessee. That is not to say I haven't done it in the past but only if I could water the ground. This particular area of my backyard will never be watered because it is simply too far away from the house and it just isn't worth it to me to water the area. I don't see it from the house and rarely work in this area. I don't know about you all but as I get further away from my house my gardens tend to be more wild. Do you all do that too?
DSCN3149
So for the time being this Wannabe Garden will sit and wait until the rains return so it can become a Real Garden. I have plans for some more bottlebrush buckeyes, and native drought tolerant plants to go in this area. So far there are a few plants planted here. Above you can see the common witch hazel I planted about five years ago. It is not happy in our dry soils but still it survives. Behind the shed are some cast away plants such as 4 O'Clocks, crocosmia, verbena bonariensis, sunflowers, irises, and a hearts a burstin shrub. There are probably more plants back there too but it is an area I really don't manage. The weeds even sometimes get away from me but the mulch will sure help take care of that problem. One more area of this new garden is the rock wall. I had a lot of rocks left over from a load I had purchased from a local resident in town and did not know what to do with them. I asked the teenager, very forcefully I might add, to please make a rock wall around the new garden area. With much grumbling and complaining he accomplished the task. Now all I have to do with this new garden is wait for the rains so I can finally get to the fun stuff-planting a new garden....


in the garden....

Don't forget about checking a random give a way on this blog found here


Words and Photos Property of In the Garden Blog Team, In the Garden

Wednesday, January 26, 2011

My Top 10 Gardening Resolutions for 2011

From In the Garden

I figure if I print my gardening resolutions for 2011 I might be more apt to follow them but we'll see. Here goes:


1. I will plant the right plant in the right spot the first time. If I fail at that I will limit myself to moving it only one time-just once!


2. I will not buy anymore hydrangeas. 


3. I will plan for the drought by endeavoring to plant drought tolerant plants.


4. I will not water each time a plant shows signs of wilting. 


5. I will only grow those vegetables I love and not those vegetables that are easy. 


6. I will preserve my harvest or not grow it the following year.


7. I will focus on my core group of plants and not strive to have every fancy plant that comes along. 


8. I will finish some uncompleted projects-one at a time instead of trying to do five at a time. I will not go onto a new project until the previous one is completed.


9. I will not stress over blank spots in August when the spot was filled in April. I just need to get over it. 


10. I will enjoy my garden more by relaxing and savoring the moment. 


Any gardening resolutions in your neck of the woods?


in the garden....


From In the Garden
My first daffodil of the season bloomed inside my kitchen and it is a lovely one! I planted several Narcissus tazetta 'Minnow' in a clear square glass container using red glass gems as the growing medium, as you can see in the opening picture of this post. I have also planted over 100 of these lovely fragrant miniature daffodils in the garden. While they are showing their sweet heads they are no where near to blooming. 


Garden season has begun here at Tiger Gardens. I've been busy cleaning up the left over fall garden, removing mulched leaves where they are too thick, working on new garden projects (some of which will appear here), giving garden talks, and just generally enjoying the longer days of spring-even though as you read this we are probably covered with snow. Nonetheless, spring is near....


in the garden....


Words and Photos Property of In the Garden Blog Team, In the Garden

Friday, September 24, 2010

Relandscaping the Now Missing Pool

From In the Garden

See that huge sand pit in my yard? The area used to house a nice above ground pool that at one time looked like this:

From In the Garden
Not too shabby and a most inviting sight on a hot summer's day. The reason why the pool is no more is the trees. Over the past nine years that we've lived here our trees have grown phenomenally and had really closed in on the pool. Trees drop leaves and acorns-tons of acorns. The maintenance on this pool just got to be too much for me so I suggested to Mr. Fix-it, quite strongly I might add, that we sell the pool. Enter Craig's List and said pool is sold immediately!

We spent one hot day in early August taking the pool down. It was hot, sweaty, and dirty work. At least we were in the shade while taking the pool down. Because we didn't want to leave the very nice buyer out in the cold in the 100 degree heat in full sun without a pool we (Mr. Fix-it and I) offered to help him set it up. I'm not going to make this a long story but after taking the pool down and nearly having the frame set up in its new home a strong gust of wind came through and blew the pool down. It was not a pretty sight. Then a strong thunderstorm came through. Whew! From sweating in 100 degree heat to freezing and soaking wet we had quite the day with this pool. Fortunately, Sunday dawned nice and the new owner of the pool did some work on the pool overnight so that when we convened to work on setting up the pool again, all went smoothly. It helped that his neighbors came over and helped too. You really need a lot of hands when setting up a pool. The big rush with the buyer of the pool was that his wife was due to have a baby within the week and they really wanted their new pool set up. Mission accomplished but not without some pain and some good memories. Just let me tell you that taking down pools and setting them up is not for the faint of heart. It is a very difficult job! But when all was said and done Mr. Jacob got a very nice pool for a very reasonable price and we got this....

From In the Garden
13 September 2010

The final product came out rather well I think. A new path down the center of where the pool used to be located and a lot of shrubs and perennials complete the landscaping job of the pool area. Lest you think making a new garden is as easy as snapping pictures and walah it is done-I added the dates in to show you just how long it took me to complete this huge job. We initially took the pool down the 30th of July. Of course, draining the pool and preparing it for movement began a few days earlier. The landscape job is pretty much complete with the exception of a few wheelbarrows of mulch on this date, 24 September 2010-about eight weeks later!
From In the Garden
26 August 2010
First of all it took me a few weeks to find the time and energy to start back filling the large hole where the pool used to be. The delay was in part due to the intensely hot temperatures we experienced in August, but I also needed to really get myself psyched to do what needed to be done-namely to back fill the large hole left by the pool. Since our property slopes the pool was dug into a slight hill where at its highest point there was a two foot drop off from the outside garden to where the pool used to be located. Here we can see where some of the drop off has been filled in. I used fill from edging my other garden beds where I moved approximately 40 wheelbarrows full of soil and grass. This soil was unceremoniously dumped into the hole. I wished I could have edged all the beds because that would've cut down my trips to get soil, but with the drought the ground was practically like rock and no edging was going to work. Enter the local quarry for some soil for back fill.
From In the Garden
2 September 2010

I took five trips downtown (about a 13 mile trip one way) to the local quarry where I had Mr. Fix-it's truck loaded with about 1.5 tons of soil each trip. This soil, while not ideal, was handy and available and they loaded it for me. I had to unload it -with a snow shovel. Surprisingly it only took me about 1.5 hours to unload the truck after each trip. These trips were spread out over a week or so based on my schedule and the heat.

As I was back filling I decided to fill the left side of the hole first and plant as I went along-can you say inpatient? That was me! When I say left side I mean of the new path area and where the pool used to be. You can clearly see where the left side of the hole has been partially filled in the picture above. When I got an area completely filled in I planted plants in that area. I surmised they'd do better in the ground than in the pots they had been sitting in all summer. I had had about 40 pots full of plants waiting in the shade near the water spigot just to be planted. The plants were looking rough as it is difficult even with regular watering to keep a shrub or even perennial alive in a small pot in 100 degree weather. I don't know how nurseries do it! After I planted I watered. Did you know a water molecule is a 'sticky' molecule? It will make a chain with other water molecules and try to fill up all spaces where there is no water. Hence, after watering the left side of the new beds I woke up in the morning to find that the water had spread to the center of the former pool area where the path was to go. Can you see the water line in the dirt in the above picture? This is where the water finally ran out and stopped moving. It had saturated all it could then gave up. The 'soil' I used for back filling is creek bottom soil and is a very fine particle soil. I have used this soil before and find it extremely heavy. The saving grace is that there is about 4-6" of sand under it (the former base of the pool). I'm hoping this will make drainage better since this area of my yard is naturally low anyhow and seems to draw water; not that we've had any this summer.

From In the Garden
7 September 2010

Ah, here we go! We can now see my plan for the space. It took more than one month but it is coming together nicely. The grass path (six feet wide to allow for the lawn mower and easy access to the shed) is in place. All grass was removed from the area surrounding the old pool and transplanted to its new location. Just look at the pool picture (second picture on this post) to see the lovely grass that I worked so hard to fertilize, grow, and weed-only to rudely move it into a new location; all with my trusty shovel. The grass this time of the year is mostly dormant or mostly weeds. I grow fescue and I tell you this summer has been difficult for it. Nonetheless, the soil and sand are covered and the grass will settle in quickly. As an added good measure to get a good stand of grass in this area I sprinkled Rebel grass seed on top of the transplanted grass. By next spring you'll never know it had been transplanted.

From In the Garden
7 September 2010

A word about the garden on the right side. Like I said before, I planted as I went along so that once one part of the garden was done I did not need to go back to it. Part of this new garden in the pool area encompassed the 'Greenhouse Garden' that was an already established garden. I needed to change this garden because my whole vision for this area had changed with the removal of the pool. The change involved moving some 'Annabelle' shrubs and perennials. This part of the job, while time consuming, was actually not difficult since I had a good idea what would work, what I wanted and how I planned to plant.

First and foremost was the fact that since the garden area is about 75 feet from my deck I needed a big impact and onesies and twosies were not going to cut it. Nor would only perennials. My line of attack was to plant all shrubs in the old pool area and gradually step down to perennials as you come closer to the deck and up the slight hill toward the greenhouse. There are two trees in the greenhouse garden already (Crabapple and 'Burgundy Flame' Japanese maple) and these two trees did not move. In the planted right side of the garden are: 9 red astilbes (transplanted), 9 'Magnus' coneflowers, 9 'Ruby Star' coneflowers (all coneflowers purchased for $1 per pot markdown at Lowes), 9 'Golden Jubilee' agastache (also $1 markdown) , 3 'Striatum' geraniums (Jung Seed), 6 'Tango 4 You' lilies ($1 markdown), 15 great blue lobelia started from seed (thanks Catherine), 10 turtleheads (cuttings), 2 columbines (markdowns), 3 cimicifugua racemosa (divided and transplanted), 3 Japanese anemones (transplanted), 2 chrysanthemums (transplanted), St. John's Wort (gift from Naomi), 'Globosa Nana' cryptomeria (transplanted), 3 Annabelle hydrangeas (moved from next to greenhouse to under crabapple), woodland phlox, woodland asters, hardy ageratum (all transplanted), a variety of sedums (already there), 'Immaculee' peony (already there), asters (already there), 3 oakleaf hydrangeas (seedlings transplanted from elsewhere in the garden-they are now about 5 years old and 5 feet tall), iris cristata, 6 'Adagio' ornamental grasses (moved from around the pool and divided), several daylilies, little bluestem grass, 'Goldsturm' rudbeckia, 12 'Red Riding Hood' penstemons, a clump of heliopsis, and about 8 clumps of the 'Autumn Sun' rudbeckia. The area is quite large so though it sounds like a lot I list the plants mainly for my own records and not really for you all. I'll tell you why, most of the time when I read blogs I don't really pay attention to the lists of plants so I'm sure you all won't either. Just suffice it to say the perennials and shrubs are all massed in areas I think they will do best based on soil and light conditions. All plants are tiered from shortest to tallest in the garden based on the vantage point. I must say this though, there is another path behind this garden that separates a maple tree and groundcover from this particular garden so that other path has a completely different look to it from its side of the garden. The area is quite large but I seemed to have filled it up quickly. I can never imagine just how quickly until I plant.

On the lower end of the right side of the path (where you see mainly plain dirt) I planted: 4 'Limelight' hydrangeas, 3 'Tardiva' hydrangeas, 5 doublefile viburnums, and a 'Diablo' ninebark. The below picture shows a better view of all the shrubs. See the limelight? It is happy and hopefully will be happier next year now that it is in a moister area that receives more sun.

From In the Garden
8 September 2010

The doublefile viburnums are the anchor in this garden alongside the fence and under the oak tree behind the 'Limelights'. You cannot see them now because they are rather small and a bit hidden. The 'Doublefiles' were all bought at Rural King during their 75% off sale for $5 a piece. A steal for sure. Viburnums are low maintenance and I hear the doublefiles are the best. We shall see. Hopefully if they do well they will grow to 8-10 feet tall and wide. They will make a nice cushion against the wood fence and beneath the oak tree behind the hydrangeas. There are various other perennials planted in here. Some dwarf iris, tiarellas, nicotiana, hostas, ferns, and hellebore seedlings as well.

From In the Garden
14 September 2010

Here we are with all hydrangeas moved and in place as we walk along the path at ground level. Pictures just don't really give the reader the feel for the area unfortunately but walking along you can at least see it up close. Some cardboard has been placed for mulch. All cardboard was received via another Freecycler who just moved to the area. I find cardboard great for under shrubs where voles are not a major issue. The cardboard has since been covered by hardwood mulch. Prior to removing the pool this area would be inaccessible and the way to the shed would be to the far right and to the far left of the 'Limelight' hydrangeas. What a difference for me!


From In the Garden
14 September 2010

Looking up toward the house we can get a different perspective of the garden. Paths are one of the most important features in a garden and I like my paths to be functional yet a bit mysterious and enjoyable when traversed. Coming up from the storage shed this is my view.

While I listed my plants for the left side of the path I did not list them for the right side. They are as follows: sourwood, three spireas, 3 'Limelight' hydrangeas, 'Duet' variegated beautyberry, 'Soft Touch' mahonia, yellow and orange daylilies (transplanted from around the pool-you can see them in the pool picture), hostas, pachysandra, and hellebores. I have intentionally kept this side simple due to an awful lot of shade and competition from a cedar tree. The sourwood tree will be the focal point once it gets larger (which will take years probably). It is situated in the curve of this bed where it is sandwiched between the canopy of an oak and a cedar tree. I have read where sourwoods do not like root competition. Right now there is none but in a few years I suspect roots will grow to fill in this garden area; therefore I've tried to use hardy plants here. I've found 'Limelight' hydrangeas actually do fairly well under trees because these large and mature ones were growing under a black gum tree. I was able to pull them out bareroot due to the drought. The roots surprised me because they spread more than four feet from the shrub's trunk. The problem I found that I did not like was the roots were not very deep; which is not good for survival in the typical drought conditions Tennessee seems to experience each summer. We'll see how they do in their new location where there are still roots, but the area is moister.

Wow, this is a long post and one I've been working on for a while now. I am not done with this area. I did do a landscape design for this garden but it is not quite finalized. I will share that at a later date....

in the garden....


Words and Photos Property of In the Garden Blog Team,

In the Garden

Friday, June 4, 2010

Keeping Track of Japanese Maples and Other Acers

From In the Garden

My son Brian was visiting recently and he and a friend came up with an innovative way to keep track of some special trees in my garden. They got the idea to seal the leaves between wax paper. We felt the result was a real work of art all on its own and then I had the idea it would help me to keep track of the different Japanese maples and other special Acer trees in the garden. The above leaf collage belongs to my son but he made me my own collection of leaves which he and his friend labeled for me. Now I have a great resource for identifying these trees (besides the labels).

I never really compared the trees themselves or their differences before but just looking at the leaves you can clearly see differences. Some of my Japanese maples are named cultivars but most are simply red Japanese maple seedlings. The two cut leaf Japanese maple leaves (first and last leaves on the second row) pictured above are 'Tamukeyama' and 'Crimson Queen'. There is quite a difference between the leaves even though looking at them in the garden you can't tell the two cultivars apart. I am loving my new pictorial collection of Japanese maple leaves....

in the garden....

Do you have any tips for keeping track of your trees?

Words and Photos Property of In the Garden Blog Team,

In the Garden