Showing posts with label Paths. Show all posts

Tuesday, July 10, 2012

Extending Pathways Pt.1

BY SKEETER
After tramping through the leaves on the outskirts of the Semi-Formal Garden, I decided it was time to extend the pathway. I had stepping stones in place from the pea gravel path in order to get to the bench. But I would find myself always going out through the leaves verses the path. This was a bit of a short cut in my Georgia Garden.
This project started back in November with the removal of weeds, leaves and pine needles. I then used these free Stones that my parents had left over from a project and passed along to me. The area around the pine tree is a bit higher then the rest of this garden. I used the stones to build a sort of retaining wall.
It was January before I worked on this project again. Next, I removed the stepping stones and started to make a border with more free bricks that I found on Freecycle.
There is a lot of sandy soil in this area which was not difficult for brick embedding. But the many roots from the nearby pine tree made it an ever painful process. I hate tree roots!
This project was once again put on hold. In early April, I was back at it and had one side of bricks embedded all the way to the bench.
I was on the lookout for matching pea gravel to extend the path. I could not find any rocks in the natural brown colors. So once again, this project was put on hold.
I could not find the pea gravel in bags but in bulk yes. Even though gravel is cheaper by the truck load, it would be more difficult for me to move it around. With bags, I can easily handle the gravel. So I just went ahead and mulch in areas and once again, left this project aside.
It was late April and I was back at it. The Saint had a solution for me. He suggested that I remove the same color pea gravel from other areas of my gardens and put it into this path and then we would add the different colored gravel to the old paths. Hum, I went with his idea and the match was perfect! Here you cannot even tell where the old meets the new old. That Saint of mine also put a fresh coat of paint and stain on the bench.
With this expansion, the area to the left and right of the bench are new plantings. In this picture, the mulch has yet to be put into place (across the path) from the front of the bench.
Now we move to the present time and things have changed even more since April. That bird cage is a bargain purchase from last year that I have yet to talk about. $5.00 cage and put in place with an old Shepard hook lying around. She now has a Clematis growing up her.
Zooming in below the Pine Tree, we find Solomon's Seal surrounded by Clumping Liriope, Sage and Scotch Broom. I once had Hosta planted here but the deer and voles munched until I had to move them.
The other side of the bench has a new Hydrangea and Russian Sage. Along with Blackeye Susan, Moss Phlox, Lavender and other fun stuff. In the back, I planted Silverberry Bushes to hide the fence from next door. I chose Silverberry as this area is mostly shaded. In front of the Silverberry is one Howard Ligustrum bush.
When sitting on the bench, you see this area. Butterfly Weed, Lantana, Salvia's, Balloon Flower, Clematis, Summer & Moss Phlox, Red Hot Poker, Spirea, Primrose, Penstemon, Gaura and of course, Susan.
View from standing to the back of the Ligustrum. The Ligustrum is planted where I once had a beautiful Japanese Loquat. (Click HERE to read about that sad loss.)
Looking down the path, to the right you will find the Liriope area under the pine tree, then an area with Verbena and the Mailbox I recently showed you.
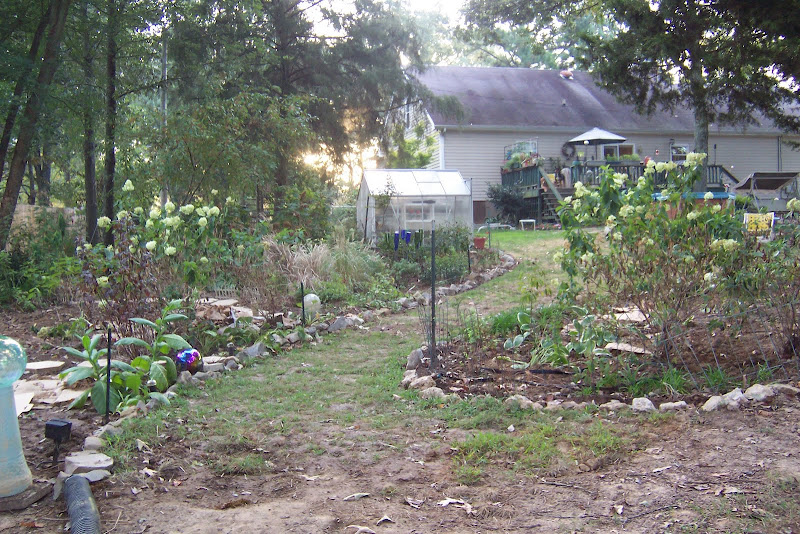
This is the long shot of the Semi-Formal Garden. Hum, how do I bring those two pathways together? Or do I just leave this area as is? This grassy area leads to the Wood/Mower Shed and also the area where we collect debris. We would like to leave this area a grassy pathway if possible. Thursday, I shall show you more EXTENDING PATHWAYS, In the Garden...
Words and Photos Property of In the Garden Blog Team, In the Garden

Thursday, May 10, 2012

Through the Garden Gate

BY SKEETER
A little addition can really perk something up a bit. I found these simple panels for $5.00 each. As soon as I saw them, I grabbed 2 of them and knew just what I was going to do with them. I wish, I had grabbed the remaining 3 as they were such bargain finds. I just love the "Christmas Tree Shops" because they have such bargains and new inventory weekly! I put the panels by the Semi-Formal Garden arbor to make a sort of faux gate. The Saint wanted me to keep them black so I put them into place.
Hum, I like Black Iron Gates but not with a White Arbor. I tried this look in my Georgia Gardens to see if it would grow on me.
As you can see, it did NOT grow on me. Sorry Saint but I just had to give them a coat of white spray paint.
I now think they look as though they belong there and are part of the arbor.
I extended the walkway outside the gates beyond the Lily Rows. And also placed Cypress Mulch for moisture and weed control.
I think the white of the gates now tie in with the arbor and the little poles (Faux Fence) topped with bird houses. Click Here to see the Faux Fence. On down the line, I have added something else you may spot but we will not talk about that today as it deserves its own post at a later date. The Faux Fence is a bit difficult to see with the Lily's in front. Wow, that grass is thirsty.
Our neighbor's kitty Lilo likes the gate.
The Lily's are arriving!
I just love Lily's and they seem to enjoy our soil conditions.
They are thriving even after being divided last fall. Do you see what I see in this Lily? Yes, Rain Drops! Finally, we are having a decent rainfall today! (which is Wednesday as I type)
I have lost track of the lily names so please don't ask me about them. This summer when I am stuck inside keeping cool in the Air Conditioning, I plan to make some sort of tags for the plants. I have lost track of so many names but luckily, I have kept most (not all) store tags. 
It would be nice to stroll along the gardens and be able to name the beauties when someone ask about them. As we age, the mind does not seem to hold onto the information as it once did in life. Oh gee, I am still in my 40's (for one more year) and I know "I ain't seen nothing yet" where the memory is concerned.
It is difficult to name a favorite of my blooms. As with children or pets, how can you pick a favorite? But this is a bloom I might call a favorite. It is located in the Semi-Formal Garden as you go THROUGH THE GARDEN GATE, In the Garden... 

Words and Photos Property of In the Garden Blog Team, In the Garden

Friday, September 24, 2010

Relandscaping the Now Missing Pool

From In the Garden

See that huge sand pit in my yard? The area used to house a nice above ground pool that at one time looked like this:

From In the Garden
Not too shabby and a most inviting sight on a hot summer's day. The reason why the pool is no more is the trees. Over the past nine years that we've lived here our trees have grown phenomenally and had really closed in on the pool. Trees drop leaves and acorns-tons of acorns. The maintenance on this pool just got to be too much for me so I suggested to Mr. Fix-it, quite strongly I might add, that we sell the pool. Enter Craig's List and said pool is sold immediately!

We spent one hot day in early August taking the pool down. It was hot, sweaty, and dirty work. At least we were in the shade while taking the pool down. Because we didn't want to leave the very nice buyer out in the cold in the 100 degree heat in full sun without a pool we (Mr. Fix-it and I) offered to help him set it up. I'm not going to make this a long story but after taking the pool down and nearly having the frame set up in its new home a strong gust of wind came through and blew the pool down. It was not a pretty sight. Then a strong thunderstorm came through. Whew! From sweating in 100 degree heat to freezing and soaking wet we had quite the day with this pool. Fortunately, Sunday dawned nice and the new owner of the pool did some work on the pool overnight so that when we convened to work on setting up the pool again, all went smoothly. It helped that his neighbors came over and helped too. You really need a lot of hands when setting up a pool. The big rush with the buyer of the pool was that his wife was due to have a baby within the week and they really wanted their new pool set up. Mission accomplished but not without some pain and some good memories. Just let me tell you that taking down pools and setting them up is not for the faint of heart. It is a very difficult job! But when all was said and done Mr. Jacob got a very nice pool for a very reasonable price and we got this....

From In the Garden
13 September 2010

The final product came out rather well I think. A new path down the center of where the pool used to be located and a lot of shrubs and perennials complete the landscaping job of the pool area. Lest you think making a new garden is as easy as snapping pictures and walah it is done-I added the dates in to show you just how long it took me to complete this huge job. We initially took the pool down the 30th of July. Of course, draining the pool and preparing it for movement began a few days earlier. The landscape job is pretty much complete with the exception of a few wheelbarrows of mulch on this date, 24 September 2010-about eight weeks later!
From In the Garden
26 August 2010
First of all it took me a few weeks to find the time and energy to start back filling the large hole where the pool used to be. The delay was in part due to the intensely hot temperatures we experienced in August, but I also needed to really get myself psyched to do what needed to be done-namely to back fill the large hole left by the pool. Since our property slopes the pool was dug into a slight hill where at its highest point there was a two foot drop off from the outside garden to where the pool used to be located. Here we can see where some of the drop off has been filled in. I used fill from edging my other garden beds where I moved approximately 40 wheelbarrows full of soil and grass. This soil was unceremoniously dumped into the hole. I wished I could have edged all the beds because that would've cut down my trips to get soil, but with the drought the ground was practically like rock and no edging was going to work. Enter the local quarry for some soil for back fill.
From In the Garden
2 September 2010

I took five trips downtown (about a 13 mile trip one way) to the local quarry where I had Mr. Fix-it's truck loaded with about 1.5 tons of soil each trip. This soil, while not ideal, was handy and available and they loaded it for me. I had to unload it -with a snow shovel. Surprisingly it only took me about 1.5 hours to unload the truck after each trip. These trips were spread out over a week or so based on my schedule and the heat.

As I was back filling I decided to fill the left side of the hole first and plant as I went along-can you say inpatient? That was me! When I say left side I mean of the new path area and where the pool used to be. You can clearly see where the left side of the hole has been partially filled in the picture above. When I got an area completely filled in I planted plants in that area. I surmised they'd do better in the ground than in the pots they had been sitting in all summer. I had had about 40 pots full of plants waiting in the shade near the water spigot just to be planted. The plants were looking rough as it is difficult even with regular watering to keep a shrub or even perennial alive in a small pot in 100 degree weather. I don't know how nurseries do it! After I planted I watered. Did you know a water molecule is a 'sticky' molecule? It will make a chain with other water molecules and try to fill up all spaces where there is no water. Hence, after watering the left side of the new beds I woke up in the morning to find that the water had spread to the center of the former pool area where the path was to go. Can you see the water line in the dirt in the above picture? This is where the water finally ran out and stopped moving. It had saturated all it could then gave up. The 'soil' I used for back filling is creek bottom soil and is a very fine particle soil. I have used this soil before and find it extremely heavy. The saving grace is that there is about 4-6" of sand under it (the former base of the pool). I'm hoping this will make drainage better since this area of my yard is naturally low anyhow and seems to draw water; not that we've had any this summer.

From In the Garden
7 September 2010

Ah, here we go! We can now see my plan for the space. It took more than one month but it is coming together nicely. The grass path (six feet wide to allow for the lawn mower and easy access to the shed) is in place. All grass was removed from the area surrounding the old pool and transplanted to its new location. Just look at the pool picture (second picture on this post) to see the lovely grass that I worked so hard to fertilize, grow, and weed-only to rudely move it into a new location; all with my trusty shovel. The grass this time of the year is mostly dormant or mostly weeds. I grow fescue and I tell you this summer has been difficult for it. Nonetheless, the soil and sand are covered and the grass will settle in quickly. As an added good measure to get a good stand of grass in this area I sprinkled Rebel grass seed on top of the transplanted grass. By next spring you'll never know it had been transplanted.

From In the Garden
7 September 2010

A word about the garden on the right side. Like I said before, I planted as I went along so that once one part of the garden was done I did not need to go back to it. Part of this new garden in the pool area encompassed the 'Greenhouse Garden' that was an already established garden. I needed to change this garden because my whole vision for this area had changed with the removal of the pool. The change involved moving some 'Annabelle' shrubs and perennials. This part of the job, while time consuming, was actually not difficult since I had a good idea what would work, what I wanted and how I planned to plant.

First and foremost was the fact that since the garden area is about 75 feet from my deck I needed a big impact and onesies and twosies were not going to cut it. Nor would only perennials. My line of attack was to plant all shrubs in the old pool area and gradually step down to perennials as you come closer to the deck and up the slight hill toward the greenhouse. There are two trees in the greenhouse garden already (Crabapple and 'Burgundy Flame' Japanese maple) and these two trees did not move. In the planted right side of the garden are: 9 red astilbes (transplanted), 9 'Magnus' coneflowers, 9 'Ruby Star' coneflowers (all coneflowers purchased for $1 per pot markdown at Lowes), 9 'Golden Jubilee' agastache (also $1 markdown) , 3 'Striatum' geraniums (Jung Seed), 6 'Tango 4 You' lilies ($1 markdown), 15 great blue lobelia started from seed (thanks Catherine), 10 turtleheads (cuttings), 2 columbines (markdowns), 3 cimicifugua racemosa (divided and transplanted), 3 Japanese anemones (transplanted), 2 chrysanthemums (transplanted), St. John's Wort (gift from Naomi), 'Globosa Nana' cryptomeria (transplanted), 3 Annabelle hydrangeas (moved from next to greenhouse to under crabapple), woodland phlox, woodland asters, hardy ageratum (all transplanted), a variety of sedums (already there), 'Immaculee' peony (already there), asters (already there), 3 oakleaf hydrangeas (seedlings transplanted from elsewhere in the garden-they are now about 5 years old and 5 feet tall), iris cristata, 6 'Adagio' ornamental grasses (moved from around the pool and divided), several daylilies, little bluestem grass, 'Goldsturm' rudbeckia, 12 'Red Riding Hood' penstemons, a clump of heliopsis, and about 8 clumps of the 'Autumn Sun' rudbeckia. The area is quite large so though it sounds like a lot I list the plants mainly for my own records and not really for you all. I'll tell you why, most of the time when I read blogs I don't really pay attention to the lists of plants so I'm sure you all won't either. Just suffice it to say the perennials and shrubs are all massed in areas I think they will do best based on soil and light conditions. All plants are tiered from shortest to tallest in the garden based on the vantage point. I must say this though, there is another path behind this garden that separates a maple tree and groundcover from this particular garden so that other path has a completely different look to it from its side of the garden. The area is quite large but I seemed to have filled it up quickly. I can never imagine just how quickly until I plant.

On the lower end of the right side of the path (where you see mainly plain dirt) I planted: 4 'Limelight' hydrangeas, 3 'Tardiva' hydrangeas, 5 doublefile viburnums, and a 'Diablo' ninebark. The below picture shows a better view of all the shrubs. See the limelight? It is happy and hopefully will be happier next year now that it is in a moister area that receives more sun.

From In the Garden
8 September 2010

The doublefile viburnums are the anchor in this garden alongside the fence and under the oak tree behind the 'Limelights'. You cannot see them now because they are rather small and a bit hidden. The 'Doublefiles' were all bought at Rural King during their 75% off sale for $5 a piece. A steal for sure. Viburnums are low maintenance and I hear the doublefiles are the best. We shall see. Hopefully if they do well they will grow to 8-10 feet tall and wide. They will make a nice cushion against the wood fence and beneath the oak tree behind the hydrangeas. There are various other perennials planted in here. Some dwarf iris, tiarellas, nicotiana, hostas, ferns, and hellebore seedlings as well.

From In the Garden
14 September 2010

Here we are with all hydrangeas moved and in place as we walk along the path at ground level. Pictures just don't really give the reader the feel for the area unfortunately but walking along you can at least see it up close. Some cardboard has been placed for mulch. All cardboard was received via another Freecycler who just moved to the area. I find cardboard great for under shrubs where voles are not a major issue. The cardboard has since been covered by hardwood mulch. Prior to removing the pool this area would be inaccessible and the way to the shed would be to the far right and to the far left of the 'Limelight' hydrangeas. What a difference for me!


From In the Garden
14 September 2010

Looking up toward the house we can get a different perspective of the garden. Paths are one of the most important features in a garden and I like my paths to be functional yet a bit mysterious and enjoyable when traversed. Coming up from the storage shed this is my view.

While I listed my plants for the left side of the path I did not list them for the right side. They are as follows: sourwood, three spireas, 3 'Limelight' hydrangeas, 'Duet' variegated beautyberry, 'Soft Touch' mahonia, yellow and orange daylilies (transplanted from around the pool-you can see them in the pool picture), hostas, pachysandra, and hellebores. I have intentionally kept this side simple due to an awful lot of shade and competition from a cedar tree. The sourwood tree will be the focal point once it gets larger (which will take years probably). It is situated in the curve of this bed where it is sandwiched between the canopy of an oak and a cedar tree. I have read where sourwoods do not like root competition. Right now there is none but in a few years I suspect roots will grow to fill in this garden area; therefore I've tried to use hardy plants here. I've found 'Limelight' hydrangeas actually do fairly well under trees because these large and mature ones were growing under a black gum tree. I was able to pull them out bareroot due to the drought. The roots surprised me because they spread more than four feet from the shrub's trunk. The problem I found that I did not like was the roots were not very deep; which is not good for survival in the typical drought conditions Tennessee seems to experience each summer. We'll see how they do in their new location where there are still roots, but the area is moister.

Wow, this is a long post and one I've been working on for a while now. I am not done with this area. I did do a landscape design for this garden but it is not quite finalized. I will share that at a later date....

in the garden....


Words and Photos Property of In the Garden Blog Team,

In the Garden

Friday, October 17, 2008

Georgia Flower Garden pt 2

Today is the second part to my 2 part series on what I like to call my Semi-Formal Flower Garden. Yesterday, I told you about Levels 1 and 2 so today we will go into Level 3 or the main level of the Garden...

You know the white fencing was the first thing to start the garden by hiding that ugly gas tank. The second thing was the formation of this round planter. I had some free bricks that needed a home so I dug them into the ground to form a half circle around the circle planter. This was fine for the first year but with the addition to the Levels, I no longer thought it worked in my garden. Time for a change.

I got my shovel and little red wagon and went to work! I broke up the half circle into two separate planters. As you can see the black-eyed Susan's were already popping up from the ground inside the planters. See the clay brick's that form a planter to the left in this picture? Well, those bricks were taken from the planters and I dug them into the ground to form a border to a walkway. Many bags of pea gravel made for a perfect path for the feet. My only regret was not using landscaping cloth under the pea gravel. Pulling weeds from the gravel was not fun this summer. Argggg, live and learn...

Wow, did I pound a lot of bricks into the soil. Did I mention I had a tonsillectomy a few weeks prior to taking on this task? Yep, I love to play in the garden in the spring and surgery will not keep me out for long!
I put in stepping stones to the garden bench. Ah, the fun of playing with a hand shovel, rubber mallet, sand and a level...
You can see the 3 levels from this view. The main garden, then up one level to the upper level, then up one more level to the boat shed.
Boat Shed, what boat shed? I don't see a boat shed, do you?
I have accomplished my goal. I don't really notice the Metal Monster any more. There are too many other things for my eyes to see.
Things started out growing slowly but once the warm summer was here to stay things started to take off like weeds. The picture below was snapped on May 9, 2008.

This picture below was snapped on June 19, 2008. What a difference 6 weeks can make in the garden!
In this picture below, you can see both Castle Rock planters that now replace the clay brick planters. The planters look so much nicer with the Castle Rocks to replace the brick. I am bad about taking away from one project to create another project. Does anyone else do this?
This picture below was snapped on July 30, 2008. Another 6 weeks of growth makes a bigger difference. Notice how the circle planter filled with Periwinkle has grown. I will show you that planter in a close up sometime in the future.

This picture below, was snapped on Sept. 8, 2008. I had to finally cut the golden Lantana from the pathway. Snakes like to hide under such fun stuff and I like my ankles without holes in them!

Just look at the upper level on Sept. 8, 2008. The Verbena has grown like crazy and the Periwinkle has reseeded itself from last year and jumped the planter! You can no longer see the Castle Rock planter. Everything is getting into the grass of the yard now. We must take control...This is the view from the upper level into the main garden. The elephant ears give such a tropical feel to the garden. The main level has Lavender, Lantana, Yarrow, Verbena, Cosmos, Marigold, Begonia, Black-eyed Susan, Periwinkle, Coreopsis, Mexican Heather, Trumpet Vine, Cleyera, Loquat and Plum trees.
Here is a view from standing behind the white picket fence. I can see the entire Flower garden, the Butterfly Island and also my blooming Crepe Myrtle! Ah, what a view!

So there you have it. A Semi-Formal Flower Garden all because of an ugly Boat Shed! Who would have thought something so pretty could have come from something so ugly?

Spring is my favorite time of year as everything wakes up from a long winters nap and is ready to take on the world. I am kind of like that also. I take off into the garden and have so much fun creating things such as this GEORGIA FLOWER GARDEN while the birds sing high above me as I play, In the Garden...

*Note: I want to give Tina a big Thank You for allowing me to post this week. I knew getting a posting up every day was a challenge but had no idea how much work is involved! I enjoyed my week but am looking forward to taking off for the next week for a bit of R&R myself. So see you all in about a week or so! Okay Tina, back to work for you! lol