Showing posts with label Landscape Design. Show all posts

Monday, September 29, 2014

Update On My Friend Eddie's Garden


DSCN1823
Garden tour time! And what better garden to tour than a good friend's beautiful garden you designed yourself? Such was the case when my garden club met at Eddie's garden last month. What a fun visit! Besides being very gracious, Eddie and her husband have quite the beautiful home and lovely garden. Today is an update of the now mature garden I designed and won an award for last year from the Perennial Plant Association (PPA).
DSCN1833
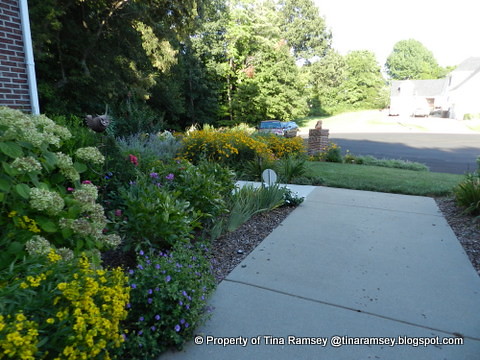
This garden was designed for a plant lover. Eddie wanted something different, something in bloom all year round, a wildlife friendly garden, and something she could work in. The above view is from her front door.
DSCN1831
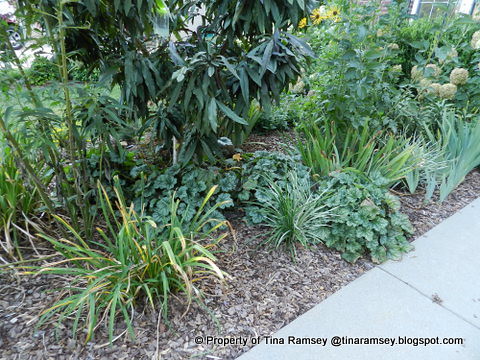
This corner to the right of the front door showcases her patio peach and some groundcovers. You cannot beat heucheras for year round interest. Here 'Mocha Mint' takes up the job along with some irises and daylilies under the patio peach tree.
DSCN1829
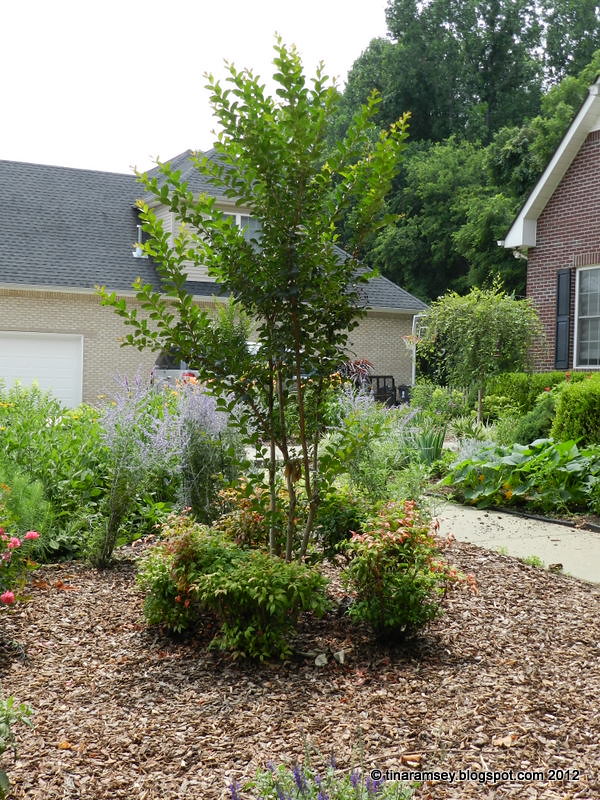
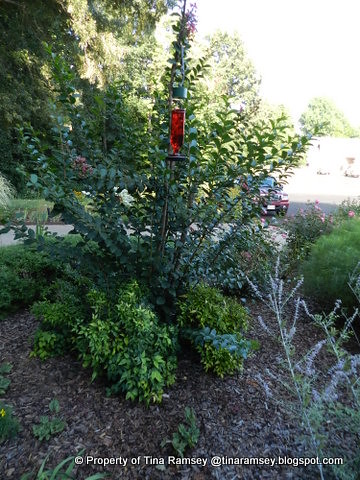
One of my strengths in designing a landscape is to combine trees, shrubs, perennials, bulbs, etc, into a complete landscape that flows and provides lots of interest. Here we have a crepe myrtle underplanted with dwarf nandinas. I am not a big fan of the tall nandinas but do like the dwarf nandinas as they can be planted in sun or shade (prefers more sun than shade), and they are evergreen. This is a bonus in a year round landscape.
DSCN1828
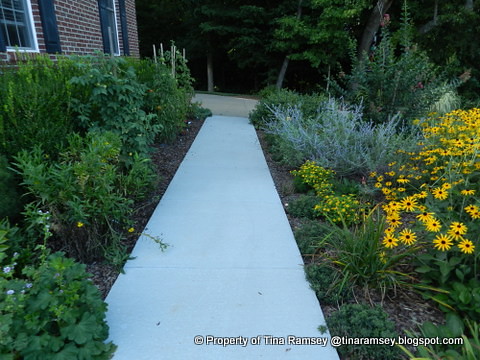
Walking down her front sidewalk you are greeted by all sorts of pollinator friendly plants. Eddie is lucky in that her home faces east. In Tennessee you can grow just about anything in an eastern exposure.
DSCN1827
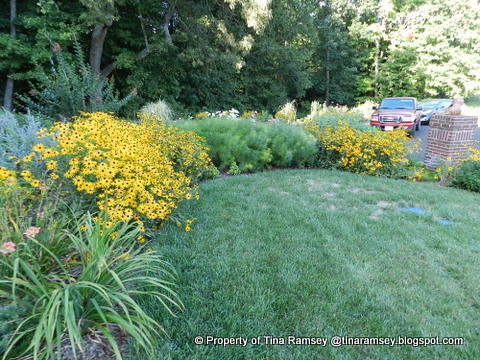
Eddie's front lawn is bounded by perennial beds. Here we have the 'summer garden' filled with amsonia, brown eyed Susans, dayliles, and coreopsis. The border goes further into the background toward the driveway where 'Knockout' roses are planted along side baptisias and asters.
DSCN1824
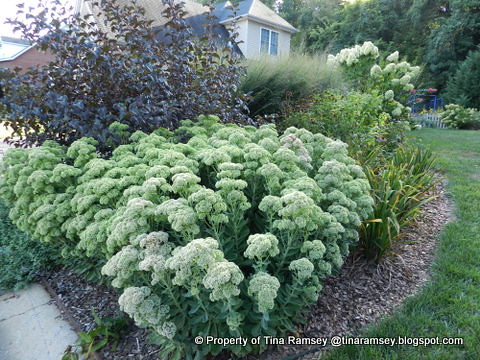
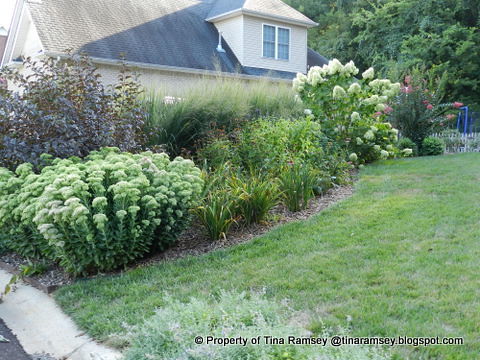
This part of Eddie's garden is my absolute favorite part due to these beautiful 'Autumn Joy' sedums. I call this her 'fall garden'. This area divides Eddie's home from her neighbors and provides year round interest in addition to hiding a power transformer box behind the grasses. The purple ninebarks like 'Diablo' (pictured here) make a good companion for sedums.
DSCN1822
This border garden flows really nicely and is not unfriendly to the neighbor house with the way it was designed to flow. The intent was not to cut off any neighbors but to enhance Eddies gardening views and gardening time.
DSCN1820
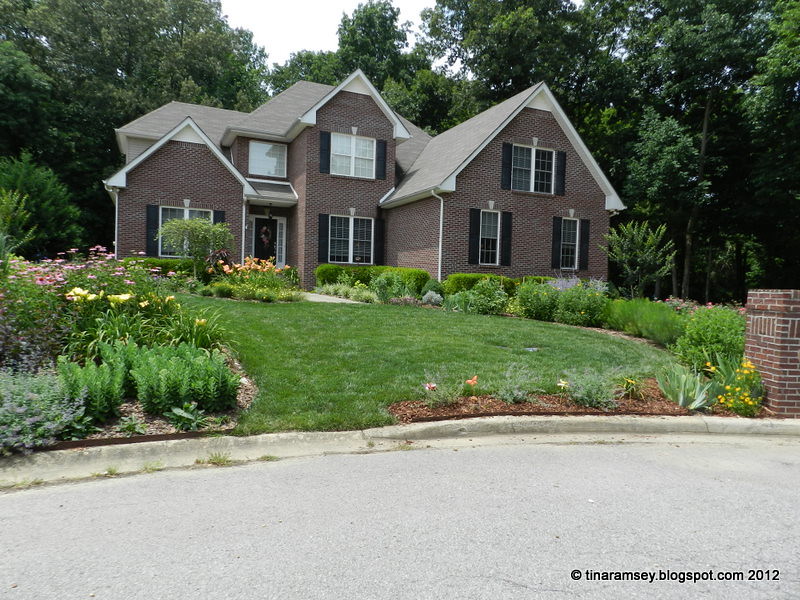
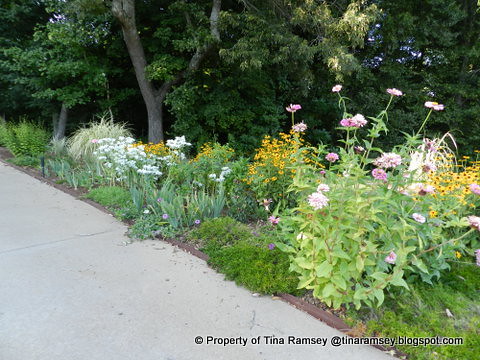
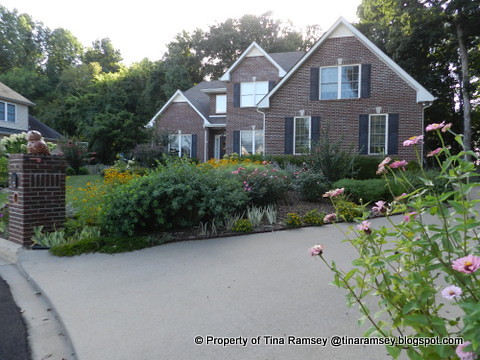
Now this garden is a garden I had no part of and I tell you I love it! Eddie has done a fantastic job landscaping the end of her cul-de-sac. Just look at all that color! And if you could see this garden in person you'd be delighted with all of the pollinators visiting this beautifully done garden. The textures, heights, and colors all work very well to make this end of the street garden a draw for passerbys.
DSCN1819
One last shot of Eddie and Pete's beautiful home....

in the garden...

I am really behind on posting pictures and articles. Hopefully things will slow down for me a bit so I can be more regular but life is hectic! Blogging sometimes takes a backseat. Please stay tuned for more garden tour pictures from my friends gardens coming up-soon! 

Words and Photos Property of In the Garden Blog Team, In the Garden

Wednesday, August 20, 2014

An Update to My Daughter's Garden and Landscape Design Progress


DSCN1763
I love Limelight hydrangeas! The above bouquet was picked by my daughter Liz from her garden in Louisville Kentucky. On a recent visit Mr. Fix-it and I got to enjoy her garden as well as her and her one year old daughter (our granddaughter) and we had a good visit though we missed Liz's twin sister and her daughter (they were supposed to meet us there but it didn't work out this time--we'll see them soon tho).
DSCN1706


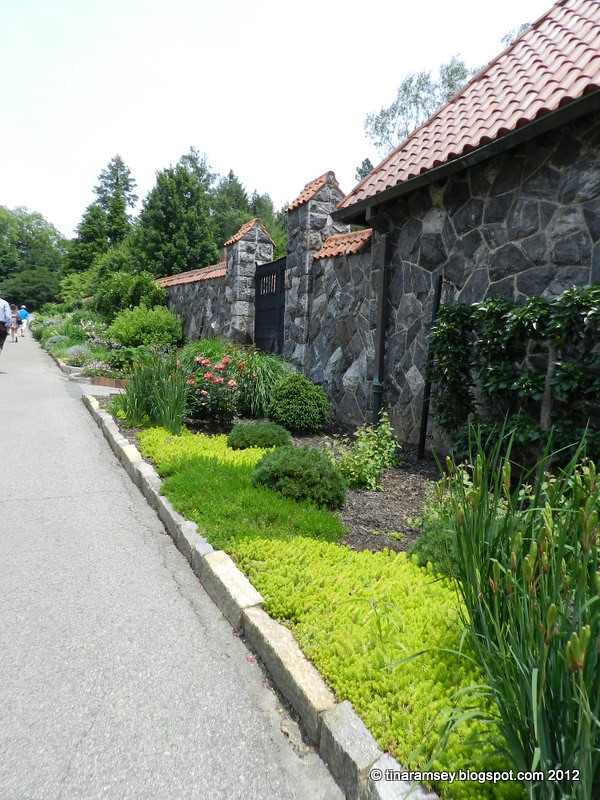
I was quite interested in the gardens because I did the complete landscape design for Liz's house two years ago and the front gardens are finally coming into their own. If you like, please go back and look at that post about the landscape design because you will most likely be quite stunned by the changes in the curb appeal in only two years. Liz has not been able to install the complete design but on my visits up there and when she is able to, she and I work around the gardens. Having a small toddler in the house means garden work can be slow, but this front garden is really impressive and honestly it takes very little time for maintenance but looks good all the time. It is pretty well finished.
DSCN1710
All of my garden and landscape designs start with structure and year round interest. In Liz's garden I knew the front garden had to be fairly large and its edge had to have a nice mowing curve. So many times I see foundation gardens designed too small with awkward angles that mowers cannot easily mow around. The structure here is the 'Grace' smoketree. It is the taller shrub with purplish foliage. Liz has been digging up and moving this particular shrub from house to house as she has moved over the last six years. This is the first year it has really come into its own. We are working on developing a strong framework for it because during the moves it has suffered some setback. Ultimately it will be come a nicely limbed up small tree that will provide year round interest. It's purpose is to provide structure, privacy, and interest without totally overwhelming the house and view from the house and to the house from the road. It is also a nice tree that will not overly shade the southern facing garden but will give Liz and Everleigh some shade in the spring, summer, and fall without blocking the southern sun in the winter. 'Grace' smoketree is an awesome cultivar of smoketree and will do well in a full sun exposure. Once established all smoketrees are quite drought tolerant.

Most of the perennials in Liz's garden have come from my garden. They are all grouped in balloon (massed bubbles) sized spaces on the plan and massed to make a nice effect. I group perennials by the texture of foliage and bloom times as well as heights and then finally colors. The pinkish sedum right here on the corner of the driveway and sidewalk really makes an attractive edging that will provide year round interest. These were just planted a few months ago and will fill out even more by next year. The color of this sedum blends perfectly with the nearby coneflowers and does not clash with any of the yellows in this garden. Behind the sedum are: coneflowers and rudbeckias, coryopsis, 'May Night' salvia, Japanese roof irises, asters, and daylilies. Interspersed in this garden are daffodils and surprise lilies. Liz's garden will have something going on in it all seasons of the year with the combination of perennials, bulbs, and small trees. 

Here is a copy of the design tho I am not sure if you all will be able to see it in this format. Each of my designs are drawn out on 24" x 36" vellum. Th vellum copy was scanned into a computer to get the electronic file copy. Liz's information has been blacked out to protect her privacy.

Liz House Design


The rock edging was all picked up by us from the as yet undeveloped part of her subdivision. This limestone is a tan color and is indigenous to the area. It fits right in as the color of the limestone is subdued in this garden and picks up some colors in the house. A lot of Liz's neighbors are also using landscape rock around their houses for some interest too.
DSCN1708
This is the eastern side of the house. As such, it is a somewhat sheltered part of the garden as far as sunlight and harsh conditions. Over here are some aucubas, spiderworts, hostas, heucheras, Japansese irises, columbines, and a 'Limelight' hydrangea and peony out front of this part of the house. This area descends down to the backyard. The good cover of hardwood mulch (I use it only on new gardens) underlaid with cardboard has ensured this garden does not erode down the hill while the plants establish themselves. This winter was a pretty tough winter on most gardens and Liz's garden also took a hit. Mainly to the three aucubas located on this side of the house. Aucubas are marginally hardy in Zone 6/7. It helps if you plant aucubas in full shade so that they do not quickly warm up in the winter then suffer freeze damage when the sun goes down at night. This is really what got to Liz's aucubas. Fortunately two of the three are slowly coming back. One died.
DSCN1712
The western side of the front garden gets a lot of sun. As such all sun loving plants will do well here. Here we have some 'Limelight' hydrangeas, peonies, lambs ear, salvias, irises, mums, and a 'Graham Blandy' evergreen corner accent shrub. I made a common mistake when I designed Liz's landscape design. Oftentimes experts in the business can tell what season a design is prepared in just by looking at the design. The clue to which season this design was designed is that it looks great in the summer-the season I designed it. The problem I made was I did not allow for evergreens to help carry the garden through the winter. Liz and I have somewhat compensated by adding some low growing junipers in front of the 'Limelight' hydrangeas. These are slowly filling in and hopefully will provide that much needed color in the winter. If a designer designs a plan in the winter then most likely she or he will go heavy on evergreens, it is the opposite for summer designs. A hard learned lesson for me.The 'Limelight' hydrangeas are a bit floppy because they are young plants and simply overloaded with blooms. Hence the bouquets of 'Limelight' hydrangeas in the opening picture. As time goes on we will train the hydrangeas by pruning; which will in turn shore up the main trunks and help to prevent floppiness in the future.
DSCN1715
This is a close up of the sedum. I can't tell you how beautiful this garden looks from the sidewalk, street, and even houses across the road. This is one of my absolute favorite sedums. I don't even know the name but butterflies flock to it. On this day the rain kept most insects away.
DSCN1759
But! The rainy day garden did bring out a box turtle! Liz found the little box turtle while working outside in the garden. It was a lesson in teaching her daughter the value and beauty of nature to her daughter and those little moments are priceless! And all because of a garden....

in the garden....
Words and Photos Property of In the Garden Blog Team, In the Garden

Wednesday, May 15, 2013

Measuring the Land for a Landscape Design


DSCN6768
I've been busy lately working on a labor of love. That labor is working on our newly purchased land and trying to move my current Tiger Gardens to the land. This feat alone would keep me busy for months but I've also undertaken the task of designing the property.

Well, one part of design you can never get away from is measuring the area you plan to design. For a 600' long field that is on average 150' wide, the measuring can be a daunting job. But! With the help of one Mr. Fix-it, a compass, measuring wheel, 300' measuring tape, and several hours of work we were able to get the job done a few weeks ago

I have found over the years that I have been designing landscapes that the best most accurate way for one person to measure a property is to use a baseline. When I measure homes and their yards I normally set up a baseline parallel to the house and take all measurements off from that one baseline. It is then very easy to be accurate back in my home office because I know precisely where my baseline is in relation to all of my measurements and in relation to the house. On our property since we have no house I ran my baseline down the center of our large field. Once this was done I used my handy dandy Army compass to give me the heading of the tape measure. In my case my heading was 250 degrees (looking west) and 070 degrees looking east. Our field is somewhat on a slant which is something I am not too happy about. Mr. Fix-it and I want our home to face due west (270 degrees) with the back facing due east (090 degrees). The difference is a mere 20 degrees but this difference makes a big deal with natural lighting inside of a home. Many folks prefer their house to be oriented on a north/south axis but we do not. Our current home faces east with the back heavily shaded by oak trees facing west. We love it! Gardening on either the east or west sides of a home in Tennessee is very easy because there is usually lots of good lighting. East exposures are preferable to west exposures. Gardening on either south or north exposures has its challenges and I find when I visit homes with that orientation I simply do not like it. At any rate, the orientation of the field does not matter at this point. It simply means our house will be a different direction than facing straight down the field. But even that is not yet determined since I have not completed my design. 

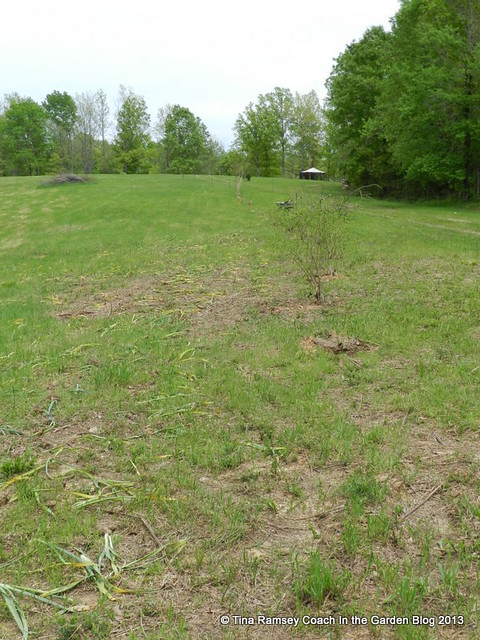
Once I have my baseline oriented properly I begin taking perpendicular measurements off from both sides of the tape measure every 10' feet or so. I annotate all measurements on graph paper I carry with me. Mr. Fix-it and I found our field to be a full 600' long. It started at the west end to be only 87' wide but at the east end it was about 300' wide. The east end of the field (the direction we are looking in the above pictures) will be where we'll build our house. Both the above picture and below picture are looking east from the west end of the field. You can just make out the top of our gazebo in the far distance. That gazebo is our 'home away from home' while we work on the land and once we begin the house build. Looking at the gazebo you can see the field slopes down slightly on the eastern side. Our house will be built on the high point of the field to the left of where you see the gazebo.  
DSCN6777
I included this picture to also show my other labor of love-moving my garden. To date I have planted approximately 6200 daffodil bulbs of several different varieties. Some are late blooming, some are very early, some are white, some are doubles, some are yellow or a combination. Some bulbs are newer cultivars and some are very old cultivars. If you look closely you'll see the yellowing foliage of some of the daffodils I recently planted. Daffodils can be divided and transplanted at any time of the year. You should always leave the foliage until it turns yellow. Unfortunately these bulbs had their foliage turn yellow prematurely since they were dug up and transplanted. Transplant shock will get bulbs as well as plants. The bulbs will be in a bit of shock for a while but should still bloom next year. I have learned a few lessons in my current gardens regarding daffodils. You do not want them planted too closely to shrubs. The shrubs will quickly overtake the daffodils as they grow large. It is very difficult to dig out the daffodil clumps once the shrubs get large due to the roots. To prevent this issue I have left a 10' buffer between the daffodils and the shrubs. All along the driveway I planted hydrangeas, crepe myrtles, and some grasses. Right now the shrubs are not much to look at but they will do well with time. On the northern side of the field next to the forest I left about a 15' foot buffer between the daffodils and the forest. This is for mowing and walking purposes only.
DSCN6767
I don't think (in fact I know) I will be able to take all of my garden to the land but I am making a good valiant stab at it. It seems whatever is in bloom and can be moved reasonably easy is what I am moving. Besides the hydrangeas (11 PG, 7 oakleafs, 5 eight foot crepe myrtles, and three clumps of plume grass) I have moved some Japanese snowball bushes. I was able to dig up more than a dozen from around my very large Japanese snowball bush. I could not dig up the mother plant as it is much too big and probably would not survive the move. I am just as happy taking the smaller plants anyhow as they will settle in much faster than the bigger plants. I planted eight Japanese snowball bushes at the west end of the field. The large white 'snowball' blooms will be a focal point from our house. One that we will easily be able to see when looking all the way down this field.
DSCN6776
Since the field narrows at this end I used my handy cloth measuring tape and curved it around a perimeter of the field set back 15' from the woods. I then measured every 10' along the tape measure and sited my Japanese snowball bushes. I put five on the outside border and three more offset on the inside curve. When looking at the 'hedge' of snowballs from the house it should look like one solid mass of snowball bushes. But! I will still be able to mow around these bushes and they will have plenty of space to grow. 

This is just a long post but sometimes to get all the info of my thought processes out there posts need to be long. I oftentimes look back at posts to see what I have done and why because as I get older my memory fails me. Thank goodness for records, designs, and blogs....

in the garden....
Words and Photos Property of In the Garden Blog Team, In the Garden

Monday, July 16, 2012

Coloring Landscape Designs Using Alcohol Markers


DSCN3550
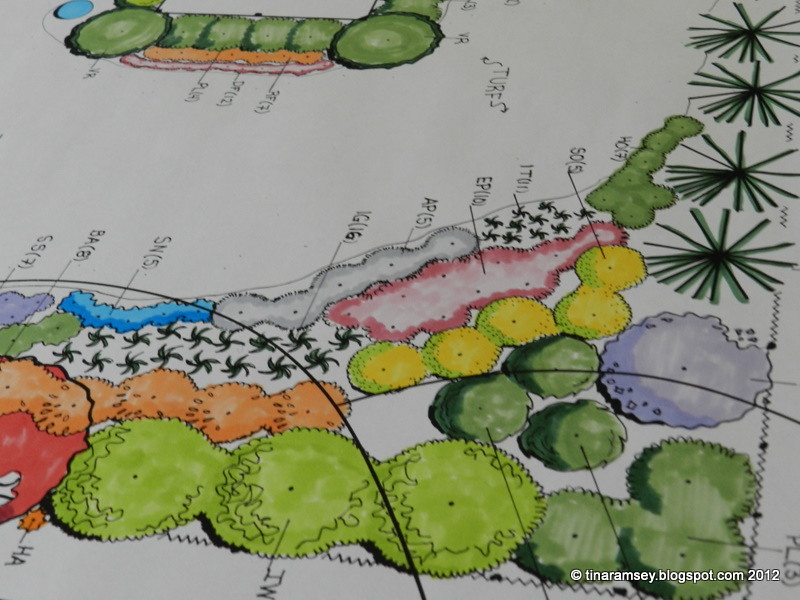
I recently discovered an excellent way to color my landscape designs using alcohol markers. Some of you may know of alcohol markers but for me they are a new and unique thing. When I began my design business I did not color designs, but as time went on I realized colored designs really help to bring them to life for the clients. I experimented using different colored water markers, even the high priced ones, but the results were not satisfactory at all. I next happened upon watercolor pencils. I liked this effect second best to markers but since I could not locate the appropriate kind of marker to color my designs I had to use the watercolor pencils. 


Watercolor pencils are different colored pencils that you can apply a small bit of water to in order to blend colors. The designs I colored really came out nicely but sometimes the paper would be wrinkled and I just did not like the vividness of the pencils. Pencils just did not compare to markers. Let me back up a minute, my landscape design books show pictures of designs colored with both markers and pencils. Both techniques can be used to good effect but I personally preferred the look of the markers.


I just happened to be at Hobby Lobby when I spied a clear showcase full of markers. "Hmmmm, I wonder what those are?" I thought to myself.  I asked the representative to open the case and I was actually able to try out the markers. Wow! Enlightenment never came at such a cost. The 'Colorific' markers work great and come in hundreds of colors. They are known as sketch markers and can be blended easily to create different effects. What a cool new tool I found. The only problem is that each marker has a price tag of $6.99. That price must be why the markers were kept under lock and key as paying this amount for one marker seems kind of crazy to me. But pay I did. I had to be very selective in what colors I chose for my landscape design palette. I tend to like to color plants in the natural color they will grow in a client's garden while differentiating them just enough to show they are a unique plant. Without buying one of every color what I was able to do was to purchase some color groups such as green, and other colors with only one or two colors that were simply one or two shades off from one another. The colors I selected have worked well for me. As I've begun using the alcohol markers I have learned you don't always have to use more than one color. You can actually layer one color over itself to get a completely new effect. These markers are really useful and excellent for creating beautiful landscape designs....


in the garden....

P.S. This design was not completely colored when I took the picture. Perhaps I'll post a picture of a completely colored design at some point. 
 

Words and Photos Property of In the Garden Blog Team, In the Garden

Friday, July 13, 2012

A Landscape Design Before and Afters


Materia Pictures 002
Before

I thought I'd share one of my landscape designs with you in the form of before and after photographs. The client of course gave me permission to share the photos. 

This was a front yard landscape design I did last May. The client diligently worked all summer and fall and got the beds put in as well as all of the unique plants. The only request made of me when designing this garden was to make it a showplace with interest all year long. One more major consideration is that the homeowner is a very good gardener. This meant very unique plants, and lots of them. I am a designer who designs with trees, shrubs, and perennials. All are in the this front yard design. I think you'll agree this is indeed now a showplace that would delight any gardener-and in only one year! I tell you my reward when designing (besides some income) is to see the designs installed! I hope you enjoy the new garden as much as I do. In person it is really nice and may be on display in a garden tour in a two years-I hope. Enjoy the tour.
DSCN3259
After


DSCN3258
After: left side of house.
Materia Pictures 004
Before: left side of property.


DSCN3260
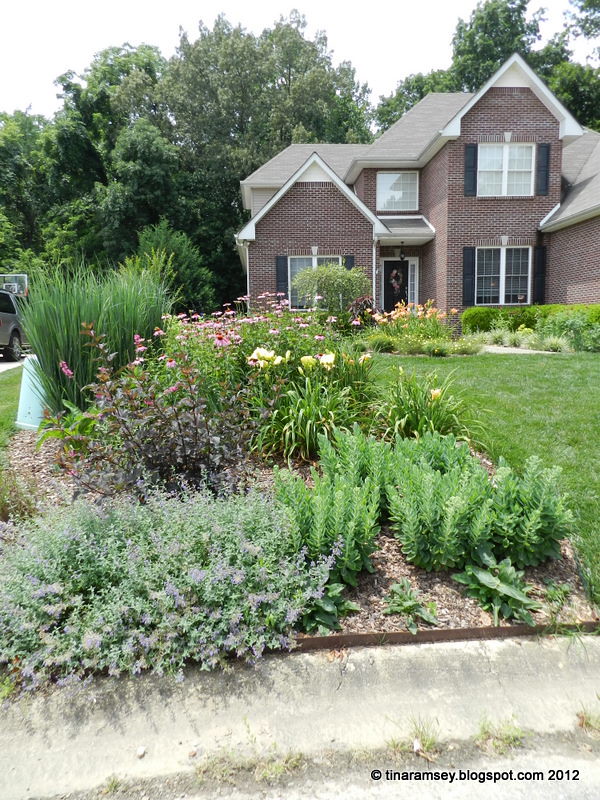
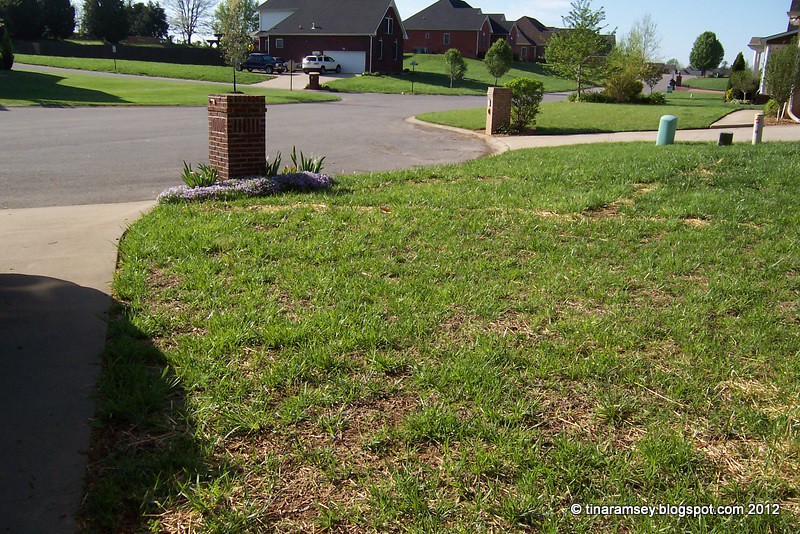
After: Left side of property looking toward the house (west). I call this part of the garden the 'Fall Garden'. There are asters, sedum, grasses (more on the type below), and a ninebark in this section of the front yard. I generally try to design drought tolerant areas further away from the house and all of these plants are drought tolerant. Catmint also grows here but I consider catmint a year round plant and would use it in all gardens if I could. 
Materia Pictures 020
Before: front sidewalk area looking north.


DSCN3262
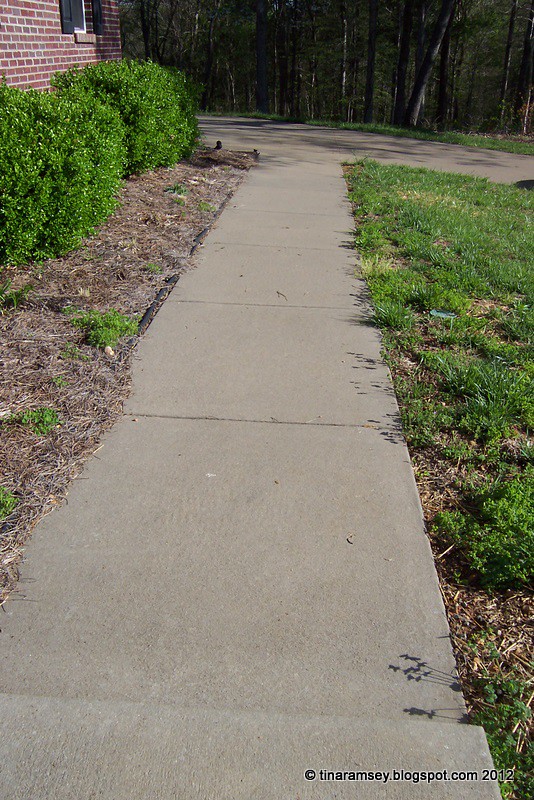
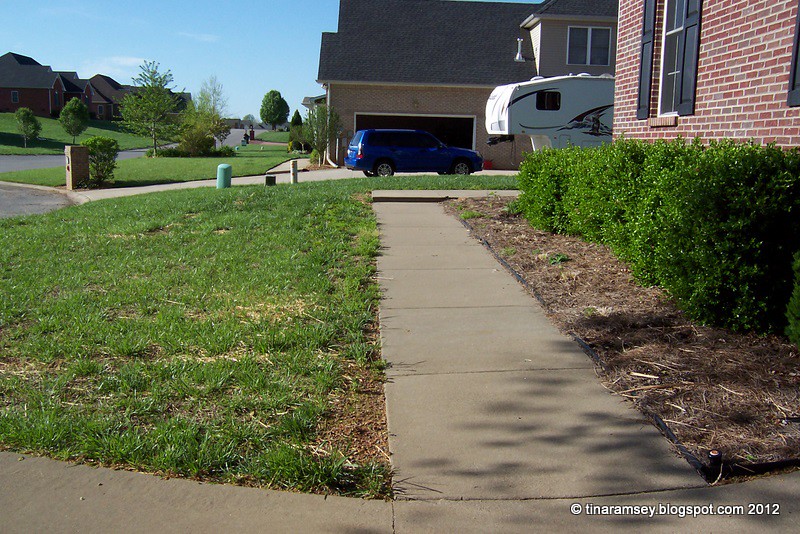
After: front sidewalk area looking north.
Materia Pictures 011
Before: Left side of house looking east.
Materia Pictures 015
Before: left side of house looking north.
Materia Pictures 016
Before: left side of the house looking northeast. wonderful grass that I can just about guarantee no one else in your neighborhood will have-unless you happen to live in this particular neighborhood. I highly recommend this grass for a full sun average garden soil location with a bit of moisture.
DSCN3269
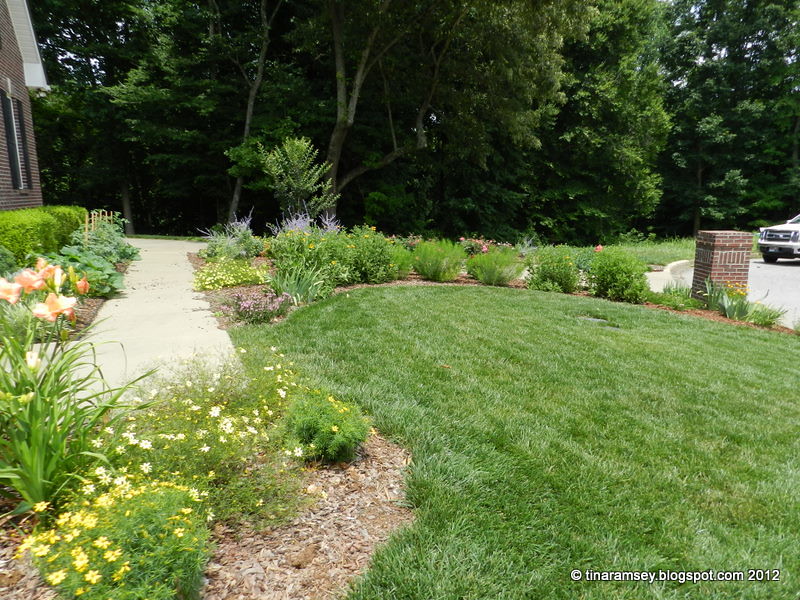
After: left side of  house looking northeast.
Materia Pictures 006
Before: left side of house looking west.
DSCN3265
After: left side of house looking west.
DSCN3264
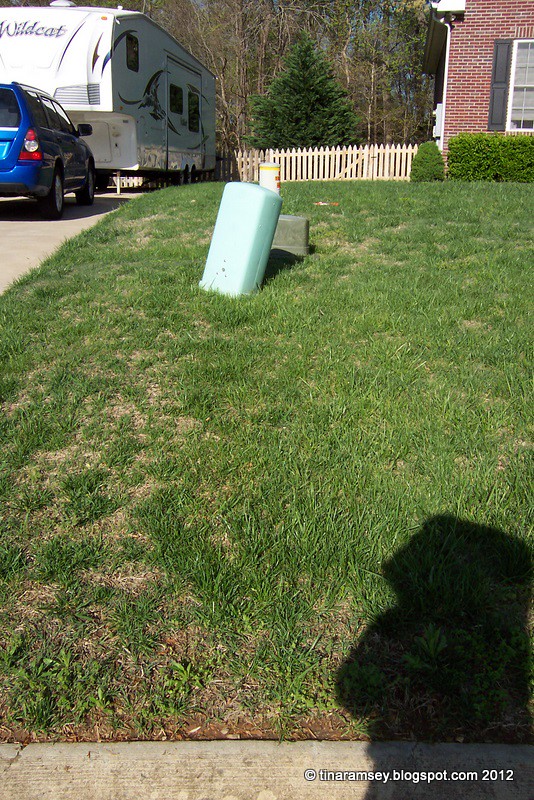
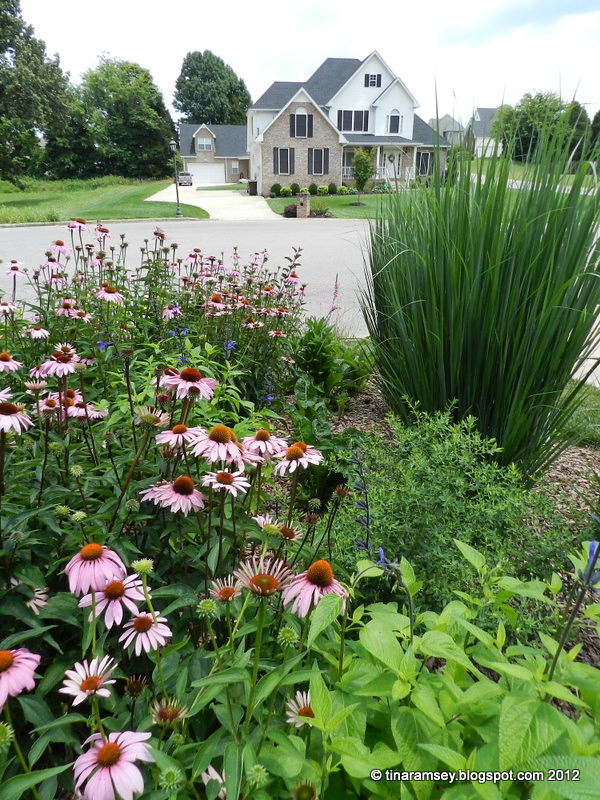
After: front garden alongside the road looking east. The grass I used to screen the power boxes is not your normal grass that is generally used to screen the power boxes in neighborhoods. Normally miscanthus is used for screening; probably because it is so easily found in stores. The one I used is Panicum virgatum 'Northwinds'. This is a wonderful grass that I can just about guarantee no one else in your neighborhood will have-unless you happen to live in this particular neighborhood. I highly recommend this grass for a full sun average garden soil location with a bit of moisture.
Materia Pictures 037
Before: Right side of the house looking away from the house.
DSCN3257
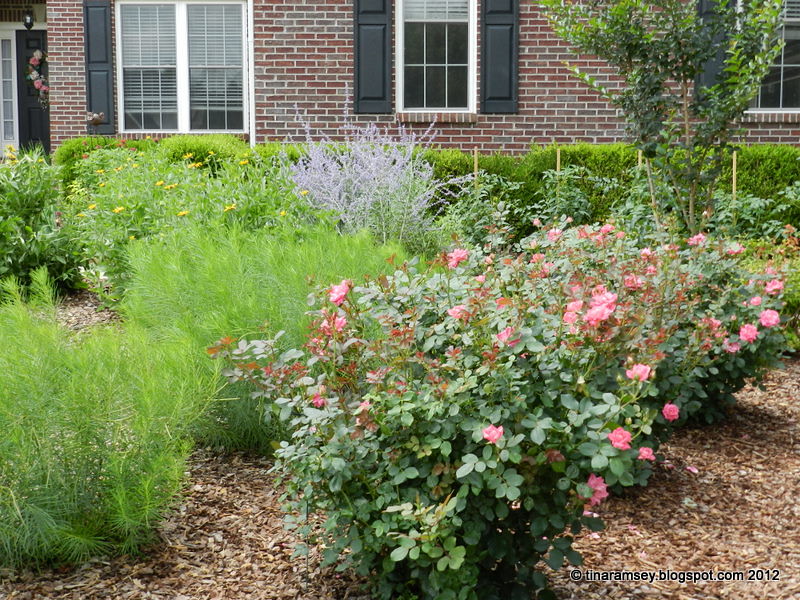
After: right side of the house looking toward the house. In my designs I try to use native plants. Most clients want something unique and different in their landscapes when they hire me. Native plants fit the bill because not only are they not well known enough to be used in landscapes, but they are not often sold by most plant nurseries; at least in my experience. If all nurseries sell the most 'sellable' plants (read cheapest to produce or resell, and market) then other plants will not they may be more satisfactory might not be as common. Such is the case with native plants. In the above picture you can see one of my most favorite native plants. It is also a plant that I feel is underused in landscapes. It is not the Knockout roses but can you guess which plant it is? It is the fine textured plant to the left of the Knockouts and it will turn a vivid wheat color in the fall. Any guesses?
Materia Pictures 036
Before: Right side of house looking south.
DSCN3256
After: right side of house looking south. 

As a relatively new designer I tell you I love my job and I love it ever so more when I see my designs come to life. All of the credit must go to the client with this wonderful garden. Without such super nice clients I'd never be able to design a thing. Designing is but one facet of a beautiful landscape and I highly recommend getting a design for any landscape project. I only with I'd taken the time to do a design for my gardens! It would've made things a lot easier for me. 

I recently finished the backyard design for this same client and I tell you I can't wait to see that come to fruition too. A hallmark of my designs is a lot of variety, textures, and interest year round tailored for each individual client. If the front of this house is a showplace for the public then can you guess what the back yard will be? Yup, you guessed it, a wonderland for the gardener and beautiful too....

in the garden....


materia house google earth

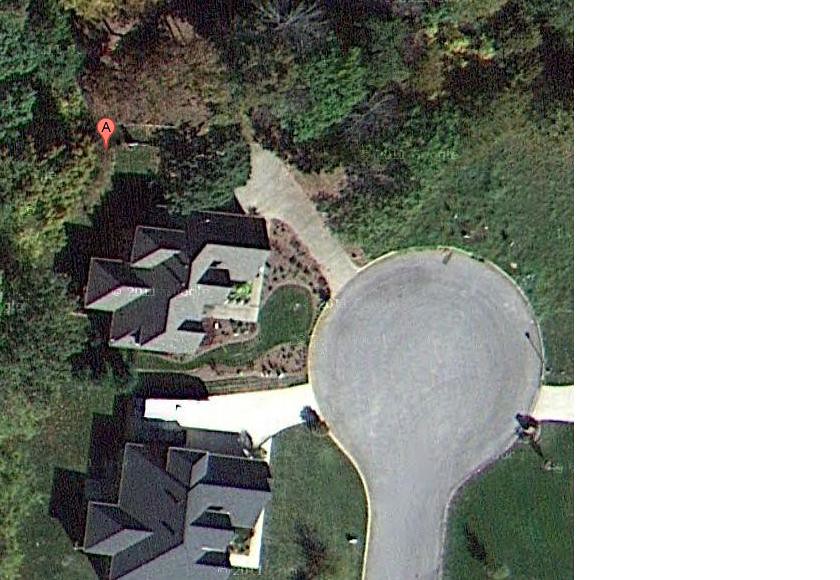
I wanted to show you one last thing on this house. The above photo is from Google Earth and clearly shows the outline of the new gardens at this particular house. If you haven't used Google Earth it is a great and easy tool to use when landscaping your property....

in the garden....
Words and Photos Property of In the Garden Blog Team, In the Garden

Wednesday, July 11, 2012

My Daughter's New House-Which is About to Get a New Landscape Design


DSCN3418
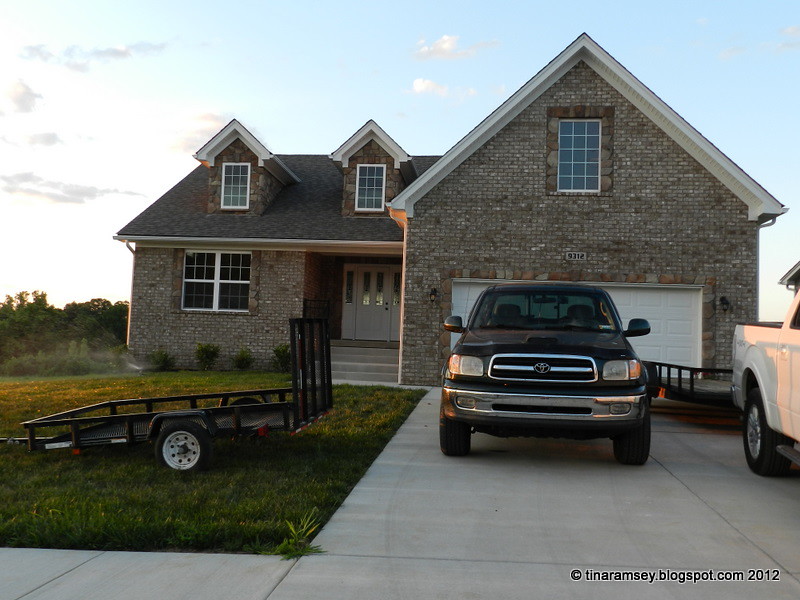
Welcome to Louisville Kentucky and a brand new house for my daughter Liz to start a new phase of her life. Recently Mr. Fix-it and I traveled the three hours north to help Liz move into her beautiful brand new house. It is a house I simply love! I've never lived in a brand new house and I found this one to be most cool with a great contemporary layout that works so well for Liz that I feel the house will be perfect.
DSCN3409
And here is the happy new homeowner after a long day of moving into the new home-a long hot very busy day and she's still smiling! That was more than you could say for me as I was pooped and hot and miserable on a very humid southern day.


As a housewarming gift I will be designing Liz's brand new landscape. Working with a blank slate is my dream. It is so much easier to design a landscape with no existing plants. Of course, with most new houses there are a few plants that were installed by the landscaper and they are really the subject of this post-or rant.


DSCN3463
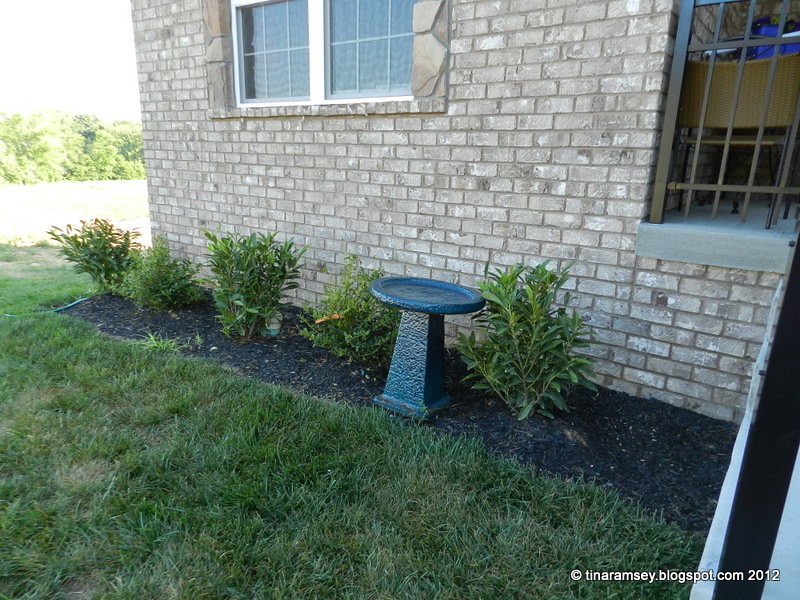
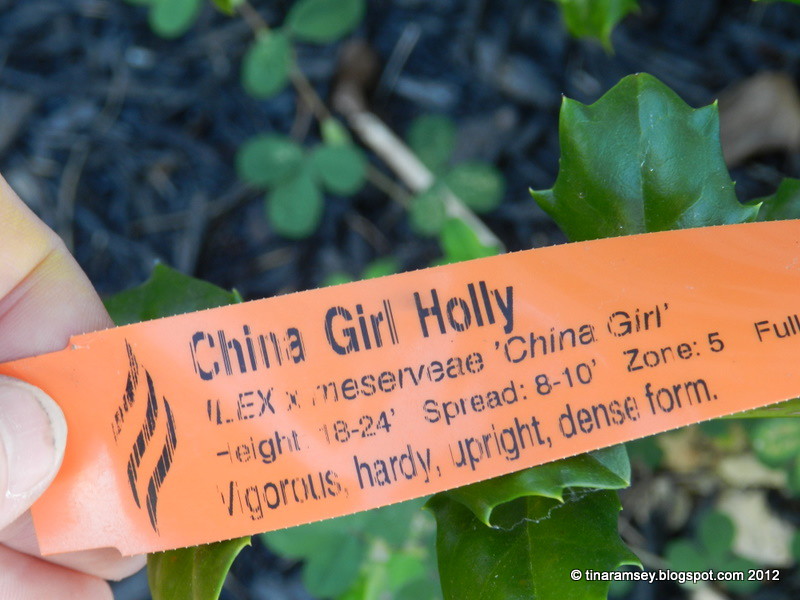
Here is a picture of the landscaper's package. It consists of exactly five plants. The five plants are two 'China Girl' hollies and three 'Schip' laurels. I bet you can notice the shrubs are all planted rather close to the house-less than two feet to be exact. Perhaps you are thinking that is my complaint? No, that is not it. I totally understand why the landscaper planted these shrubs (that will grow to at least 5-6' wide and run right into the house) too close to the house. He or she did it simply to save money on mulch. Two feet of garden space is a whole lot less to mulch than like six feet out from the house. I understand this is a pretty typical practice and kind of expect it.


DSCN3465


The part I did not expect was planting two shrubs that will grow to 18-24 feet tall in front of windows that are a mere five feet off the ground! I just don't get this. Do landscapers even read the tags of the plants they are buying? I am sure 'Dwarf Burford' hollies would have done the same job as the 'China Girl' hollies and they would not outgrow the windows. I am rather incensed about this situation because while my daughter knows enough to know this is not smart planting, many other unsuspecting homeowers do not know enough to remove those shrubs right away and plant them in a better location. A location where they can grow to their full potential without having to be hacked to pieces several times per year for however long they live in their location. I've seen this kind of situation way too many times. You've seen it too. Almost everyone has moved into a house with overgrown shrubs that were planted way too close to the house. The solution is to either prune the heck out of them or remove them. Removing them when they are full grown is not an easy undertaking at all. I just don't understand why a landscaper can't take two minutes to look at the shrub he or she is planting and plant the right shrub or tree in the right spot-or don't plant at all....


in the garden....

Words and Photos Property of In the Garden Blog Team, In the Garden

Wednesday, June 6, 2012

Landscape Like the Biltmore Professionals


DSCN2758
My recent visit to Biltmore showed me many great landscape and garden design tricks. I thought I'd share some examples of the principles of landscape and garden design with you all today in the form of pictures of the wonderful Biltmore Gardens. Let's begin shall we?


1. Use groundcover plants or low growing plants at the front of the border for interest. When looking at a garden it is best to tier the plants with the tallest in the back descending to low growers in the front. Low growers have the added benefit of being able to soften the lines of the garden and prevent weed growth if planted thickly.
DSCN2763
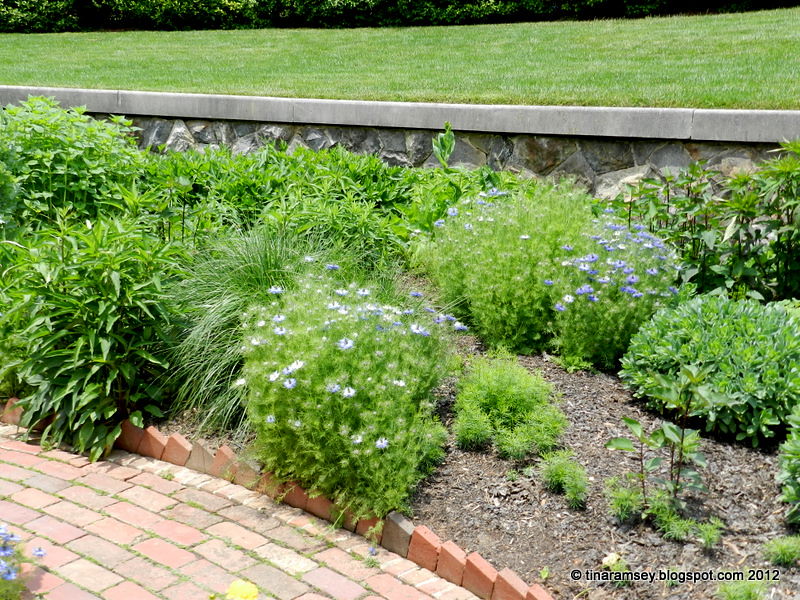
2. Mix shrubs with perennials. This is known as a mixed border. Using shrubs ensures there is something interesting to look at all year.
DSCN2768
3. Use different bloom and leaf forms for contrast.
DSCN2770
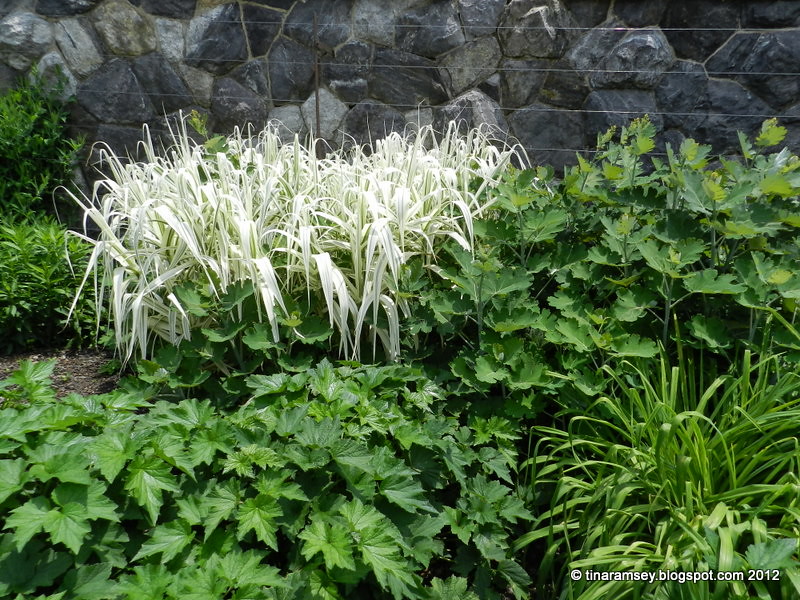
4. Use different colors for that wow factor. Do you notice how the white plant appears even more white when surrounded by dark plants? I suspect the dark plant (anemones) are probably white. When they bloom I bet they are going to be white which will work pretty well with the white grass.
DSCN2772
5. Use different forms of plant growth such as vertical (the iris), mounding (lamb's ears), groundcover (sedum), cascading (miscanthus), and so on. Other growth forms include: vase shaped, roundy, frilly, upright, trailing, etc.
DSCN2774
6. Use architectural plants such as the yuccas shown above. Architectural plants remain a major presence year round and are usually quite substantial.
DSCN2776
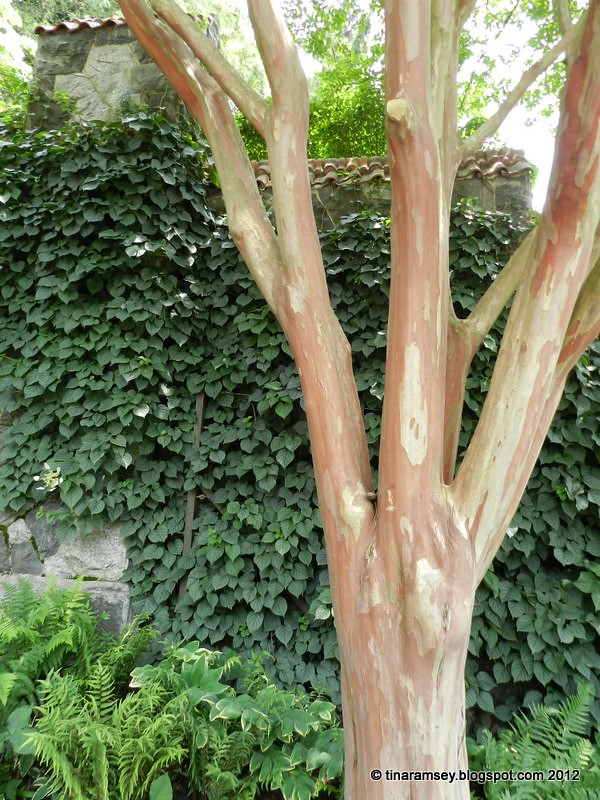
7. Layer your plants by using trees, shrubs, vines, perennials, annuals, and bulbs. Here we see the attractive bark of a crepe myrtle with a climbing hydrangea in the back on the wall, at the foot of the vine grow ferns and Solomon's seal.
DSCN2788
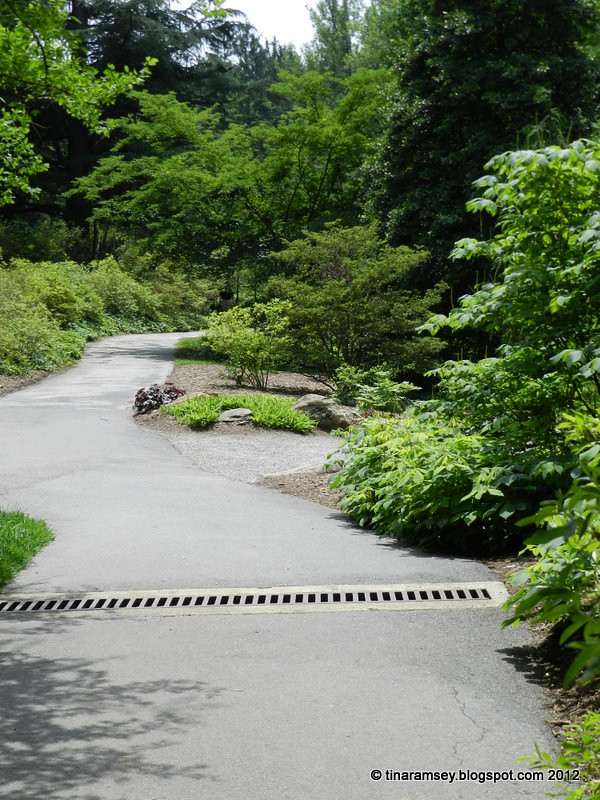
8. Have neat edgings and paths easily traversed.
DSCN2797
9. Design paths where the destination is a secret. The fun is in the journey.
DSCN2799
10. Use focal points to draw the eye. Where does eye go to immediately when looking at the above picture?
DSCN2806
11. Don't forget age in a garden. We can clearly see the age in the above tree and nothing makes you feel more at home than well worn and loved things such as this gnarled and giant tree trunk. It looks like a good spot to lay down for a nap huh?
DSCN2810
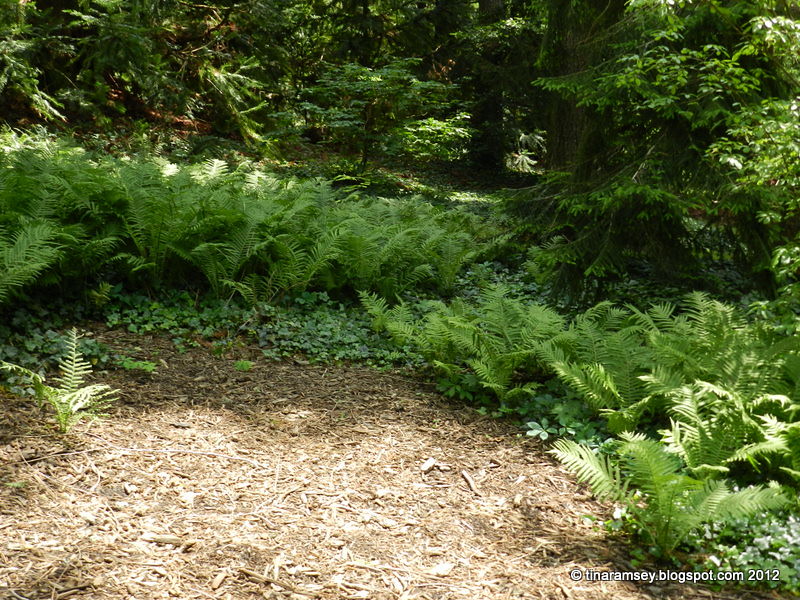
12. Be sure to include shade in your landscape. No matter how pretty sunny gardens are people always appreciate shade.
DSCN2819
13. Be sure to leave a place to sit and use hardscaping to complement the gardens. 


For more landscaping ideas for your backyard check out Reader's Digest backyard ideas....


in the garden....

Words and Photos Property of In the Garden Blog Team, In the Garden