Wednesday, April 30, 2008

Clematis: The Puzzling Queen


Clematis is a versatile and rewarding vine to grow in one's garden. I think of them as the 'Queen' of vines. I love them and find them very easy to grow, but a bit puzzling because of the pruning requirements.

After umpteen years of gardening and doing it a bit haphazardly I might add, I have decided to get organized and to learn so much more. One of the things I need to learn is not only how to prune clematis, but which clematis needs which type of pruning. That would assume the gardener knew what type of clematis he or she planted in the first place! I don't keep good enough records so this is a problem for me. I am slowly working on that problem now that I generally understand clematis.

Clematis are grouped into three groups for the purpose of pruning. You must know the variety you planted in order to know which group it is in and how to prune it. According to Sandra Mason from The University of Illinois (http://web.extension.uiuc.edu/champaign/homeowners/031004.html), the three groups are known as: Group 1, Group 2, and Group 3.


Group 1 clematis bloom on old wood and generally bloom between April and May. Some Group 1 varieties I grow are: C. macropetala, C. montana and 'Snow Queen'. Others in this group include: C. armandii, C. alpina and C. cirrhosa. This group requires no pruning except for the occasional trimming of dead. The four varieties pictured on the arch fall into this group (I think). I believe this is right because I have never pruned these four clematis for fear of destroying them. They have still bloomed wonderfully so I am really thinking Group 1?

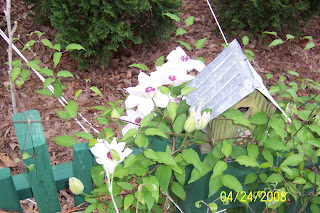
Group 2 clematis bloom mid-season and are double or semi-double cultivars. This group will repeat bloom and needs only light pruning. If cut to the ground it will still bloom, though later in the season. Some Group 2 clematis I grow are: 'Nelly Moser' and 'Miss Bateman'. Miss Bateman is growing on a picket fence in my lower garden (fourth picture with birdhouse). I know this because I recently found the label stuck into the ground next to the vine. What a relief! I have now logged it so I do not have to rely only on the label in the future. I have not pruned these clematis either. Come to think of it, I don't prune any of my clematis though I should.


Group 3 clematis bloom on new wood and include many brilliant and favored cultivars. This clematis should be pruned in early spring before new growth begins. If it is not pruned, it will likely produce blooms only at the top of the vine out of sight of the gardener. Some Group 3 cultivars I grow are: 'Jackmanii', Sweet Autumn Clematis, 'Comtesse de Bouchard', 'Ernest Markham', 'Henryi', and 'Crimson Star'.

The black metal arbor over my side gate is the crowning glory of my clematis. Every time I walk through this arbor I feel like I am in Hawaii or some other tropical location. I have never been to Hawaii, but somehow envision it with lovely draping flowers hanging from the trees. The flowers might be mandivilla or bougainvillea and not clematis, but I feel the clematis takes its place here in my locale. It is kind of neat how the flowers open all the way up the arbor and just seem to drape themselves around it. As an added bonus, the spent flowers and ensuing seed heads are so intriguing. They remain on the vine all winter and somewhat resemble spiders with twiny tendrils coming from the center of the spent flower. Not all clematis have the same seed pods, so you might want to be sure and buy it not only for the flower, but for the seedpod.


From now on when buying and purchasing clematis, I am researching and selecting exactly the right clematis for the purpose intended. I recently installed two twin arbors upon which to grow clematis. I chose 'Crimson Star' in Group 3. Crimson Star should bloom a large brilliant red and only on new wood. I desired the Group 3 because I wanted to be able to control its growth. As you can see on the above arbor, clematis can get quite large and bulky. They become a tangled mess after just a few years. Finally, I am getting it together by choosing the right plant for the right spot and for my purposes. It felt good but we'll see if it works out. That is the part about gardening that can never be predicted, whether or not all will go according to the 'best laid plans'.

How do you grow clematis now that you know a little about pruning? Well, I can only tell you how I grow my clematis. First and foremost they need a support on which to twine. The support needs to be fairly thin so the clematis can grasp it with its tendrils. Clematis will not stick to large smooth poles and you will have to tie it up if this is what you are using. I had to add a criss cross of metal wiring between the two support poles of this arbor in order for the clematis to be fully supported. Even then I do have to sometimes tie and direct the growth. Another technique for supporting clematis is to plant a clematis at the base of a small tree or shrub and allow the clematis to twine into the tree or shrub. It is a beautiful effect, but one I have had limited success with since the clematis cannot get all the sun it really needs when planted below a tree. You can see one of my clematis blooming among the crabapple leaves in the last picture. I have planted clematis at the base of all my crabapples and learned this is an old gardener's trick. I love learning secrets from experienced gardeners, secrets not found in gardening books.
Once you have a good support, take time to prepare the hole. I add compost and plant my clematis deeply. Most clematis like full sun with their roots shaded. Shading can be accomplished by simply placing stones on or near the base of the clematis. These four clematis growing on this arbor are planted in less than ideal soil conditions and are cramped, but they have excelled. The clematis growing on my picket fence have much better conditions but only get part sun. They are also doing well. Clematis are truly not difficult to grow, the difficult part is the pruning, but only because you have to keep good records of the 'Queens' you plant in your garden.

in the garden....

Tuesday, April 29, 2008

Red Tip Photinias


The 'Red tips' are absolutely outstanding this year! Even my little red tip has done so well it is blooming! This is the first time in the nearly five years I have had my red tip that it has bloomed. Let me tell you a little something about red tips. When I returned from Iraq in July 2003, the first thing I began doing was planting, in EARNEST. I really went kind of wild with planting. I had not been able to do planting like I wanted to the whole 20 years I was in the Army due to the constant travel and moves around the world. Sure, Mr. Fix-it and I owned our homes while we were stationed stateside, but we always knew it was only a temporary home, until we hit Fort Campbell.


We diligently hunted for an acceptable house that would not only house our family (then a 16 and 7 year old), but would house us for the rest of our lives. After much hand clenching and stress and frustration while living in an on base guesthouse, we finally found 'our' home. Both boys approved, especially the oldest, Brian. He was to get a master suite all of his own! As a bonus, it was downstairs; which I am sure made him happy because he was theorizing about sneaking out at night and being able to sneak back in too! We know those teenagers-huh Brian?!


Anyhow, we finally got our home and moved in. Come August it will be seven full years we have lived here. We have always, always loved our home. Every bit of it. For me it has mainly been the garden and the land, all one acre of it. I do certainly love the inside and there is nothing I would change about it. That never happened in my previous homes. There was always something I would structurally change in those houses, but again, they were only temporary. We are permanently home.


The one thing this house did not have was boundaries. Out here one yard seems to extend into another. This bothered me. I wanted boundaries and structure and I wanted to feel safe and secure in my paradise. All of my previous homes were in subdivisions (easier to rent out when we were stationed elsewhere) and had boundaries. Now I come to the red tips. Red tips are evergreen, fast growing ornamental shrubs. I had a hedge of them when I lived in North Carolina in my very first home. I was fortunate enough to buy that house from a few people who just happened to like to garden. Lucky me! The red tips were my favorite as they were planted in the front yard between my neighbor's house and mine. They were well maintained and large and colorful. They made a perfect boundary while still being friendly and beautiful. Back when I bought that house in the 90s, red tips were very popular. It seemed every single yard in North Carolina had a few red tips. They were so popular they were overplanted and became prone to disease. Leaf spot. Red tips have somewhat fallen out of favor since the 90s because of overplanting and leaf spot-but not for me!


I bought the pictured red tip as a little guy in a one gallon pot almost as soon as I stepped off the plane from Iraq. I planted it in this "Northside Shrub/Mixed Border" and forgot about it. Each year I would note it was growing, and growing fairly steadily and nicely. Occasionally I would hand prune it for shaping and for fullness. Now, like with children, I look at it and see it is full grown! How did that happen?? It is the perfect foil for structure between my neighbor's yard and my yard even before I added the privacy fence. If I could, I would probably plant a whole hedge of these red tips. They are really not practical for me though because they prefer full sun; whereas I have mostly shade and NO full sun anywhere on my property. Despite this fact, the majority of the red tips I have planted (somewhere in the neighborhood of one dozen) have done well.


Red tips, Photinia fraseri, are super hedging and accent plants. They can get to 10-15 tall and wide, especially in full sun. I see them around town as an accent or specimen plant and very few hedges of them. Too bad as they are great hedging plants. The fungus induced leaf spot is not a major problem. The leaf spot will NOT kill the shrub and I find it only to be a minor inconvenience with aesthetics. I do not spray or treat my red tips and hardly notice the fungus. It is there though.

When you drive around town in certain areas, and around Nashville you might not easily identify the red tips because they are covered with white flowers and are in full bloom. They don't look quite like mine in the picture above because this one had not yet come into bloom and even now it has sparse blooms due to the shade it is located in. I have never seen such a glorious display of white flowers on red tips as there is this spring. They are truly outstanding.


in the garden....

Monday, April 28, 2008

Luna

I really like night lighting and posted about a different type of night lighting before (see : Night Lighting , but this kind of lighting here is not an ornamental type. My little street lamp above my garage door is not highlighting the house, but only providing security and much needed light during the night time hours.

One of the unfortunate side effects of this type of lighting is the fact it attracts all sorts of creatures of the night. To name just a few: bats, moths, beetles, toads, and birds. An unwitting victim of the night lighting is the Luna moth. Stepping outside recently I noticed one fluttering on the ground right outside the garage door. Not one to waste an opportunity I grabbed my handy camera and snapped a picture. This moth is still alive in the photo but it could not fly and initially was upside down. I righted it but still couldn't fly. It was doomed, not really a night lighting victim, but a victim of its short life span.


According to the following website:
http://www.ivyhall.district96.k12.il.us/4th/kkhp/1insects/luna.html, luna moths are a rare find in the eastern United States. though they are common in the wild all the way from southern Canada to Maine to Florida. We have been blessed with many luna moths on or near our garage because of the night light. These moths have a short life span of only one week and lay just 4-6 eggs. In the north the luna moths eat the leaves of paper birches. Down here in the south they prefer the leaves of the persimmon tree.

These moths are welcomed into my garden anytime and I do appreciate the opportunity to see them, regardless of my 'streetlight' lamp being a bit of an eyesore. They moths are beautiful and quite regal and always a joy to see fluttering around. The next morning this luna was gone, probably eaten by some early bird or nocturnal predator.

I am on a steep learning curve trying to figure out the whole link thing with this blog, so please have patience as I know the night lighting link did not work but I will continue to learn. If you would like to see the night lighting post it is in the February archives.

in the garden....

Sunday, April 27, 2008

Century Plant

A few years ago, our local newspaper published an interesting article on a locally blooming Century Plant. The Saint and I found the article so interesting that we had to drive by and check it out. Of course, with such a rarity, I had my camera with me.

Even though this plant appears to be a Cactus, Wikipedia tells me it is a Agave which are closely related to the Iris and Amaryllis families. The Yucca plant is also a Agave.

I find it difficult to believe they are not in the Cactus family because they appear so similar to them. The base is clumped with long leaves that end in a point. Each long leaf contain spines along the edge. I can recall my grandmother having a similar plant in a pot in the kitchen window. We called it a cactus but I wonder if it was a small Century Plant?

The Century Plant only blooms once in its
lifespan. The blooms consist of clumps of yellow tubular flowers. The bloom stalk shoots way up high into the sky at such a fast rate, that it uses all the plants energy. The plant then dies.

The long stalk stands up as if a ships mast standing tall into the sky. I cannot help but think of the Fairy Tale, Jack and the Bean Stalk! Hum, I wonder if a Century Plant was the writers inspiration?

Legend says it takes 100 years for one to bloom, hence the name Century Plant. In reality, the plant only has a life span of about 25 years. As a gardener, waiting 25 years for a plant to bloom can seem like a Century!

Even though this plant dies once bloomed, suckers produced at the base of the stalk form new plants.


This Century Plant is located on one of the routes we travel to town so we see it often. These pictures were snapped on June 30, 2005 but to this day, the dead stalk is still standing tall.

As you can see, this yard contains more then one Century Plant.

I have since, spotted Century Plants in other yards in the older section of town. I wonder if they were at one time, the "IN" plant for the town...

Note:
Longwood Gardens in PA. (Click here) Century Plant 2007 - Longwood Gardens documented a great series of pictures of a Century Plant blooming in their garden. It is amazing how fast the stalk grew! It is worth viewing.

***********************************************
**I posted a topic with "Pet People" about the progress of our Bluebird family. If anyone is interested, Click on this sight below and then click the topic title "I am a new Mommy" (beside) Skeeterkitty... Yes, I am a Tuxedo Cat!
http://www.theleafchronicle.com/apps/pbcs.dll/section?Category=BLOGS02&groupid=Blog:d67b4443-aac7-4d3b-bc0f-8255cf55bb0e
***********************************************

Saturday, April 26, 2008

Worth the Wait

I purchased a bunch of dwarf irises several years ago from a mail order catalog. I wish I could remember the varieties and the company, but I cannot. I got five colors: apricot, light blue, dark purple, white with purple and white falls, and one other that escapes me now.


I promptly planted them out front around an oak tree. I like irises around trees because while they can have long roots, generally the roots are somewhat shallow rooted and compete well with the tree. At least the irises seem not to suffer and still continue to bloom wonderfully.


I really have been unhappy with these irises as they never did anything. I was actually contemplating pulling them for placement elsewhere, since I can never throw away any plants. I really need to be more ruthless with disposing of plants no longer needed or performing well, but I am SO glad I held off on these irises. Now the tulips, they met their demise just this week as it just wasn't worth me trying to coax some life and blooms from the 100 or so I dug out of the ground. The compost can use the nitrogen.


I am used to the big bearded irises which multiply rapidly. Very rapidly. But finally, after about four years I see some success with the dwarf ones! And it was worth the wait! I need to pay better attention because I had overlooked these guys. Such was the case when I finally snapped the pictures. It would seem they had been in bud or even blooming a day or two prior to me spotting them. Spring, isn't it lovely? Nothing says spring as well as a rainbow of irises. What are your favorite varieties and/or colors of irises?

in the garden....

Friday, April 25, 2008

What's the Point?

Mr. Fix-it and I were traveling the Indiana countryside recently and we came upon this cool garden. Cool is a word I like to use for the different and out of the ordinary. This garden fits the bill.


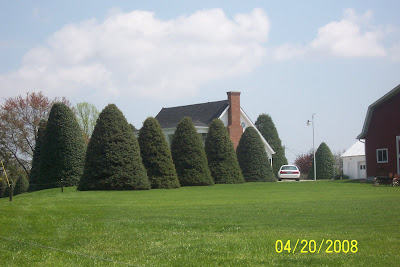
This farmhouse sitting off of a city road caught my eye from a distance. You know the Bette Midler song? From a distance.... Anyhow, what really caught my eye was not so much the farmhouse itself, but the huge immaculately groomed spruces surrounding the farmhouse and nearby barn.

This barn and farmhouse were what I thought classic examples of country architecture and are quite common in this area.


What wasn't common was the fact you could barely see the farmhouse itself due to these large 'pointed' trees. The landscape made me wonder what point the homeowner was trying to get across to his or her community and neighbors. Obviously this type of garden does not develop overnight and required many years of precise attention to detail and care. I really would've loved to knock on the door and ask the homeowner about the garden, but we were pressed for time so I will just have to ponder the point.


in the garden....

Thursday, April 24, 2008

Planting Trees


I love trees! Did I say I love trees? I mean I really, really love trees. Trees are the backbone of our landscapes and serve to truly raise our quality of life by providing shade and protection, and by taking our wastes and making food and converting energy to oxygen; which is what we breathe! The first picture is but a sampling of some of the trees on my one acre lot. We are blessed with many oak trees and a few evergreen trees too. Last year my son Brian came to visit the first week of May. It was a sad sight which greeted him in Tennessee. We had no leaves on the trees. What you see above is more than what we had in May of last year and I am ever so grateful for the shade and leaves this year.


Dave at The Home Garden (see sidebar) is linking posts about planting trees so I thought I would join in. This year alone I have planted about eight trees. Four were coral bark Japanese maples and four were seedling redbuds given away by our extension agent. These little sticks haven't done anything as of yet, but I am still hopeful they will take. The coral barks have taken off. I finally figured out what it is I love so much about the Japanese maples, it is not the wonderful color of the leaves or the bark, nor is it their nice branching pattern, though that may be part of it. No, I really love Japanese maples because of the cool way all the leaves seem to lay horizontally. I really like that effect from these trees as I can't think of any other tree that does the same thing. See how the leaves on my little Japanese maple seem to all be horizontally laid out? Part of the effect is created by the branching pattern (probably all, but I can only see the leaves) and I really like it in my landscape.

Anyhow, I am looking forward to seeing all of the posts Dave links to concerning planting trees. Here is to happy tree planting!

in the garden....

Lawns-Ah the Sweet Grass and Happy Birthday!

Lawns, oh the sweet feel of soft cool grass underfoot. How many of you can relate? Growing up in Maine was a real treat because the Kentucky bluegrass which commonly grows up there was always soft and sweet underfoot. One of my favorite pastimes was to lay on the grass under a clear blue sky with a few white fluffy clouds to occupy my attention, and a nearby oak tree to shade me.


As much as I love lawns, I have a love/hate relationship with mine. Most really smart gardeners know to do away with the lawn all together. Forget about conventional wisdom that says you have to have a lawn. No! Just get rid of all the maintenance hogging chemical loving pain in the butt grass and go to flower beds! No flower beds? How about going native with your lawn? Anything is almost better than cultivated grass.


Why you ask? Well here in Tennessee and most of the mid-south we have a little problem. We are in a transitional zone. A transitional zone for lawn grasses is an area where either cool or warm season grasses can grow. Cool season grasses grow during the cooler months and tend to go dormant (read brown and dead) in the hot summer months. Warm season grasses grow during the warm summer months and go dormant (again read brown and dead) in the winter.


One would rationally think that we could grow both warm and cool season grasses in our lawns and have the best of both worlds. Nope. It doesn't work that way. Oftentimes lawns around this area are growing both types of grasses. You can always tell because in the winter there will inevitably be areas of brown patches amongst the green, indicating warm season grasses. In the summer it is harder to tell when a homeowner has both types of grass unless you look closely at the lawn but you can tell due to the differences in textures of the two types of grasses. Warm season grasses are generally finer bladed and very competitive with cool season grasses. Both usually remain green in the summer unless there is extreme heat and/or drought. Last summer just about everyone's cool season grass went dormant. Both types of grasses compete with each other and together do NOT make for a nice lawn in my humble opinion.


One of the major differences between the two grasses, besides their growing seasons, is the cultural care requirements of the grasses. The two grasses require different heights in mowing, and also need to be fertilized at different times. Trying to grow both types successfully in the same lawn would be a nightmare. It just will not work. One will be harmed and die out. Therefore, the homeowner is left with a choice: warm or cool season grass.


The choice is simple and based solely on the homeowners desires and ability to properly care for his or her lawn. If you want to be assured of a nice green lawn during the summer months and be assured it will turn brown in the winter, plant warm season grasses. If you prefer a nice green lawn year round with the possibility of it turning brown and thinning out in the summer, plant cool season grasses.


Whatever the choice you make, make an informed one and be prepared to adjust as the situation warrants. Both types of grasses have their advantages and disadvantages. I did a lengthy post on lawn care last fall and will not re-hash the information here, but whatever you decide to grow; choose wisely. Reestablishing a lawn is not an easy task.


Today is my youngest sister's 40th birthday. I am posting a picture of one of my favorite flowers, the camellia. Partly in honor of her birthday and partly because I like them so much. I wish this were my shrub, but it is not. My friend Lola E. grows it in her garden here in Clarksville. It is a good birthday flower and a pretty color for my sister. I don't do cards so I hope this will suffice for birthday wishes.


Happy 40th Birthday Terri-Lynn!


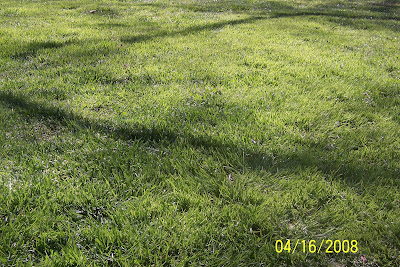
P.S. What type of grass is growing in the picture above? Cool or warm season? And what type of grass do you grow and why?

in the garden....

Wednesday, April 23, 2008

Field Trips

The Beachaven Garden Club recently traveled to Cross Creeks Wildlife Refuge in Dover, Tennessee for a wonderful field trip. One of our members, Diann, did an awesome job of setting up the trip. And to top it all off, Mother Nature cooperated by providing us with an outstanding spring day with which to enjoy the trip!


The trip began at the visitor center with an informational briefing about the refuge from our tour guide, Karen. Karen and a loyal volunteer, George, clearly love their refuge and graciously showed the eleven members of Beachaven around the refuge. Karen and George are pictured in the first picture. Some areas were off limits due to the recent floods and washout of bridges, but we did get to see many wildflowers, trees (See "Barking Up What Tree"), and some wildlife.


Can you picture butterflies, birds and frogs everywhere you looked? Lots of spring songs from birds and frogs and the native flora was in full bloom. The recent floods did not leave too much of a mess. Karen actually expected to find the trails in worse shape than what we found. The only damage from the floods was the depositing of downed trees and trash, mainly bottles. I am the first one to complain about trash but even I did not think it was such a big problem out here considering just how under water the whole bottomlands were from flooding by the Cumberland River.


The second picture shows part of the bottomlands. Bottomlands are basically the floodplain as I understand it. This area is usually farmed in the summer when it is dry. Migrating birds overwinter here. This year was a banner year for Cross Creeks Refuge. At one point there were over 10,000 migrating Canadian geese here at this refuge. That is ALOT of geese!
I can't resist putting this picture of the Jimster with his little buddy at the Mesker Zoo. This Canadian goose was not happy with the intrusion into her area, and let the Jimster know in no uncertain terms! He kept trying to get her to pose with her mouth open trying to bite him but I couldn't quite catch it right. Can you imagine 10,000 geese? Geese can be rather temperamental at times and if you have ever been bit by one-you know what I am talking about!

Among the many things we saw were birds. Tons of birds. Two vividly come to mind. The first is a Phoebe. It frequented the area by the visitor center and kept calling its name Fee-beee Fee-beee! It is a cute little bird and has a nest on one of the buildings. You can listen to its song if you click on this link: http://www.birds.cornell.edu/AllAboutBirds/BirdGuide/Eastern_Phoebe.html#sound


After our visit at Cross Creeks was completed, we convoyed to the ferry on the Cumberland River in Dover. The ferry trip was a special ride across the Cumberland River and saved us many miles of driving. I snapped a few pictures while on the short ride. The picture with the smoke stacks is the Cumberland Steam Plant. I am told it is an excellent fishing area for fishermen. I have seen pictures of 40-50 pounder catfish taken out of the river in the vicinity of this steam plant. Mr. Fix-it tried it out himself but didn't catch anything. I am sure he will return to try again when his job allows him some free time.


After the trip across the river we wound up on Lylewood Road; which is the road I live on. It was the first time my garden club had visited this area ALL the way out here in Woodlawn. I feel like every time I go to town it is a major trip because it really is a long way! I was extremely happy to not have to travel to town for garden club and instead to have them travel out here to my neck of the woods!


On Lylewood Road we made our way to Lylewood Inn. Lylewood Inn is a bed and breakfast managed and owned by Mandy and her family. Mandy served our garden club a wunderbar lunch of poppy chicken, home grown vegetables and homemade pickles, with our choice of three desserts. I chose the deep fried apple pie. It was my first time eating deep fried apple pie and it was different. I am told it is a southern dish, but anything deep fried is pretty good-southern or not!


I told you I saw two special birds on this outing. The first being the phoebe, and the second a bald eagle! The bald eagle was spotted at Lylewood Inn. This is the first time I have ever seen a bald eagle in the wild. We finished our delicious lunch and ventured outside to have a look around the farm. Up in the sky Geri spotted a bald eagle! It was unmistakable and slowly spiraled around and around. I so wished I had brought my binoculars!


Here is a picture of Mandy and her two week old mini horse. The parents were on site and were quite concerned about their baby. They loudly let us know they were not happy with his absence from the pen. This mini horse kept biting Mandy but she said he did not have any teeth. That was a relief! Mandy's dog was bigger than this horse and the whole farm and plantation house was absolutely splendid. Can you see the river behind Mandy? Such a lovely place and house. The views were outstanding.


There is a summer church camp located adjacent to Lylewood Inn. It is an overnight camp and while we were all having lunch Mandy told us she grew up attending that camp. The very house she lives in was owned by someone else and as a child Mandy and the other kids in the summer camp would come up to the house and sing camp songs on the huge front porch. Mandy and her husband have continued the tradition. Now the camp children sing to Mandy. I too attended church camp for many summers in Camden, Maine. I loved it so much and truly value the memories. Talking about this camp brought back many of those memories and I want to tell my mother thanks for sending me to camp!


I am going to end this post with a good picture of the group who attended the outing. They are from left to right: Lili, Bernice, Faye, Sandra, Diann, Debbie, Rubeye, Ann, Dorothy, Geri, and I am kneeling in front. I have been a member of the Beachaven Garden Club for over three years now, and this is the first group photo we have taken together. I treasure this photo and all the friends pictured in it and look for many more in the years to come.


in the garden....


Tuesday, April 22, 2008

Vegetable Garden Update-April 08

This is my monthly post updating you all on my vegetable garden. While the vegetable garden is fairly empty I thought it would be a good time to show you another vantage point of it. I have already posted about the fact I had to shift it over in order to allow Mr. Fix-it access to his garage, but I never showed the vantage point of it from his garage.


Our backyard slopes slightly down and to the south (the right of this picture is due south). So we are looking east up toward the house and drive through gate. I had a hard time designing this garden with a new outline that was not unsettling to me. The initial design I came up with had the outline in the form of an off balance medieval shield. With some more adjusting, I wound up with the outline of a simple shield. The point of the shield is closest to the camera. It is a bit odd, I know, but the site demanded this shape.

The rhubarb both here and in an ornamental bed out front are slowly growing. I will have to wait until next year to harvest some canes for strawberry rhubarb pie as it generally takes two years for rhubarb to establish itself.


Every vegetable garden needs a scarecrow. In my case, an old dress draped over a PVC person form is my scarecrow. Though, honestly, the birds just love it and perch on her arms quite frequently so she is not very scary!


Just on the other side of the hypertufa pots is a small ornamental bed. This bed serves the purpose of filling in an awkward spot in the shield, while providing me with the ideal spot to grow zinnias, marigolds and a small flowering shrub, Indigo amblyantha. I am looking for good things from this shrub. When I purchased it last summer it was blooming pink blooms all over. It has already budded out this spring and I look forward to all season color mixing in with the zinnias.This little garden also has some other flowers including Love in a Mist and Iris reticulata.


Looking past the point of the shield, you can see a few of the beds, there are a total of six not counting the ornamental bed in the point of the shield. In the center of the vegetable garden beds is the round millstone bed; which contains Musa bajoo, my hardy bananas. The hardy bananas are the focal point of this garden as they make such a tall statement each summer. They are just beginning to make their appearance. As you can see, they suffered no ill effects of being left in the ground all winter. These are hardy bananas and I have grown them here for two winters with no problems.


The outside left side of the vegetable garden is reserved for two things. Species tulips grow in this bed during the spring, and during the summer I grow orange cosmos. The cosmos are butterfly magnets and serve to provide me with all season color in a nice bright orange color. Once the seeds are up and growing, weeds stand little chance of growing in this bed.


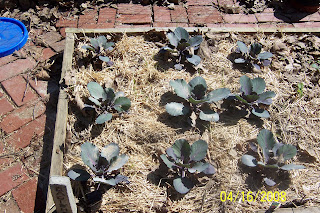
My red cabbage is coming into its own. I have the cabbage, radishes, onions and lettuce growing under the gourd trellis. I am hoping shade will help keep them cooler this summer. The broccoli and peppers planted in another bed are also doing well. I hope the cabbage loopers stay away from both the cabbage and broccoli long enough for me to harvest some.


The peas are up and growing well. I will be planting gourd seeds in here soon. The gourds will grow up the same trellis the peas are just beginning to climb. I intensively plant and oftentimes vegetables share the same space. The peas will be declining by the time the gourd vines get big enough to be a problem for the pea vines.


Here you can see some lettuce I started from seed back in February. It is not doing well at all. Mixed in with the lettuce are carrots. The carrots are actually growing well. I planted these carrot seeds last fall. Amazingly they have wintered over and are now beginning to show some signs of giving me some nice baby carrots.


Finally, lest you all think I only grow vegetables to grow vegetables, I do actually harvest and eat the vegetables. I love radishes. Fresh radishes are best, but I also purchase bunches of radishes when they are in season. Radishes are a cool season crop and conditions need to be right for them to do well. The trick is to get them to grow quickly with plenty of moisture and comfortable weather, not too cold and not too hot. If they don't grow quickly, they tend to get quite strong tasting. I prefer my radishes mild. I harvested this small bunch of radishes for lunch today. They were pretty good, though small.

I also have potatoes growing in odd places in this garden. The potatoes are volunteers left over from over potatoes I planted two years ago. The potatoes I actually planted this year, in the Jimster's garden behind Mr. Fix-it's garage, were nipped by the frost we had last week. No matter, they should bounce back. There are also strawberries and gooseberries growing in that 'overflow' garden I call the the Jimster's garden. More on that garden in another post. For now this post is about the main vegetable garden. While preparing this post I realized I have neglected posting about the vegetable garden in favor of more ornamental postings, but really I think all gardening starts with the vegetables so I should pay more attention! Don't you think?

in the garden....

Monday, April 21, 2008

Beautiful Blooming Crabapples


Remember my post on the Crabby Crabapples? This post is a follow up to that post and is a redeeming post for crabapples. These pictures on this post are why I grow crabapples.


I just absolutely love them when they are in bloom. And guess who else loves them? The bees and butterflies are in heaven with the blooms this time of year. You can surely tell spring is here.

The big pink crabapple is Nina's crabapple. I like the pink blooms so much because they are different from the usually white dogwoods and white cherries and white crabapples. They really show up well and blend in nicely with the landscape. Nina planted her crabapple in a great spot. There is plenty of room for the tree to grow, and this tree really stands out nicely!


My little Prairie Fire crabapple also has pink blooms and is filling out nicely. I had no idea what color or form my crabapples would grow into since I bought them on sale and out of season. While I love all three of mine, the forms are all different. The different forms make a problem for me. The Prairie Fire has a large spreading form and is planted near a pathway. This has caused me to have to prune it more than I would like. Another upright white crabapple (not pictured here but pictured in Aprils Bloom Day post) has plenty of room and would've been a much better choice in the Prairie Fire spot. I wish I had known that prior to planting 4 years ago.
The second picture shows my 'dripping' crabapple in my perennial garden. This tree has a weeping form. See how the branches tend to grow down? I have had to prune it too much in order to raise the canopy and it is a painful battle for me. Sigh. Anyone else have these problems or am I the only one who doesn't fully plan my locations out with the right plant in the right spot? I am doing a MUCH better job of planning now, but initially when I earnestly began to garden here about five years ago, I barely had enough time to read the labels, let alone research the cultivar. I have since learned to read, research and then plant! Regardless of the form of the crabapples, the blooms are all lovely.

Since crabapples can vary so very much in both form and color, please be sure to buy a variety which will work with your conditions and which is resistant to diseases and fungus so you don't wind up with 'crabby crabapples'.

in the garden....
Sunday, April 20, 2008

Restaurant or Garden?


Is this beautiful place a Restaurant or a Garden? I like to think of it as a Garden Restaurant!

I still recall the feeling of excitement when seeing Carrabba's Italian Grill for the first time! One cannot help but be captivated by the beautiful garden rooftop. I could not wait to get inside to see the greenery awaiting within. To my disappointment, the inside is filled with artificial plants. What a total let down that was for me. The yummy food makes up for the lack of decor inside!

This is a chain restaurant and I think there may be one in the Nashville area. I can only assume they are all displayed with beautiful greenery such as this one.

I bet they get lots of new customers due to this unique display of live plants. I know it gets our attention and business.

We usually keep this place as a treat for Special Occasions.

Every time we drive by the place, we are still mesmerized at the beauty. How do they keep it watered and so lush with green? I don't know but I do know one thing, I ready do admire this Restaurant or is it a Garden?

Saturday, April 19, 2008

Barking Up What Kind of Tree?!


What in the world could this picture be featuring? It kind of looks like the surface of a far away planet doesn't it? What could it be? Does Esther in the Garden (http://www.estherinthegarden.blogspot.com/) recognize the "thing" in this picture?

Any guesses? Could the next picture on here give my readers a hint? Or perhaps the title of the post gives the answer away? It is bark of course! Bark of what?

Well, the bark of a tree of course! What type of tree?


As you may have guessed from the post title, this post is about tree bark. Trees are a big deal for me. They are the backbone of the garden. Even if they weren't an asset to the garden, the very fact they provide shade is vitally important to me. I love shade, hence, I love trees. Living in a country like Iraq for a short period of time where they had practically no trees, plus experiencing such a hot summer as we had last year may have made me love shade a whole lot more. I know I sure appreciate shade and the trees that provide it.

Are you still curious as to what type of bark this is? Tennessee bloggers-you don't count! You can't guess. That would be too easy. Still, ponder it.


What kind of tree could this second picture be? Anyone ever heard of Musclewood before? Also known as American Hornbeam (Carpinus caroliniana). This tree has smooth bark over a ridged trunk. I am not sure why the trunk is ridged, but the ridging gives the tree trunk the appearance of a muscular arm or leg. Look closely at the large tree in the foreground and do you note the 'bulge' of the 'tendons' just slightly off center of the tree trunk? The sun is playing up its' features nicely and you should be able to see what I am talking about. The bark is very smooth so the ridges are obvious and truly do look like muscles. Neat looking tree.


How about some hickory chips with your next barbecue? Does Jillybean at Post-it Place (http://post-itplace.blogspot.com/) like hickory chips in her specially prepared barbecue sauce? And just where do all those hickory chips come from that we use to flavor our food? Why hickory trees of course! I must mention, Jillybean is running a contest and she gives away nice gifts. I was the recipient of one and so I can firmly say I can vouch for Jillybean' authenticity. You all make sure to visit her (garden bloggers welcomed!) and leave a comment so you can be in the running for the contest.


Shagbark hickories (Carya ovata) provide the source of most of the hickory chips we use when barbecuing outside. The third picture shows the bark of a Shagbark hickory. Can you guess why it is called Shagbark? Maybe it wants to shag like Austin Powers? Or maybe it wants to shag with you? You know, just dance a little jig late at night when only the gnomes can witness the spectacle.

Are you still concentrating on that first picture? Concentrating hard on the type of tree that bark covers? What can it be with all that neat texture? A petrified tree with fossils? Can you see the striations on the bark? Maybe they are claw marks or fossilized imprints of something. I don't know what.


I had to snap a picture of the sign marking this last tree I am going to feature. It is a Shellbark Hickory (Carya laciniosa). The name sounds a lot like Shagbark Hickory, AND the tree looks remarkably like the Shagbark Hickory. In fact, it is also sometimes called a Shagbark Hickory. Honestly, I don't know how you would tell the two apart. I had never heard of a Shellbark hickory and so I was interested in this tree. I had to look it up to find out a bit more about it. It's hickory nut is actually the largest of all hickory nuts and is very sweet. The nut is often harvested by wildlife and humans.


Okay, time's up! What is the tree featured in the first picture? If you guessed Hackberry Tree (Celtis occidentalis), you are correct! It is not a picture of another planet, nor is it a picture of a fossilized tree. Nothing so exotic. Hackberries are a common tree growing here in Tennessee. I think its' bark is SO neat and distinctive. While I don't have any hackberries growing in my garden, I have noticed these trees around town and find them to be strong beautiful trees. Anonymous has a few in her garden; which were cut down by the city. I hear the wood makes great fires for warming the house.

All four of these trees are native trees commonly found in Tennessee. These trees were spotted at Cross Creeks Wildlife Refuge near Dover, Tennessee. All were growing next to the Cumberland River in an area known as bottomlands. These bottomlands were flooded recently, but the trees suffered no damage. They were all so cool! More on the Cross Creeks Refuge in another post will be forthcoming.

in the garden....

Friday, April 18, 2008

Tulips...Ah sweet tulips


Tulips, ah sweet, sweet tulips. Such a welcomed sight in the spring. What?! No tulips? You say you planted tulips and while they bloomed lovely one year, they have now disappeared?

Rest assured, you are not alone. Tulips seem to disappear each year. It is SO frustrating for a gardener.
One summer, when the Jimster was in the local public library children's program, we made weekly trips to the library. My big thing was to read plant books. I especially like books dedicated to one type of plant, like bulbs. There are TONS of bulb books in my library, but not so many dedicated to just tulips. I researched and researched. I just knew I could learn what type of tulip bulbs to plant to hopefully have them not only return each year, but to spread themselves around and perennialize.
All the books I read said Darwin hybrid tulips perennialize well. Maybe the authors' ideas of perennializing and mine were not the same. I expected all tulips to return and even to make more, they did not. I think the author maybe meant Darwin tulips perennialize better than most tulips. Since most tulips don't come back faithfully, they don't perennialize. I guess that means Darwin tulips return occasionally?


Optimistically I planted about 500 Darwin tulip bulbs that year (2005). I like bright colors, so I chose Apledoorn in red and yellows, and also some white ones. I just knew, based on my research, that the bulbs would all return. Nope. What a disappointment.


Last year (after two wasted years on the Darwin hybrid tulips), I decided to go another route. I deduced that species tulips would be the best for returning each year. After all, they are not hybridized and some have been around for hundreds of years. I duly researched all the bulb catalogs and chose the oldest type species tulip in the color I liked, red of course.

I purchased 250 of these tulips at a bargain price. They are planted in massed formations all around my backyard. The species tulips are featured in the second, third and fourth pictures.

The first thing you will notice is the foliage is very different from hybrid tulips. The foliage of the species tulip is very narrow and much shorter. This is actually a bonus since the large Darwin tulips have foliage that tends to get rather overblown, tattered and messy quite quickly. Not to mention the fact the tulips themselves are prone to being blown over.

The species tulips are short yet colorful. They are sturdy and eye catching, but not in as big a way as the hybrid tulips. Time will tell if they return faithfully each year in a better manner than the hybrids. The picture with the pinkish red and yellow tulips surprised me. The pink tulips in all of the pictures are 'Pink Impression'. They were a sale purchase at rock bottom prices in January. The yellow tulips are a Darwin hybrid I planted in 2006. I am surprised they returned as full and lush as the newly planted Pink Impression tulips. Maybe they will stay around for a while this time and I hit a good perennializing tulip hybrid.

in the garden....